Thursday, July 31, 2008

Cheesecake w. Red & Gold Raspberries

I received a requrest from a dear friend M, who has been such a wonderful supporter of my baking endeavors, to bake for her mother's 87th birthday. I sat down with M to figure out what she wanted. This conversation resulted with a good news, bad news situation. The good news first - M wanted a decadent chocolate cake. My thought - perfect, I can definitely do this, as I have a perfect recipe! Okay, now the bad news - M's mother does not like chocolate (or cake for that matter), and her only dessert request was cheesecake. Cheesecake???? I've only made cheesecake once in my life like 10 years ago, and it was a horrific mess (undercooked filling, and the waterbath seeped into the cake resulting with a soggy crust...overall a royal pile of shit). Sounds gross? It was really gross!!! I swore I would never make another one...until last week.So, what do I do? At 87 years, I owe M's mom a dessert that she would enjoy, so I took a deep breath and promised M that I would deliver on a fabulous and delicious cheesecake. That evening, in a state of panic, I scoured all of my baking books to find a perfect foolproof cheesecake recipe. As I flipped thru Dorie Greenspan's Baking My Home to Yours, she set up a section devoted to cheesecakes. She is a total baking goddess, and almost every recipe I've made from this book was a success. So, I went with her Tall & Creamy Cheesecake recipe (this was highlighted a while back on Serious Eats).
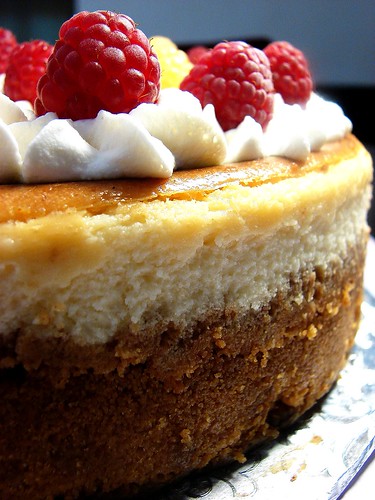
I read all of her pointers, took a deep breath and started to make the cheesecake. I made the filling as directed and dropped in some fresh raspberries to provide a little surprise in the cake. To be quite honest, the ingredients and the preparation is pretty simple and straightforward...it's the baking and unmolding that unnerves me. The cheesecake is baked in a water bath for 90 minutes, and then sits in a cooling oven for another hour. After cooling completely, the cake goes into the frig to chill until ready to serve. So, how do I know that the filling has cooked thru and that the water didn't seep into the springform pan? I won't know, as I couldn't necessarily slice or poke to check for doneness...argh!!!
Okay, the top was a bit more brown than I anticipated, but that was easily remedied with some vanilla whipped cream and raspberries to decorate the top.


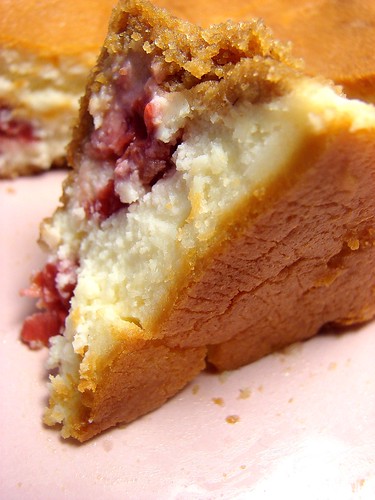
As I had a bit of the filling leftover, I decided to make a mini cheesecake using a 4 inch springform pan. I really wanted to see sample and experience the taste and texture of this recipe. As you can see here, the raspberries look GIGANTIC relative to this little cake:
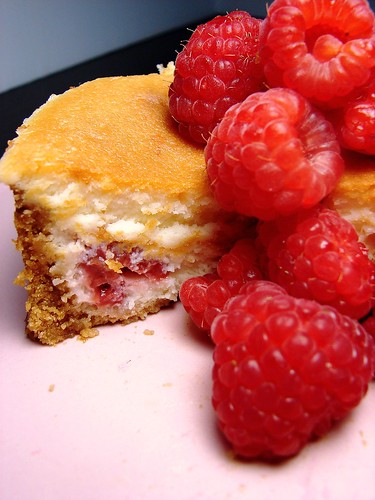
I love seeing the little fruit gems as you slice the cake:

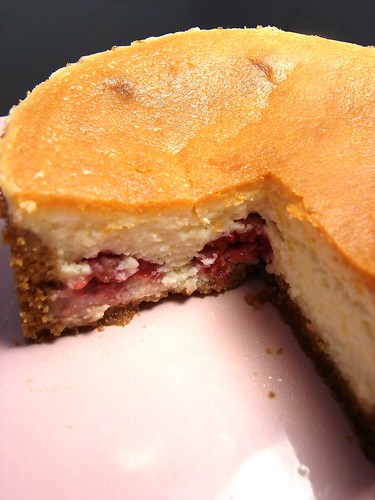
The mini cheesecake was TO DIE for...really delicious. The filling was creamy yet light and fluffy, and imparted a slightly tart flavor which really helped to cut the richness. So, if this little baby is the indicator for the larger cake, I should be in good shape.

The verdict from M and her family: an overwhelmingly positive response...as M put it "we had a total food porn moment!" WHEW!!!!

Okay, who else wants cheesecake for their birthday...I'm ready for you!!!!

Tall and Creamy Cheesecake: A Basic
- makes 16 servings
-Adapted from Baking From My Home to Yours, by Dorie Greenspan

Ingredients
For the crust (this makes a pretty thick crust, which is my personal preference):
2 1/2 cups graham cracker crumbs
4 tablespoons sugar
Pinch of salt
6 tablespoons unsalted butter, melted

For the cheesecake:
2 pounds (four 8-ounce boxes) cream cheese, at room temperature
1 1/3 cups sugar
1/2 teaspoon salt
2 teaspoons pure vanilla extract
4 large eggs, at room temperature
2/3 cups sour cream
2/3 cups heavy cream
1/2 cups fresh raspberries, plus addt'l for garnishing

Procedure
To make the crust:
1. Butter a 9-inch springform pan—choose one that has sides that are 2 3/4 inches high (if the sides are lower, you will have cheesecake batter leftover)—and wrap the bottom of the pan in a double layer of aluminum foil; put the pan on a baking sheet.
2. Stir the crumbs, sugar and salt together in a medium bowl. Pour over the melted butter and stir until all of the dry ingredients are uniformly moist. (I do this with my fingers.) Turn the ingredients into the buttered springform pan and use your fingers to pat an even layer of crumbs along the bottom of the pan and about halfway up the sides. Don't worry if the sides are not perfectly even or if the crumbs reach above or below the midway mark on the sides—this doesn't have to be a precision job. Put the pan in the freezer while you preheat the oven.
3. Center a rack in the oven, preheat the oven to 350°F and place the springform on a baking sheet. Bake for 10 minutes. Set the crust aside to cool on a rack while you make the cheesecake.
4. Reduce the oven temperature to 325°F.

To make the cheesecake:
1. Put a kettle of water on to boil.
2. Working in a stand mixer, preferably fitted with a paddle attachment, or with a hand mixer in a large bowl, beat the cream cheese at medium speed until it is soft and lives up to the creamy part of its name, about 4 minutes. With the mixer running, add the sugar and salt and continue to beat another 4 minutes or so, until the cream cheese is light. Beat in the vanilla. Add the eggs one by one, beating for a full minute after each addition—you want a well-aerated batter. Reduce the mixer speed to low and stir in the sour cream and heavy cream.
3. Put the foil-wrapped springform pan in the roaster pan.
4. Give the batter a few stirs with a rubber spatula, just to make sure that nothing has been left unmixed at the bottom of the bowl, and scrape 1/2 the batter into the springform pan. Dot the filling with the raspberries, then pour the remaining filling on top. The batter will reach the brim of the pan. (If you have a pan with lower sides and have leftover batter, you can bake the batter in a buttered ramekin or small soufflé mold.) Put the roasting pan in the oven and pour enough boiling water into the roaster to come halfway up the sides of the springform pan.
5. Bake the cheesecake for 1 hour and 30 minutes, at which point the top will be browned (and perhaps cracked) and may have risen just a little above the rim of the pan. Turn off the oven's heat and prop the oven door open with a wooden spoon. Allow the cheesecake to luxuriate in its water bath for another hour.
6. After 1 hour, carefully pull the setup out of the oven, lift the springform pan out of the roaster—be careful, there may be some hot water in the aluminum foil—remove the foil. Let the cheesecake come to room temperature on a cooling rack.
7. When the cake is cool, cover the top lightly and chill the cake for at least 4 hours, although overnight would be better.
Serving: Remove the sides of the springform pan—I use a hairdryer to do this (use the dryer to warm the sides of the pan and ever so slightly melt the edges of the cake)—and set the cake, still on the pan's base, on a serving platter. The easiest way to cut cheesecake is to use a long, thin knife that has been run under hot water and lightly wiped. Keep warming the knife as you cut slices of the cake.
Storing: Wrapped well, the cake will keep for up to 1 week in the refrigerator or for up to 2 months in the freezer. It's best to defrost the still-wrapped cheesecake overnight in the refrigerator.

Wednesday, July 30, 2008

Angel Food Cake (w. Chocolate Blueberry Ice Cream)

With all of the homemade ice cream being made at my house this summer, I've had a glut of egg whites left over. I've been making on average 2 types of ice cream every weekend, and have ended up with 10-12 leftover egg whites at the end of every weekend. And yes, I know what you all are thinking out there...my hubby and I do not consume everything I make (good grief, i think our cardiologist would keel over considering it). I end up giving away pints to my friends and coworkers, and keep a small stash in our freezer.

What to do with the leftover egg whites? We could only pretend for so long that we're uber healthy and make so many egg white omlettes (blech). The perfect solution to this dilemma...ANGEL FOOD CAKE! Promise not to tell anyone, but I can single-handedly consume an entire angel food cake in a matter of days. There is something so wonderful about the light and airy texture, the moistness of the crumb, and the delicious flavors that you can incorporate into the cake. My old standby recipe comes from Baking Illustrated, and you can find the recipe at the end of this post.

I don't know why people display and serve angel food cakes top side down. I always serve my cake top side up, as I love showing off the crazy patterns, folds, cracks and creases on the top crust created during it's time in the oven. It gives it character, doesn't it?!

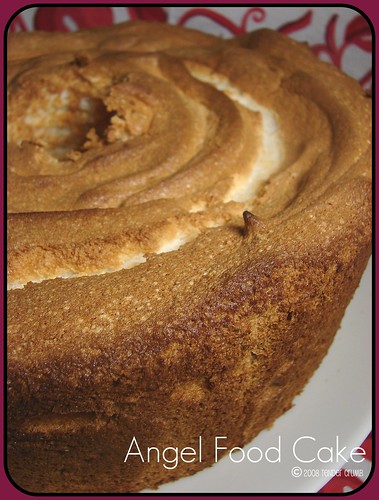
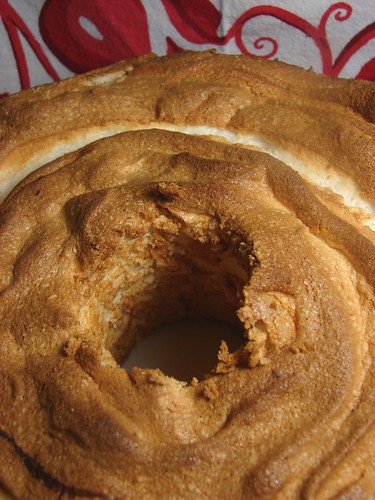
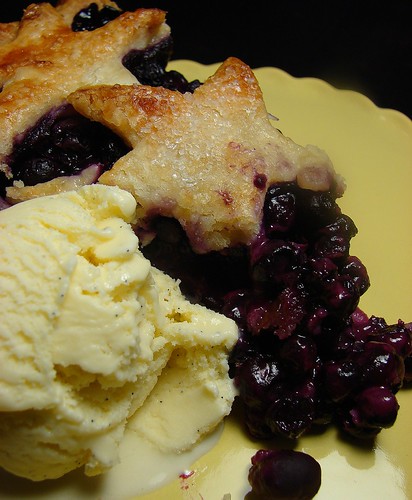
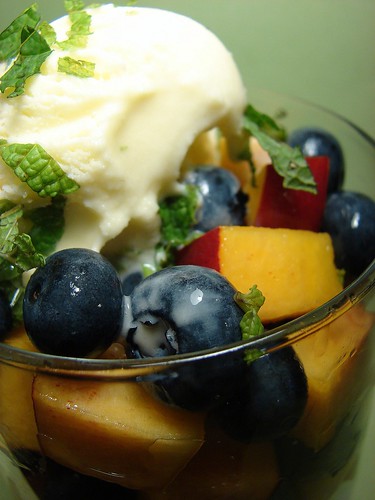
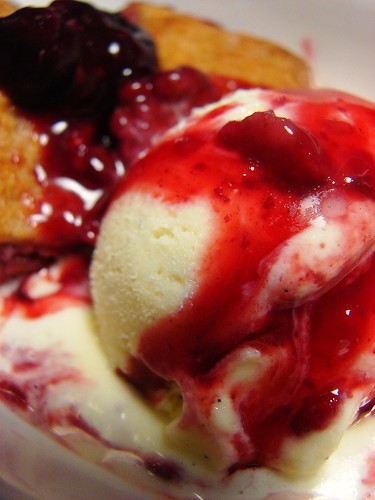
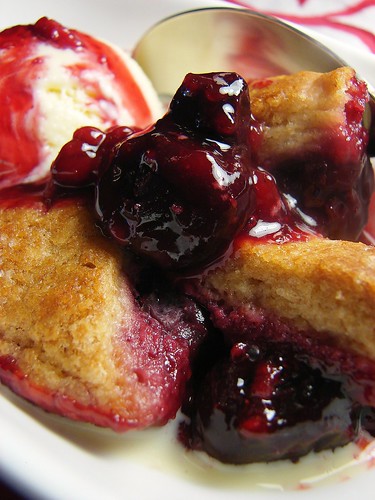
Most times, I prefer my angel food cake simple and plain. However, this cake acts as a terrific partner to fruit and ice cream. Here, chocolate blueberry ice cream and some fresh blueberries elevates this understated cake to a special little dessert.
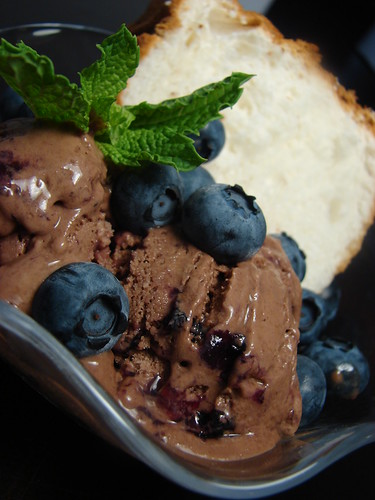
Angel Food Cake
From Baking Illustrated
Serves 10-12

Ingredients
1 C sifted cake flour
1 1/2 C sifted sugar
12 large egg whites
1 tsp cream of tartar
1/4 tsp salt
1 1/2 tsp vanilla extract
1/2 tsp almond extract
1 1/2 tsp fresh squeezed lemon juice

Directions
1. Adjust oven rack to the lower middle position and preheat oven to 325 degrees. Have ready an ungreased large tube pan
2. Whisk the flour and 3/4 C sugar in a small bowl and set aside. Have ready the remaining 3/4 C sugar by the mixer.
3. Beat the egg whites at low speed until just broken up and starting to get frothy. Add cream of tartar and beat at medium speed until the whites form very soft billowy mounds. With the mixture at medium speed beat in the 3/4 C sugar (1 tbsp at a time) until all of the sugar is added and the whites are shiny and form soft peaks. Add the vanilla, almond extract and lemon juice and beat until just blended
4. Place the flour/sugar mixture in a sifter set over a piece of parchment. Sift the flour/sugar mixture over the whites and gently fold in using a large rubber spatula.
5. Gently scrape the batter into the pand, smooth the top with a spatula, and give the pan a couple of raps on the counter to release any large air bubbles.
6. Bake until the cake is golden brown and the top springs back when pressed firmly, 50-60 minutes.
7. Once finished baking, invert the cake and cool (my pan doesn't have prongs, so I balance the pan on a funnel). Let the cake cool completely.

Tuesday, July 29, 2008

Summer Fruit Galette w. Lemon Verbena Ice Cream (TWD)

I can't believe that July has flown by so quickly! Work and life has been so hectic, and I haven't had the opportunity to slow down and enjoy summer. Still, I'm busy with good reason (it's all good), which I'll share with y'all in a future post. With that in mind, I'm going to keep this short and simple. This week's selection, Summer Fruit Galette, comes from Michelle of Michelle in Colorado Springs. This is a really terrific and timely recipe, as you can take advantage of the amazing bounty of fruit available at the farmers'markets.I decided to pare the recipe down and make two mini-galettes. I love Dorie's pie crust recipe, and I used half of the single crust recipe (the other half is sitting in the freezer). I followed the recipe as written, used a combination of nectarines and raspberries, spread fig jam w. a dash of ground ginger as the base. Echoing many people's thoughts, I wasn't too crazy about adding a custard to this galette (thought it would be too gooey and sweet), but decided to be open-minded and try it out! I served the mini-galette at room temp, and served along side it a combination of fresh golden (YUM) and red raspberries......and a scoop of lemon verbena ice cream. Before you pass judgement, you have to give this ice cream a try with this galette or any summer fruit dessert...delicious!!! For the recipe, I've posted this here.
I only had a taste (trying to exercise some self control as I'm going to Hawaii in October...definitely not in swimsuit shape at all...argh!!!!!), and the combination of the galette, the sweet/tart fresh berries, and the herbal ice cream was heavenly. My only complaint was that the galette itself was a bit sweet from the custard, which was not a winner for me. I'll probably omit the custard the next time I make this.

To see the fantastic galette creations of the Tuesday's With Dorie crew, check out the blogroll here. For the recipe, please visit Michelle's site.

Monday, July 28, 2008

Lemon Verbena Ice Cream

With summer in full swing, I have been on a total ice cream making binge! Thanks to David Lebovitz, my ice cream maker has emerged from the bowels of my cupboards and I've been putting this long neglected appliance to good use. Once we had a taste of home-churned ice cream, we said adios to hagen daz, ben & jerry and breyers and haven't purchased pre-packed ice cream in over a year (okay, cold stone is the only exception...I love those mix-ins!).

I absolutely LOVE lemon verbena, and have often infused the herb into tea or chopped the herb into fruit salad. This ice cream recipe really showcases the heady herbal flavor of the lemon verbena. I've taken the original recipe (which comes courtesy from David Lebovitz) a step further by incorporating some mint.

The perfect accompaniment to this delicious ice cream is a simple fruit salad. In these pictures, the fruit salad is made from nectarines, blueberries, some chopped mint & lemon verbena leaves, a squeeze of lemon juice, and a touch of honey.

Lemon Verbena Ice Cream
adapted from David Lebovitz.com
makes approx 1 quart

1 1/2 cups loosely-packed fresh lemon verbena leaves
1/2 cup fresh mint leaves (you can reduce the amount or omit)
1 1/2 cups whole milk
1 1/2 cups heavy cream
3/4 cup sugar
6 large egg yolks
pinch of salt

1. In a medium saucepan, warm the lemon verbena and mint leaves with the milk,1/2 cup of the cream, and the sugar.
2. Once warm, remove from heat, cover, and let steep for one hour.
3. To make the ice cream custard, pour the remaining cream into a large bowl set in a larger bowl of ice water, and put a mesh strainer on top.
4. Use a strainer or slotted spoon to skim the lemon verbena from the milk and squeeze the leaves to extract as much liquid as possible back into the saucepan, then discard them. Rewarm the lemon verbena infusion, then whisk the eggs together and slowing pour in the warm infusion, whisking constantly.
5. Scrape the warmed egg yolks back into the saucepan and cook, stirring continuously with a heatproof spatula, until the custard leaves a trail on the spatula when you drag your finger across it. (If using a thermometer, it should read about 175F, or 79C.)
6. Immediately strain the custard into the bowl of cream. Stir until cool.
7. Chill thoroughly, then freeze in your ice cream maker according to the manufacturer's instructions.

Tuesday, July 22, 2008

Cherry Cobbler (TWD)

Since joining this fantastic cooking group Tuesday's With Dorie, I've had a wonderful time cooking thru Dorie Greenspan's baking book, and making recipes that I typically wouldn't have considered trying. With that expanding of horizons (and waistlines) came buying food items that typically wouldn't occupy my pantry. As a result, my cupboards have been overflowing with baking remnants from prior weeks. Not that these items would go to waste (hate the thought of that), I've been consciously trying to get thru these supplies before purchasing anything but the essentials at the market. This exercise was put to the test with this week's selection, Cherry Rhubarb Cobbler, which comes courtesy from Amanda from Like Sprinkles On A Cupcake.
Cobbler is a wonderfully flexible and forgiving recipe, where you can mix and match a variety of fruits. I could have gone to the farmers market with a TON a great summer fruit on display, but I was determined to not buy any additional ingredients for this recipe. I went with mini-cobblers in three small, shallow ramekins, so made only half the filling and one-third of the topping. I dug out an almost full bag of cherries from the freezer (Trader Joe's brand), and supplemented it with a small handful of frozen raspberries (aslo TJ's) to get the right quantity of fruit. I had the rest of the ingredients at home, so things were looking good! I've never seen or tasted rhubarb before...and it looks like I won't be experiencing it any time soon (couldn't even tell you where to find it in my area). To add the tartness that rhubarb would have provided, I added the zest and juice of one lime. Aside from adjusting the recipe size and the rhubarb substitution, I followed the recipe as written. As these were mini-cobblers, baking time was reduced to 30 minutes.

The smell in the house while the cobbler was baking was wonderful and comforting! I also loved pulling the just baked cobbler-ettes out of the oven, with the filling still bubbling and steam emitting from the dish:


Naturally, this cobbler had to be served with a scoop of homemade vanilla bean ice cream. I spooned the still warm cherry filling over the ice cream, and I love how the ice cream melted into a creme anglaise sauce:

I have to admit that I really enjoyed this dessert (and I'm not a huge fan of cobblers). Just comparing the toppings, it definitely trumped the cobbler that I made a few weeks back. The topping in this recipe has more of a cakey texture, which I personally prefer over a biscuit topping, and I enjoyed the slight sharpness in flavor coming from the ginger. The cherry filling was delicious (couldn't tell that the fruit was frozen), and the lime added a terrific tartness. Next time, I think I'll play with the recipe to enhance the ginger flavor, maybe with some crystalized ginger (if my pantry can make room for it!).
To see the 200+ beautiful cobblers made by fellow TWD bakers, check out the blogroll. For the recipe, Amanda has it posted here.

Tuesday, July 15, 2008

Chocolate Pudding (TWD)

As a little kid, I remembered how excited I got when I discovered a snack-pak chocolate pudding in my lunch. That little can (I think I just dated myself) was worth it's weight in gold on the playground, and I could trade that for almost anything in the other kids' lunch bags...most of the time, I kept it for myself and savored every bite (okay, I didn't know any better back then)!

I chuckle about these memories, with chocolate pudding as this week's Tuesday's With Dorie recipe. Selected by Melissa of It's Melissa's Kitchen, this simple and delicious dessert is often overshadowed by other "fancy" desserts. Until just a couple of years ago, I never knew how easy and delicious homemade pudding can be, and far superior to the packaged instant stuff.


The ingredient list for this recipe is short and simple, and you definitely want to use the best cocoa you can find (I used Scharffen Berger), as that flavor will be center stage in this dessert. Unique to this recipe is the technique. A food processor is used twice, first to temper the eggs with the hot milk and then at the end to whip the pudding once it is cooked. Dorie Greenspan states that this technique will give the pudding a smooth velvety texture...let's see if it does make a difference...

Once refrigerated and set, I topped the pudding with vanilla whipped cream and broken bits of a Flake Chocolate Bar. If you haven't had a Flake before, you must run out and try one...the sweet milk chocolate literally melts in your mouth as you eat these!!! I am digressing... Let's go ahead and dig in...
OMG...this pudding was light yet creamy, and it delivered a deep rich chocolate flavor!!! It definitely delivered on both counts of taste and texture. A very dangerous dessert indeed!

My only minor gripe about this recipe is the use of the food processor, as it requires one more thing to clean up. Also the transferring the mixture back and forth from the saucepan and processor could pose a messy proposition. Still, the results are worth the effort.

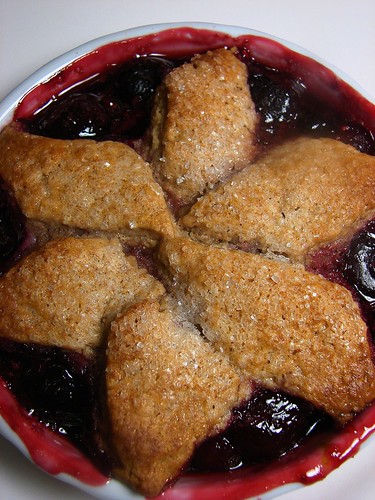
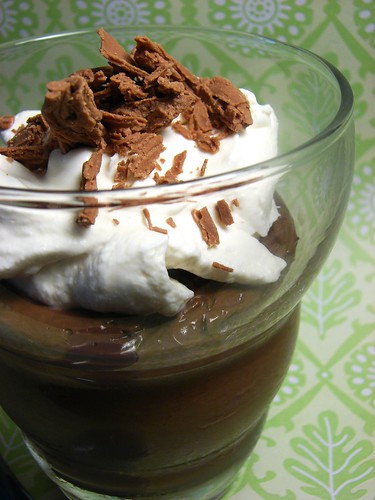
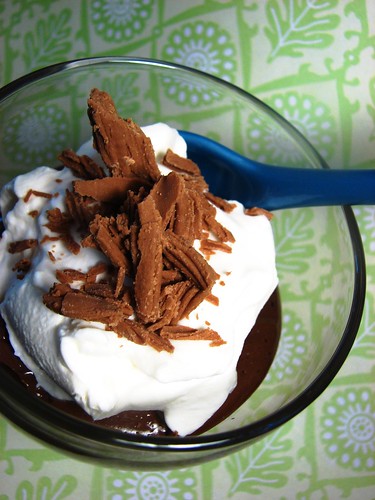
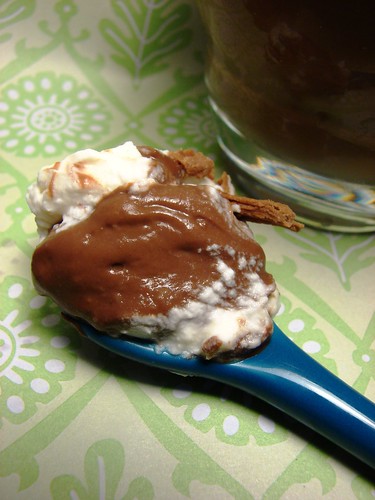
This luscious pudding was served with a couple of shortbread cookies. Click here if you are interested in reading about these delish cookies.
This recipe, and more importantly the technique is a keeper!! Dorie Greenspan has written about her pudding on her blog, and the link to the recipe is here. To see how the rest of the Tuesday's With Dorie gang fared with this dessert, check out the blogroll.

Sunday, July 13, 2008

Shortbread Cookies Two Ways (TWD Rewind)

Recently, I've been churning a lot of homemade ice cream. While there is absolutely nothing wrong with eating ice cream by itself (best standing at the frig, straight out of the carton at 11pm), I always enjoy ice cream with a little crunchy something on the side. Whether it be candied peanuts, granola, or a cookie, I need that texural contrast.

As I was reviewing all the TWD recipes that I missed, this delicious looking Brown Sugar-Pecan Shortbread recipe caught my eye. As Dorie Greenspan suggested that these cookies are a "good go-along for ice cream", I had to give them a try.

Shortbread is a great recipe get creative with. It is an extremely forgiving dough (as long as you don't overmix), and it's a great base to build on. You can experiment with a wide range of sweet and savory variations. With that in mind, I decided to try a chocolate pistachio version, based on what I had at home. 
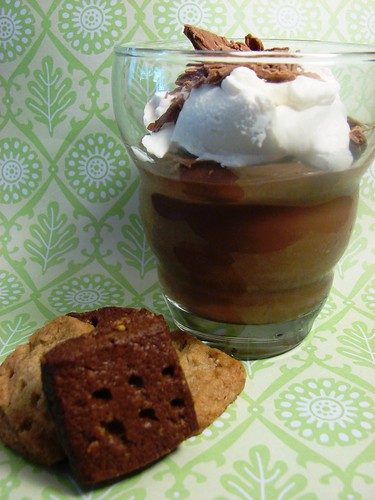
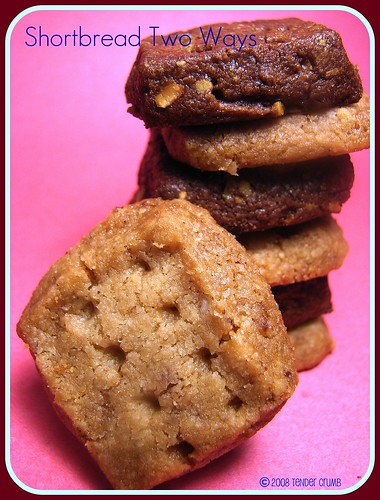
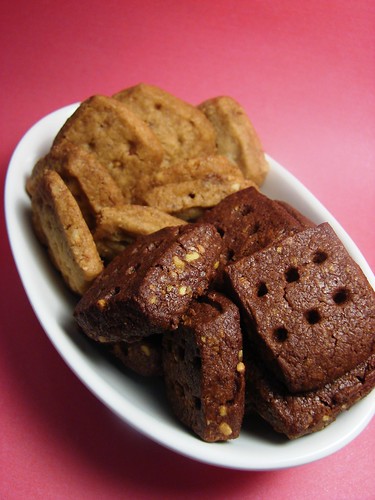
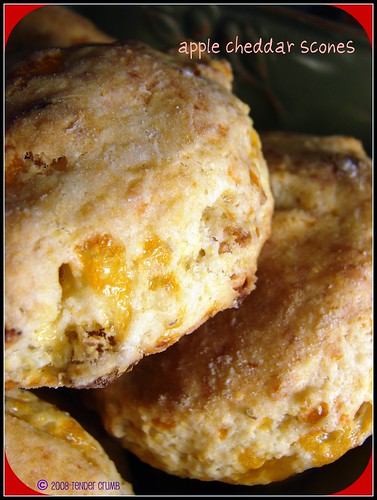
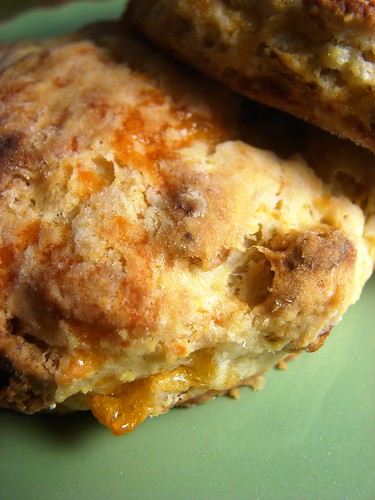
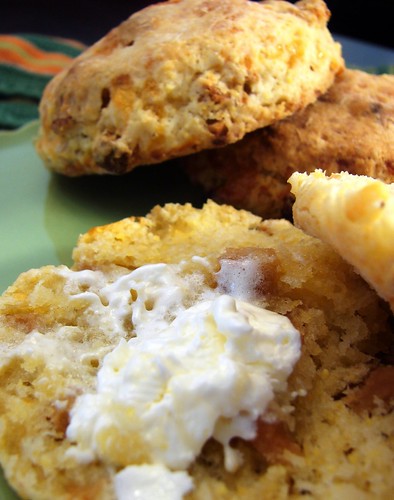
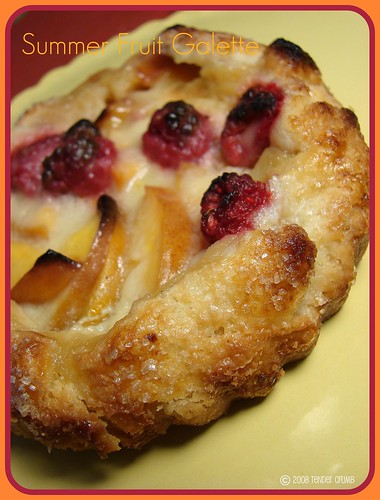
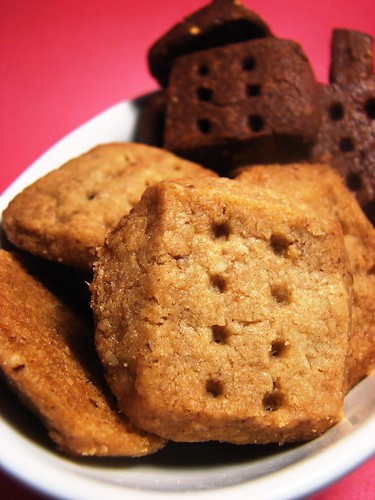
If you are compelled to make these delicious brown sugar- pecan versions, click here to for the Tuesdays With Dorie blogroll to do a search, and you should be able to located a previously posted recipe.
Oh, and before I forget, I think this chocolate pistachio version turned out pretty respectable for a first try! They are not very sweet, and the chocolate pistachio flavor combination is terrific. Texurally, they are crumbly and crunchy, just as a shortbread should be. Scroll to the bottom of this post for my recipe.
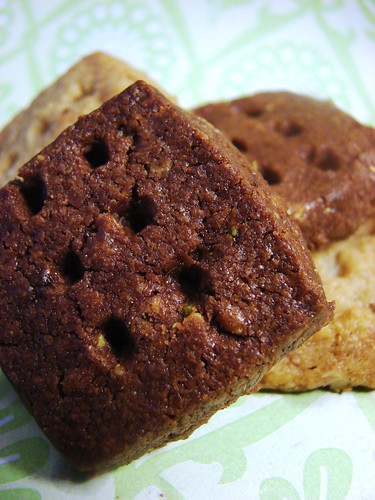
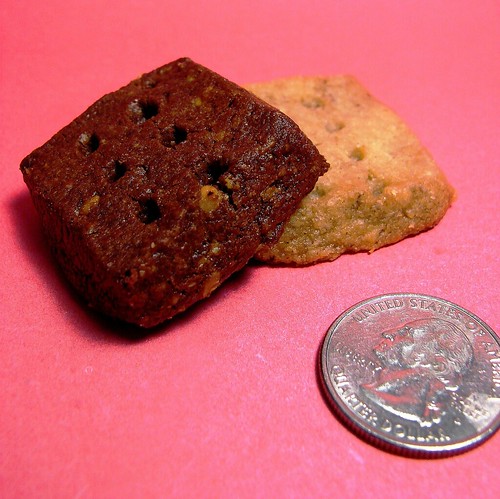
The best thing about these delicious buttery dreams? They're bite sized! :)

Chocolate Pistachio Shortbread

Ingredients
1 1/4 C AP flour
1/2 C unsweetened cocoa powder (I used Scharffenberger)
1/4 C cornstarch
1/4 tsp salt
1/4 cinnamon
8 oz unsalted butter at room temp
1/4 C lt brown sugar
1/2 C sugar
1/2 C finely ground pistachios

Instructions
- sift together the dry ingredients
- beat butter and sugars together in a stand mixer until mixture is very smooth ( about 3 minutes)
- reduce mixer to low and add the dry ingredients, mixing only until they disappear into the dough (do not overmix)
- add pistachios and mix only until incorporated
- transfer mixture to a gallon sized ziploc bag. put bag on a flat surface, leaving top open, and roll the dough into a 9" x 10 1/2" rectangle that is 1/4" thick.
- refrigerate for at least 2 hours (i would recommend freezing as well)
- preheat oven to 350 degrees F. line two baking sheets with silpat/parchment
- cut dough into 1" squares, and transfer to baking sheets. prick each square twice with a fork
- bake for 18-20 minutes. cool cookies on a rack.


Tuesday, July 8, 2008

Double-Crusted Blueberry Pie w. Vanilla Bean Ice Cream (TWD)

We did some excellent outdoor entertaining for friends this weekend! The weather was picture perfect and the July 4th holiday resulted with a nice three day weekend. Most significant for us---after two years of extensive home remodeling (both the interior and front and back yards), we can finally say that we're finished (knock on wood) and for once can enjoy our home instead of working on it.

Along with some great barbeque courtesy of the hubby, I served this week's TWD recipe, double-crusted blueberry pie. This week's recipe was selected by Amy of South In Your Mouth.

I have not been an avid baker of pies, as I've never had great success with double crust pies. It's not the dough making that I'm challenged with; it's the baking part. More times than not, I end up with a nice golden top crust and a disappointing soggy bottom crust.

I'll be damned if this recipe gets the best of me, so I did some research before getting my hands dirty. Along with heeding Dorie Greenspan's great tips and instructions, I also applied some techniques from The Pie and Pastry Bible by Rose Levy Beranbaum. The most significant shift in my technique was to bake the pie on the lowest rack in the oven, which is supposed to promote the browning of the bottom crust.

I did follow Dorie's recipe almost exactly as written. I used the smaller wild blueberries, and ended up using a combination of 1 pint fresh and 2 10oz bags frozen (a bit more than what the recipe calls for). I reduced the sugar to 2/3 C, doubled the amount of lemon juice/zest, and added a tbsn of chopped mint to the filling.

I was inspired by a picture in Martha Stewart's Baking Handbook, which showed star cutouts for the top crust (hers was a blueberry pie as well), so decided to follow her lead. After baking, the stars ended up looking like starfish, but at this point I was more fixated by what I couldn't see, which was the bottom crust.

The final results were EXCEPTIONAL! The crust was nicely browned, flaky and tender...and yes, to my relief this applied to the bottom crust as well!!! The filling had set perfectly and the mint helped punctuate the bright flavor of the sweet/tart blueberries.


The pie was served a la mode with my favorite homemade vanilla bean ice cream ---thank you once again David Lebovitz!!! To be totally decadent, I tweaked the recipe by adding an extra vanilla bean and substituting the whole milk with half & half - yes, this ice cream isn't for the faint of heart, but the end result is ice cream HEAVEN! Thanks to Dorie and David, we have another perfect summer dessert!

If you are interested in making this pie yourself (which I HIGHLY recommend), you can find the complete recipe at South In Your Mouth. To see the delicious pies that the Tuesdays With Dorie gang have been servin up, check out the blogroll.

Sunday, July 6, 2008

Peach Apricot Cherry Pie


With the bounty of luscious summer fruits, I couldn't resist the lure of making pie. I am not a great pie maker by any means (it's the crust that defeats me every time), but I'm determined to improve my skills with practice, practice, practice.

As we hosted a barbeque this weekend, I wanted to put my pie-making skills to the test. I made a blueberry pie (which I'll post on Tuesday) and this lovely pie, which highlights three delicious summer fruits: peaches, apricots, and cherries.

Peach, Apricot and Cherry Pie
adapted from Martha Stewart's Baking Handbook

Pie Dough
2 1/2 C AP flour
1/2 tsp kosher salt
1 tbsp sugar
8 oz unsalted butter
6-8 tbsp ice water

Filling
1 lb fresh peaches (pitted, peeled and sliced into 1/2 incl slices)
1 lb fresh apricots (pitted, sliced into quarters)
1 lb fresh cherries (pitted, kept whole)
1/2 C sugar
6 tbsn quick tapioca (finely processed in a coffee grinder)
1/4 tsp kosher salt
juice and zest of 1 lemon
2 tbsp unsalted butter, cut into small pieces
1 lg egg yolk
1 tbsp heavy cream
sanding sugar for dusting

For the Dough
- Combine dry ingredients.
- Cut in butter.
- Add water until the dough just holds together. Divide in half, form into disks, and wrap in plastic.
- Refrigerate 1 hour or overnight.

For the filling
- In a large bowl toss together the peaches, apricots, and cherries.
- Add sugar, tapioca, salt and lemon juice & zest and toss to combine

To assemble and bake
- preheat oven to 425 degrees (400 degrees for convection)
- roll out 1 pie dough disk for bottom crust and fit it into pie pan. put prepared pie shell into frig, while preparing lattice top
- roll out remaining pie dough disk in a 10x10 square. Cut 3/4 inch strips using a ruler and pastry cutter (pizza cutter or knife works just as well)
- pull out pie shell from frig, and
- pour filling into crust and dot with butter
- brush bottom rim w. water. cover with dough strips to create lattice pattern, gently sealing top and bottom crust
- mix egg yolk and cream together and brush top. sprinkle w, sanding sugar
- put pie on a baking sheet and place on lowest rack in oven.
- after 20 minutes, reduce oven temp to 350 degrees (325 for convection) and bake for 30-40 minutes, until the crust is golden brown and filling is bubbling and thickened.

Tuesday, July 1, 2008

Apple Cheddar Scones (TWD)

What a crappy week... I came down with a nasty case of food poisoning (sorry...TMI), and have been out of commission all week. I've been living on saltine crackers and gatorade, and my taste buds have been completely obliterated...ugh!!


Although still not feeling 100%, I wanted to try and get back into a normal routine this weekend. Being in the kitchen is a big part of that routine, so wanted to kick off my recovery with some baking! This week's Tuesdays With Dorie selection, Apple Cheddar Scones, which was made by Karina at The Floured Apron, would serve as a perfect start.

Dorie Greenspan considers this recipe for Apple Cheddar Scones as one of her favorites. I'm a huge fan of eating fruit and cheese together, with the saltiness and creaminess of the cheese complementing the juiciness and sweetness of fruit, so I can see where the appeal comes from.

I had almost all of the ingredients at home, with the exception of the dried apples and cheddar cheese. While shopping for the remaining ingredients at Trader Joe's, I was tempted to veer a bit from the recipe, as I spied packages of dried pears sitting beside the dried apples...doesn't pears and guyere sound yummy in this recipe? Ultimately, I decided to stick with the recipe as written, as I wanted to experience one of Dorie's favorite scones.


The recipe came together quickly, and I used a 2 1/2" biscuit cutter to portion the dough. This dough was much stickier than I expected, so had to flour my work surface well and work quickly. I ended up with 18 rounds (this includes using the scraps --- don't like wasting these lovely bits of dough).

These scones baked off much flatter that I expected. Then again, the scone picture accompanying the recipe was also pretty flat, so maybe this was intended. I really liked how the shredded cheese oozed out of the scones resulting with cheesy, crunchy bits on the crust (yum!). I also really like the textural contrast that the chewy dried apples delivered.

I still can't taste anything really well, so I'm relying on my hubby to give his impression on flavor. Per Mr. B: Overall, the salty sweet flavor combination of the cheese and apples was delicious and I would definitely look forward to eating them again soon...hint, hint ;)!

Thanks Karina for this delicious selection! For the recipe, please visit Karina's site, The Floured Apron. To see what the TWD gals and guys have been cookin' up, check out the Tuesday's With Dorie blogroll.

Blog Widget by LinkWithin