Showing posts with label fruit. Show all posts

Tuesday, June 8, 2010

Peach Raspberry Shortcake (TWD)

This will be a short and sweet write-up for this week's Tuesdays With Dorie recipe for Tender Shortcakes. Things have been busy and hectic around here, as the hubs and I are counting down to our upcoming vacation in Italy!

I'm a raving fan of shortcakes, as the slightly sweet biscuit serves as a delicious platform for all of delicious fruit in season. For a change of pace from my favorite Strawberry Shortcakes, I selected a combination of peaches and raspberries for the fruit filling in this version.

I loved the simplicity in making these freeform shortcakes. True to the title of the recipe, these slightly sweet biscuits have a wonderfully tender interior with a slightly crumbly exterior. I scaled down my batch to 1/3 of the original recipe, which yielded four decent sized shortcakes.

Thanks to Cathy of The Tortefeasor for this fantastic summer pick. Make sure to visit Cathy's blog for the recipe, and treat your family to this wonderful summertime dessert.

Tuesday, August 4, 2009

Classic Banana Bundt Cake (TWD)

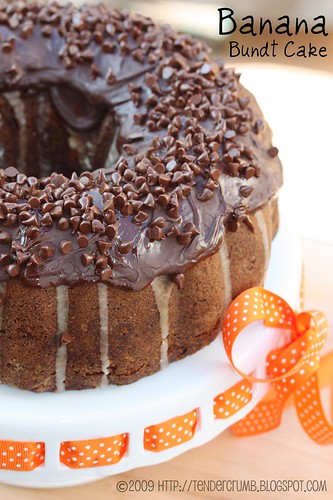
I think this week's TWD recipe, Classic Banana Bundt Cake, is one the best banana bread/cake recipes that I've ever made. I know, it's a pretty bold statement, isn't it? I have made this recipe numerous times since I've gotten my hands on Dorie Greenspan's Baking: From My Home To Yours, and this banana cake has never failed me. To me, what makes this recipe fantastic is the simplicity of the ingredients and instructions. In no time, you are rewarded with a comforting treat that you can have with your morning coffee or as an afternoon snack.

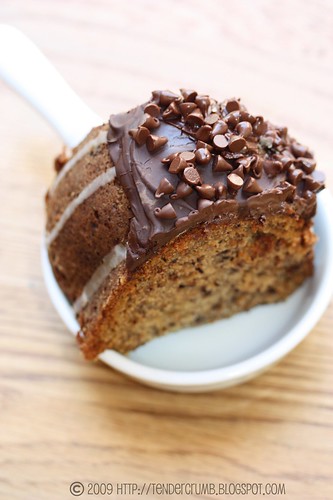
I had originally intended on sharing with you a photo of the full bundt cake, but the top photo was the best I could do. Why, you ask? This was the reason...I had absolutely no patience, and I ended up cutting a generous hunk and devoured it before I had a chance to take pictures. :(
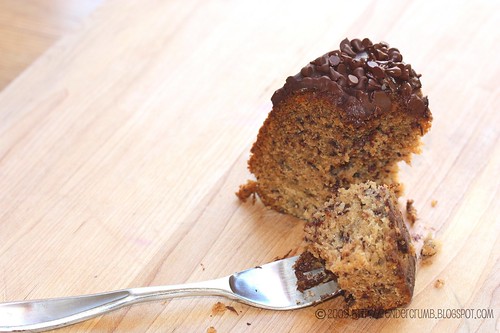
If you've had this cake before, you will understand why I couldn't wait to eat it. The cake is tender and moist, and it is chock full of banana flavor.

This time around, I tried topping the bundt with a glaze mentioned in the book. It didn't do much for taste or presentation, so I ended up frosting the cake with a bittersweet chocolate ganache and then topping it with bittersweet mini-chips. (That's why you see the white glaze drizzled down the sides of the cake along with the chocolate ganache.)

A huge shout out to my homegirl Mary of The Food Librarian for a fantastic pick this week. Mary is a fantastic baker and blogger, fellow Angelino, UCLA Bruin, ...in another word, she ROCKS!
You have to make this cake! For the recipe, you can find it at Mary's blog, or you can find a half-batch version for cupcakes at Dorie Greenspan's blog. I've made this recipe into cupcakes here, which was met with great success.

I know that my fellow TWD bakers were all over this recipe, so make sure to visit the TWD blogroll to see more of this absolutely delicious cake.

Now, you'll have to excuse me as I indulge with another piece of cake...

Tuesday, July 14, 2009

Brioche Apricot Tart (TWD)

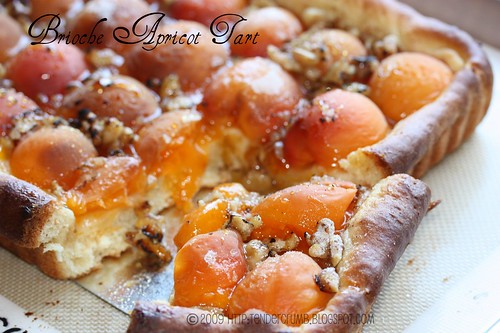
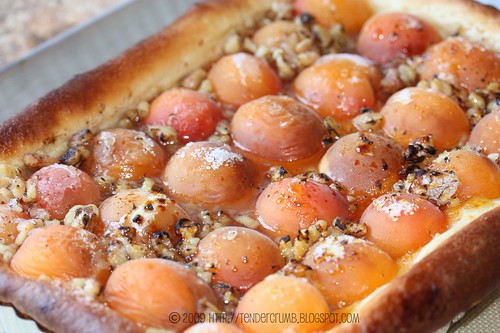
A Brioche Fruit Tart? I can say that this week's Tuesdays With Dorie recipe would be a first for me. A rich brioche base, layers of fruit jam and fresh fruit, and a sprinkling of sugar and chopped nuts --- all of these components sounded absolutely delicious, so I couldn't wait to try my hand at this recipe.

Instead of using plums as indicated in the original recipe, I couldn't resist using Blenheim apricots:
These scrumptious beauties are considered to be the best apricots around, and I wholeheartedly agree. These apricots are sweet with just a hint of tartness, intensely fragrant and have a luscious, velvety texture.

They have a relatively short season (June & July) and bruise easily, so it is my understanding that this fruit is hard to find outside of California.

In Los Angeles, I've only seen a few farmers market stalls carry these gems (I found mine at the Santa Monica Market at the See Canyon stall), and I've learned to pick up my share and gorge on them fresh while they are in season.
This will be my first time baking with these beauties, so I couldn't wait to see how this tart would turn out.

This recipe required a little advance planning, as the brioche dough would need a overnight rest in the fridge. When ready, the dough is rolled out and pressed into a tart pan. A layer of fruit jam (apricot in this case) is slathered on the dough and the apricot halves are arranged on top.
After letting the tart dough rise a second time, a little sugar and chopped nuts are sprinked on top, and the tart is popped into the oven for 20 minutes.
Once baked, the brioche dough transforms into a crunchy/chewy crust, and the fruit softens yet retains its shape. In my case, the brioche crust browned a bit quickly (13 minutes), so I had to get the tart out of the oven before the sugar had a chance to caramelize. I ended up bringing out my kitchen torch to finish the job.
I would consider this more of a breakfast or tea pastry instead of a dessert. Whatever you call it, it was delicious! The flavor and sweetness of the apricots intensified after baking, and the jammy texture of the fruit went wonderfully with the crunchy/chewy brioche crust.

Now, I hope I'm not insulting this dessert, but it was like having a decadent version of toast and jam.
This tart is perfect to assemble and bake on a weekend morning, and I know that I'll be making this again very soon...I'll definitely have to try this with plums next time.

Thank you Denise of Chez Us for selecting this gem of a recipe (please visit Denise's blog for the full recipe)! Also, make sure to visit the TWD blogroll to see the beautiful creations of my fellow bakers.

Monday, June 22, 2009

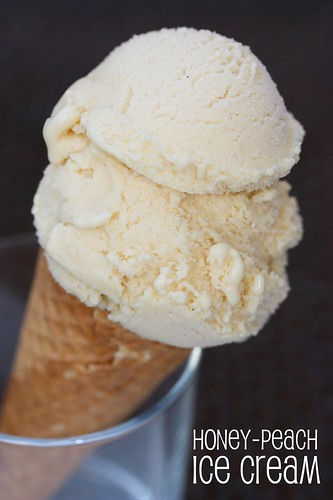
Honey-Peach Ice Cream (TWD)

Argh, I'm totally behind on my blogging! I'm juggling a bunch of things right now...I guess I'm not as good of a multi-tasker as I used to be. Wish me luck, as I'm in major catch up mode. :)

LAST week's TWD recipe, Honey-Peach Ice Cream, is a perfect treat to welcome summer. I wished the peach flavor was more pronounced, but maybe it's because I pureed all of the fruit and didn't mix in any chunks of fruit.
If you'd like to try your hand at this ice cream, please visit Tommi's blog, Brown Interior, for the recipe.

Tuesday, June 9, 2009

Parisian Tartlets (TWD)


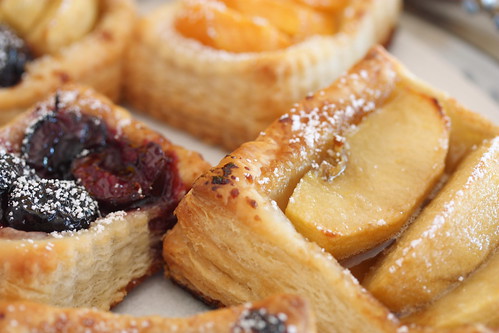
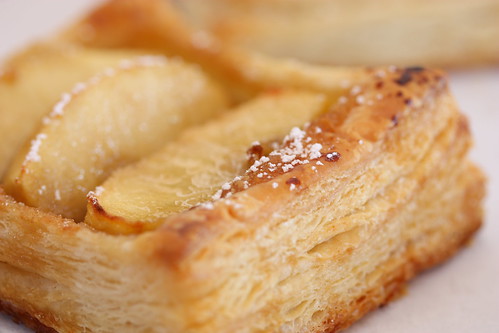
The ingredient list for this week's Tuesdays With Dorie recipe: puff pastry, fruit, brown sugar, and butter. Who knew that this short and sweet ingredient list could create these beautiful and elegant tartlets!

As we're just jumping into the summer fruit season (yipeee!!!), I also used fresh cherries and peaches, along with apples that are called for in the original recipe (please visit My Baking Heart for the complete recipe)
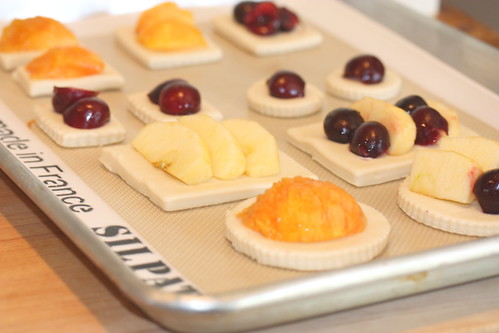
Along with the 4 inch tartlets, I also made some bite-size baby tarts (cherries and donut peaches shown here):
Out of necessity, I made puff pastry from scratch, as Trader Joe's only carries their frozen puff pastry seasonally --- who knew that puff pastry went out of season!

The last time I made puff pastry was in my pro-baking class a year or so ago, and I literally made it one-handed as I was in a cast with a broken wrist (Mary Jo can bear witness to my one-armed fiasco!).

As you can imagine, the process this time around was a lot more pleasurable. In all honesty, puff pastry isn't all that difficult to make...it's scheduling the time to roll out the dough 4-5 times to get those beautiful flaky layers that makes the recipe a little tricky.

I ran out of time (apologies), so I owe all of you lovely TWD'ers a post on this puff pastry recipe, including process photos.
Roll out the dough, use a cutter (or a knife) to cut out the dough, top with fruit.
Sprinkle each tartlet with some brown sugar and dot with some butter. Pop them into the oven for 25 minutes (I only needed 20 minutes, as went a wee bit smaller for my tartlets) and voila! --- you are rewarded with a beautiful dessert!
Thanks to Jessica of My Baking Heart for a wonderful selection this week! Please make sure to make the rounds at the TWD blogroll.

Tuesday, April 7, 2009

Banana Cream Pie (TWD)


What do I know about this week's Tuesdays With Dorie selection, Banana Cream Pie?

I know this pie well...
- Between my hubby and me, this pie can be inhaled in a weekend or less.
- On occasion, this pie and I have shared a 2am rendezvous, with me standing in front of the fridge.
- Ingorance is bliss - I know NOT to ask about the calorie count in this dessert

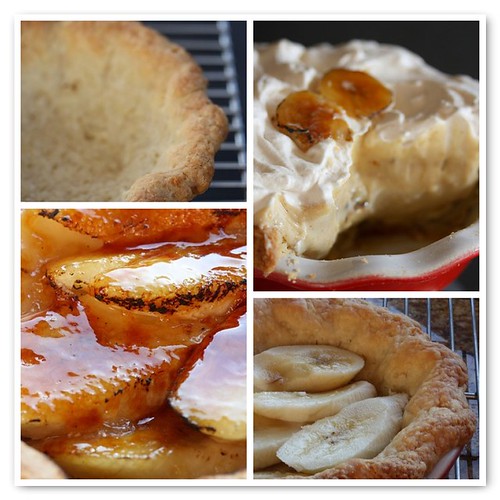
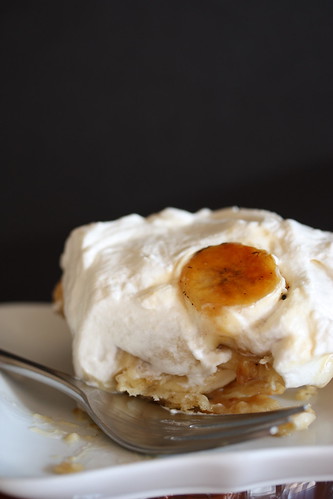
As you can see, I am very familiar with this delicious pie. Knowing our tendencies, I exerted some self control and halved the recipe to make a 4 inch baby pie. Besides, with summer just around the corner, we don't need the extra fat and calories.

Even with the reduced portions, I still had some pastry cream and whipped cream leftover ... with some crushed nilla wafers... banana parfait anyone?

This is not your run-of-the-mill banana cream pie. The base of this pie is Dorie Greenspan's fantastic crust. The sweetness is definitely dialed down in this recipe (which I do prefer) and has a dimension of spice (cinnamon and nutmeg) added to the pastry cream. Finally, there is an added tang with just a touch of sour cream added to the whipped topping.

If I plan to assemble and to serve the pie immediately, I will take an additional step and brulee the bananas before adding the pastry cream and whipped cream topping (besides, I'll use any excuse to bring out my kitchen torch). If you serve the pie immediately, you get a little crunchy surprise with the torched sugar. If you let the pie sit for any length of time, the crunchy texture will disappear but you a get a little additional sweetness from the sugar. As this pie isn't too sweet to begin with, I don't mind this touch of added sugar.
I enjoyed making the smaller pie, and it was perfect for the two of us to share. I think my husband thought otherwise, proclaiming that this baby pie was a single serving (nice try).
If you favor a more traditional banana cream pie with the sweeter vanilla flavored pastry cream, this may not be your cup o' tea. Still, I would recommend that you take this recipe for a test drive... you may be pleasantly surprised with the results.
Amy of Sing For Your Supper rocked it with this terrific selection this week! I know you want to make this pie, so head on over to Amy's terrific blog for the recipe.

Tuesday, January 20, 2009

Banana Cake w. Praline Filling & White Chocolate Ganache (TCS)

Here is another terrific installment of The Cake Slice. Our group has been baking through Sky High: Irresistable Triple Layer Cakes, and our selection for this month is this beauty. Less dense than banana bread, this cake only requires a 1/2 cup of mashed banana but produces big banana flavor.
Paired with sugary pecans (yes, they're fried, but with all of the butter, cream and chocolate in this cake, it really doesn't matter, does it?) and a whipped cream frosting lightly flavored with white chocoalate, this cake received thumbs up from all who tasted it. I'm not a big praline fan, so I'm not the best judge for taste.


To see how my fellow super-talented bakers fared, check out The Cake Slice blogroll.

~~~~~~~~~~~~~~~~~~~~~~~~~~~~~~~~~~~~~~~~

Banana Cake with Praline Filling and White Chocolate Ganache
from Sky High: Irresistable Triple Layer Cakes by Alisa Huntsman and Peter Wynne
makes a 9-inch triple layer cake

Ingredients

Cake:

3 cups of cake flour*
3 and 1/2 teaspoons of baking powder
1 and 1/2 teaspoons of cinnamon
1/2 teaspoon of salt
3/4 cup of milk
1/2 cup of ripe mashed bananas
8 ounces of softened unsalted butter
2 cups of sugar
7 egg whites

Praline Filling:
1 cup sugared pecans, cooled
1 and 1/2 cups white chocolate ganache

Sugared Pecans:
1 and 1/2 cups pecan halves
3 cups vegetable oil
1 cup confectioners sugar

White Chocolate Ganache:
8 ounces of white chocolate chopped
2 and 1/2 cups of heavy cream
1 and 1/2 teaspoons vanilla extract

Instructions

Cake:
Preheat the oven to 350F degrees.

Butter three 9-inch round cake pans. Line the bottom of each pan with parchment paper or wax paper.

Sift together the flour, baking powder, cinnamon, and salt. Set aside dry ingredients. In a food processor or blender, process the milk and banana into a smooth light puree. Set aside.

In a large bowl cream together the butter and sugar until light and fluffy. On medium high speed, beat in egg whites 2-3 at a time until smooth. Scraping down the sides of the bowl between egg additions.

With the mixer on low speed add the dry ingredients and banana puree alternately in 2-3 additions, beating until just blended. Scrape down the sides of the bowl and beat on medium-high speed for 1-minute. Divide the batter among the cake pans.

Bake for 20-25 minutes or until a cake tester comes out clean when inserted into the center of each cake. Let the cake layers cool in the pan for 10 minutes. Then turn out onto a wired rack and remove the paper liners. Then cool completely one hour.
To assemble the cake, put one layer, flat side up, on a cake stand or serving plate. Cover the top evenly with half of the praline filling, leaving a 1/4"-inch margin around the edges. place the second layer on top, again flat side up, cover it with remaining filling. Finally add the third layer and frost the sides and top with the white chocolate ganache. Garnish with sugared pecans.

Praline Filling
With a large chef's knife chop the pecans. Or pulse in a food processor being careful not to turn into paste.

Add the sugared pecans to the white chocolate ganache and stir to mix well.

Sugared Pecans
Place the pecans in a medium sauce pan, add water to cover, and heat to a boiling.

Boil the pecans slowly until they are swollen and soft 5-8 minutes. Drain the nuts well in a sieve for about 5 minutes. (Do not pat dry; the nuts must remain damp.)
While the nuts are draining, heat the oil in a large heavy saucepan or deep fat fryer t0 350F degrees.

Set half of the nuts aside. Dust the remaining nuts in the sieve with 1/2 cup of powdered sugar. Shake the sieve to coat the nuts evenly, letting any excess sugar fall away. Immediately add the coated nuts to the hot oil. Fry until golden brown about 2-3 minutes. Using a slotted spoon scoop the nuts out and drain them on several thickness of paper towels. Repeat the process with the remaining nuts.

White Chocolate Ganache
Put the white chocolate in a medium heat proof bowl. In a small sauce bring 1/2 cup of the cream to a boil. Pour the hot cream over the chocolate. Let stand for 1-minute, then whisk until smooth. Let the white chocolate cream stand until cooled to room temperature.

In a chilled bowl with chilled beaters beat the remaining 2 cups of heavy cream and vanilla until softly whipped. Stir in the white chocolate cream and beat until fairly stiff. taking care not over beat, which would cause the ganache to separate.

Berry Surprise Cake (TWD)

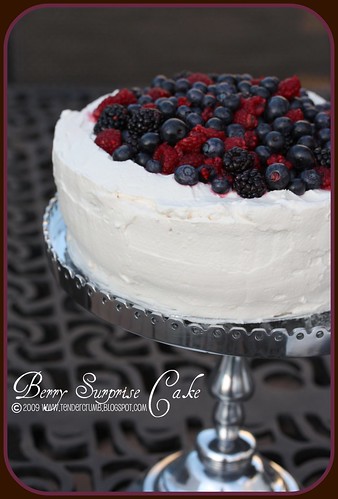
This week's summery Tuesdays With Dorie recipe is definitely a tribute to Southern California's unseasonably warm weather. Selected by MaryAnn of Meet Me In The Kitchen, Berry Surprise Cake is composed of a hollowed out genoise cake filled with berries and a cream/cream cheese mixture, and topped with a whipped cream frosting.


Dorie Greenspan described this cake as "reminiscent of the spirit of a charlotte russe". I'm embarassed to admit this, but I thought charlotte russe was the name of a retail clothing chain...I had no idea that it was a dessert! Okay, now that I've gotten that off my chest, moving on...
The instructions for this recipe were pretty lengthy, but logically broken down for each component of the dessert (cake, syrup, filling, topping). Here are my notes and adjustments:


Cake:
After recently learning all about genoise in a pastry class (I made a chocolate mousse cake which was recently posted), I was looking forward to practicing my acquired skills. With these adjustments, I had successful results with the cake:

- Instead of the whole immersing the bowl in a skillet step, I set up a bain marie.
- I reduced the butter to 1 Tbsp.
- To incorporate the dry ingredients without overmixing, I followed a pretty nifty technique my instructor shared --- Hold the kitchenaid bowl by the handle like you would hold a coffee mug. Add the dry ingredients all at once. Gently shake the bowl as you fold in the dry ingredients. The shaking will help distribute the flour with minimal mixing.
- Instead of a springform pan, I used a buttered/floured and parchment lined 8" cake pan.


Syrup:
I flavored the syrup with Chambord (yum!) and doubled the amount to 2 Tbsp.


Filling/Frosting:
Followed the recipe as stated. in hindsight would have added a little gelatin --- keep reading and you'll know why.


Assembly:
I decided to slice the cake lengthwise in half and make a layer cake --- BIG MISTAKE!! The filling wasn't thick enough to suspend the berries (a mixture of raspberries, blackberries and blueberries) and to support the cake. It didn't take long for the cake to start to implode on itself. I refrigerated the cake for several hours, hoping that it would set up. A little gelatin would solved this problem --- actually, if I followed the instructions, I wouldn't be in this predicament!

Well, here is what I got when I cut a slice (I don't think Dorie intended the berry surprise to look like this):
Not the most attractive dessert, is it? The cake slice was no more appealing:
Even though my rendition of this dessert wasn't very visually appealing, it tasted delicious! Even with all of the cream and cream cheese, the filling and topping was light and it complemented the cake and berries perfectly. I'm definitely going to make a couple of adjustments to the filling and and assembly and give this recipe another go.

For the recipe, please visit MaryAnn's blog. I'm sure your eyes need to recover from my disaster, so go to the TWD blogroll to see what this cake should really look like. ;)

Tuesday, January 6, 2009

French Pear Tart (TWD)

Happy New Year! Welcome to my first 2009 post for Tuesdays With Dorie, and it's a special one indeed. Our hostess for the week is none other than the baking goddess and cookbook author herself, Dorie Greenspan! Dorie has been a wonderful supporter of the TWD baking community over the past year, and her cookbook Baking: From My Home To Yours has been a wonderful source of delicious treats.
Dorie selected French Pear Tart for this week's baking exercise, and it's a perfect recipe to take advantage of the abundance of pears available right now. This tart is composed of a sweet tart shell, almond cream, and poached pears --- I know, what's not to love! I ended up with a 9" square tart and had enough extra filling for a round mini tart (as shown in the first photo).
I opted to poach fresh fruit, using bartletts for the large tart and petite seckel pears for the mini tart.
For the crust, I substituted with this recipe (I believe this is a Viennese dough, but don't take my word for it):
1 2/3 C AP flour
4 1/2 oz unsalted butter
2 egg yolks, hard cooked and seived
1/4 C sugar
pinch of salt
1/4 C ice water
Cut together the flour, butter, yolks, sugar and salt. Add ice water and form the dough into a disc. Chill for one hour.
The resulting dessert is HEAVENLY! The delicious almond cream is a perfect complement to the sweet and juicy pears, and this tart provides just enough sweetness to satisfy a sweet tooth.
If you'd like the recipe, please visit Dorie Greenspan's wonderful blog. I know that my fellow bakers are flaunting some gorgeous tarts, so make sure to visit the TWD blogroll.

Monday, January 5, 2009

Tall & Creamy Meyer Lemon Cheesecake (TWD)


Sorry everyone...a WAY late post for last week's Tuesday With Dorie selection, Tall and Creamy Cheesecake. This is a FABULOUS recipe, and it's helped me overcome my fear of baking cheesecakes. Okay, confession--- I've never successfully baked a respectable cheesecake until I tried Dorie's recipe here. Not only does the cheesecake taste delicious, the recipe is foolproof as I get great results every time I make it.


I opted for a meyer lemon version, taking advantage of the great looking meyer lemons at the farmers market. I used a 7" springform pan and made half of the filling recipe. I still made a full recipe for the graham crust, as I love a thicker crust. Unlike your typical heavy and dense cheesecake, this cheesecake is light and fluffy. I loved the subtle citrus flavor of the meyer lemon, and raspberries were a perfect accompaniament.
Thank you Anne Strawberry for this delicious selection! If you'd like to try your hand at this cheesecake (which I highly recommend), you can find the recipe at Anne's blog or at Serious Eats.

Thursday, January 1, 2009

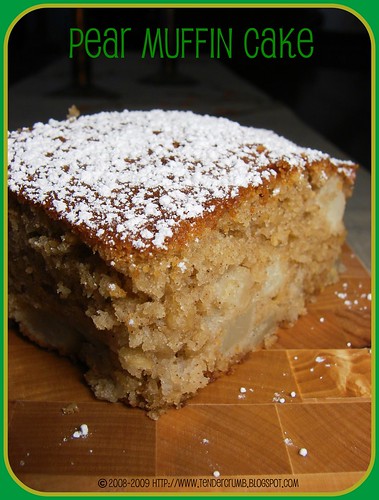
Pear Muffin Cake

Am I the only one that absolutely hates going out on New Years Eve? Maybe I’m becoming an old fuddy-duddy, but nothing beats curling up with my hubby on the couch in my flannel pjs, watching the Twilight Zone marathon on the SciFi Channel, and muching a huge bowl of popcorn and drinking champagne.

This morning, I woke up without an alarm clock and hang-over free (ahhh, now that’s a great feeling). My hubby and I hung out on our pjs all morning, enjoyed a leisurely breakfast in the backyard (it was a gorgeous day in SoCal) and watched back-to-back bowl games. This is what I call the perfect way to start the new year!

This pear muffin cake is perfect for this kind of lazy day, as it’s very quick and easy to make and it’s delicious!

Pear Muffin Cake
Adapted from Baking: My Home To Yours by Dorie Greenspan

½ C whole milk
½ C apple cider (or another ½ C milk)
1 large egg
1 1/2 tsp vanilla
8 tbsp unsalted butter, melted and cooled
1 ¾ C AP flour
½ C sugar
¼ C brown sugar
1 tbsp baking powder
½ tsp baking soda
3/4 tsp cinnamon
½ tsp cardamom
¼ tsp salt
¾ C old-fashioned oats
2 pears, peeled & cut into medium chunks
powdered sugar

Preheat oven to 400F degrees.

Butter and flour an 8 inch square pan.

Whisk together the liquid ingredients (milk, cider, egg, vanilla, melted butter) in medium bowl.

In a separate large bowl, whisk together the flour, sugar, brown sugar, baking powder, baking soda, cinnamon, cardamom, and salt to combine thoroughly. Add the oats and mix to combine.

Using a large rubber spatula, pour the liquid mixture into the dry ingredients and mix only until combined (less is better). Fold in the diced pears, and pour batter into prepared pan.

Bake for 35-40 minutes, until the cake is golden brown and a knife inserted into the cake center comes out clean.

Let cake cool until warm or room temperature. Sprinkle with powdered sugar, cut into squares, and enjoy!

Tuesday, September 23, 2008

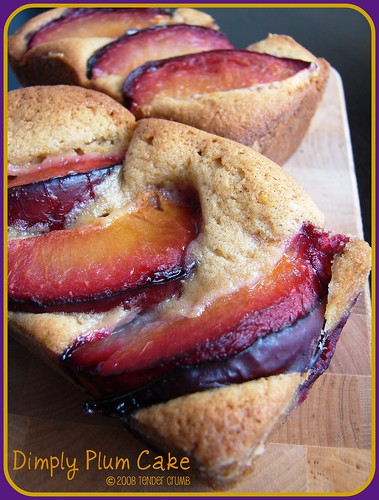
Dimply Plum Cake (TWD)

Finally, we're breaking away from cookies this week! The Tuesdays With Dorie bakers worked on some really delicious cookie recipes for the past few weeks (the Granola Grabbers and Malted Whopper Cookies were terrific!), and I welcomed the break to do something different.

Michelle of Bake-en selected Dimply Plum Cake as this week's recipe. It was a really timely pick as we now have an opportunity use the last of the summer fruits before we head into autumn.

I've previously made this recipe using an 8x8 pan with wonderful results, so this time around I wanted to see how this cake would fare in a mini loaf pan, which had compartments for 8 minis (I reduced the oven to 325F and baked 20-25 minutes). This was a great opportunity to use another fruit, so I decided to make the original recipe as well as one of Dorie's suggested variations.

I made the base dough with any flavors/spices, divided the base dough in half and then added the appropriate spices/flavors. I ended up making the following variations:

- plums, lemon and cardamom
- peaches, lemon and basil (continue to scroll down to see pics)

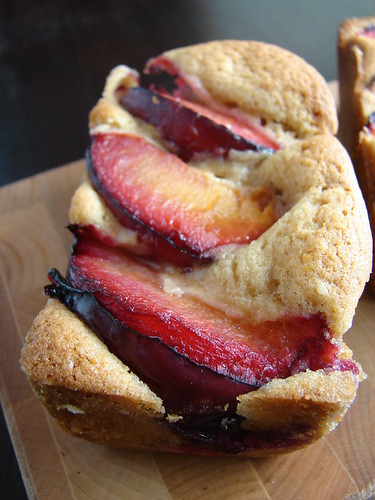
Instead of using plum halves, I sliced the plums into quarters and laid down three pieces of fruit per mini-loaf. I guess this loaf took the description dimply pretty seriously:

The minis turned out just as wonderfully as a whole cake. I actually think that they held up better as time passed. This cake kinda turns to mush after a couple of days...the mini loafs held up for 4 days.

The fruit turns "jammy" and the flavors intensify after baking in the oven:

I love this cake, as the fruit on top tells you exactly what you're eating:
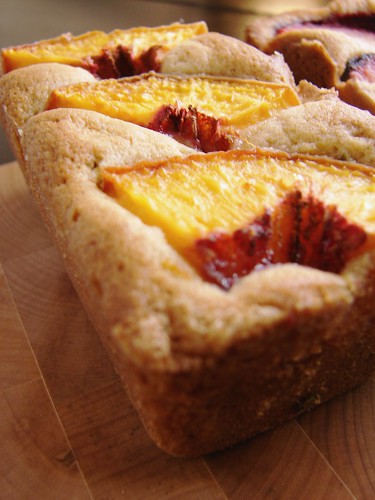
The peach version was an unexpected and delicious surprise, as it calls for some chopped basil in the dough. The basil lent a sweet, herbaceous flavor that complemented wonderfully with the sweet peaches.
This is a wonderful breakfast treat, and it comes together in a snap. For the recipe, check out Michelle's site. To see what the other TWD bakers created, check out the blogroll.


Tuesday, August 12, 2008

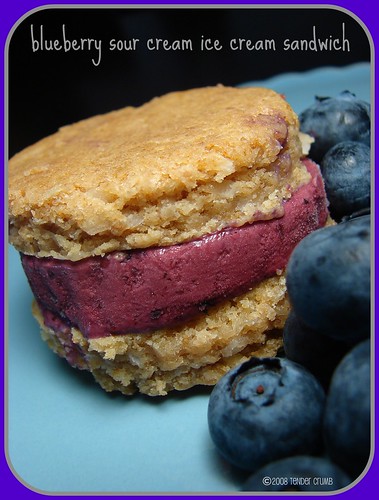
Blueberry Sour Cream Ice Cream Sandwich (TWD)

If you haven't figured out by now, I LOVE making homemade ice cream! I was thrilled to see that we had ice cream slated for this week's Tuesdays With Dorie. Selected by Dolores at Chronicles in Culinary Curiousity, this recipe for blueberry sour cream ice cream sounded like a perfect summer treat. This recipe was really simple to prepare, as all you need to do is cook & puree the berries, mix in a combination of heavy cream and sour cream, chill and churn. I love this recipe as there were no eggs to temper...yippeee! I went with fresh blueberries, as my local markets are overflowing with them. I also went ahead and added twice the amount of lemon juice (really dig the tart flavor). Once assembled and frozen, I took a little taste test (okay, twist my arm! ;) )...YUM!!! Great thick, creamy texture, beautiful purplish/bluish hue, and a nice tangy flavor that comes from the sour cream. In many ways, this tasted like a frozen blueberry cheesecake filling.With cheesecake in mind, I decide to play with the recipe and made mini ice cream sandwiches. I paired the ice cream with a ridiculously easy graham cracker based cookie (the original recipe and my adaptation notes are below). To make these sandwiches, pour the just churned icecream into a 8x8 dish (or a loaf pan---that's what I used here) and freeze to set.

Graham Cookies
makes approx 24 cookies

1 1/2 C graham cracker crumbs (I pulverized my in a food processor)
1/2 C flour
2 tsp baking powder
1 14 oz can sweetened condensed milk
1/2 C butter, softened
1 C shredded coconut
2 C chocolate chips/nuts (if omitting completely, as I did here, up the flour by 1/2 C)

- Preheat oven to 350 degrees.
- Mix the graham cracker crumbs, flour and baking powder in a bowl to combine
- Incoporate the butter and condensed milk until combined
- Fold in the shredded coconut (and choc chips and nuts, if using)
- Drop dough by the teaspoon and bake until nice and browned - 8-10 minutes.

For the sandwich recipe, halve the recipe and spread the dough onto an 9x13" pan or 1/4 sheet pan lined with parchment (very important as the dough is extremely sticky). Bake at 350 for approx 18-22 minutes, until the top is nice and golden brown. Note: I used an 8x8 pan for the cookies shown here, and the cookies came out a bit thicker than I would have liked. If you like thicker cookies, this should fit the bill; if you like your cookies thinner, definitely go with a larger pan.

I cut the cookies and ice cream using a fluted round cookie cutter, assembled the sandwiches, and placed the finished sandwiches in the freezer to set. Keep in mind that the ice cream needs to be frozen solid when assembling the sandwiches and you need to work quickly, or you will end up with a melting mess.

These mini cheesecake ice cream sandwiches tasted fantastic (it's another story on how these little guys looked :( ). The ice cream was the highlight in this treat, and this recipe will definitely be flagged for a repeat!

For the receipe, please head over to Dolores' blog. To see what everyone else churned, check out the TWD blogroll.
Blog Widget by LinkWithin