Showing posts with label vanilla. Show all posts

Wednesday, June 2, 2010

Profiteroles

It's finally feeling like summer, and the warm weather always puts me into the mood for ice cream! The hubs and I are not fussy about how we enjoy our ice cream. We'll usually enjoy our frozen treats straight of of the carton or generously scooped on sugar cones.

If I'm feeling particularly fancy and entertaining dinner guests, these delicious profiteroles will make an appearance. Composed of a choux puff that is filled with ice cream and topped with a chocolate sauce, profiteroles are a delicious sweet ending to any meal.

Pate a choux, the basis for these profiteroles, cream puffs, eclairs, and gougeres, is a dough that is first cooked on the stove, then piped on baking sheet. Once in the oven, this magical dough tranform into light and airy pastry puffs that are just slightly crisp on the outside and almost hollow in the middle.

The pate a choux is piped onto a baking sheet. As it bakes the dough transforms into these airy golden clouds.

Once cooled, these pastries are ready to be filled and served.

Here is what the puff looks like once you slice them open. They should be slightly moist inside and almost completely hollow.

Once the choux puffs are ready, all you need is vanilla ice cream and chocolate sauce and you're ready for business! One scoop of vanilla ice cream is sandwiched in the puff.

Warm chocolate sauce is drizzled on top.

Now it's ready to eat...YUM!

Profiteroles

Pate a Choux
adapted from The Secrets of Baking by Sherry Yard
makes approximately 24 medium sized puffs

1 C. bread flour
1 tsp sugar
1/4 tsp salt
1/2 C. water
1/2 C. whole milk
6 tbsp butter
4 eggs


Preheat oven to 425F degrees. Line baking sheets with silpat or parchment paper

Bring the water, milk, butter, sugar and salt to a boil in a large saucepan over medium high heat.

Once the liquid mixture starts to boil, reduce the heat to medium and add the flour all at once and stir well. Cook, stirring constantly with a wooden spoon, until the dough begins to come away from the sides of the pan (approx 5 minutes).

Transfer the dough to a bowl of a stand mixer fitted with a paddle and beat at medium speed until the dough cools to approximately body temperature.

Add the eggs, one at a time, beating well after each addition and scraping down the sides of the bowl with a rubber spatula. At this point, the dough should be smooth and shiny.

Transfer the dough to a pastry bag with a plain round tip. Pipe mounds that are 1 1/2 inches in diameter and 1 inch high on the baking sheet two inches apart.

Bake until puffed and light golden brown, about 20-25 minutes.

Transfer puffs to a wire rack to cool completely.


Assembling The Profiteroles

1 prepared batch of choux puffs
1 quart vanilla ice cream (I made David Lebovitz's fabulous recipe)
1 cup chocolate sauce (I cheated and used a pre-made jar)

Cut each choux puff in half.

Portion a small scoop of ice cream on the bottom half of each puff and put the top half back over the ice cream.

Place 2-3 profiteroles on each plate and drizzle with a generous amount of chocolate sauce.

Serve immediately and enjoy!

Tuesday, October 6, 2009

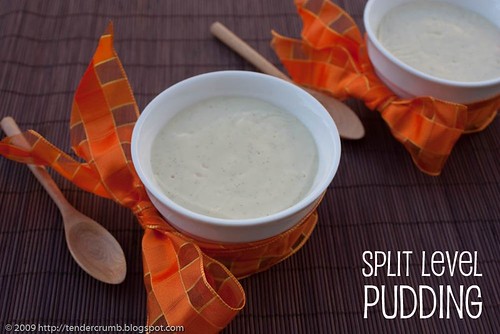
Split Level Pudding (TWD)

I'm back... after a month long haitus, I ready to get my blogging mojo on! September was an action-packed month for me, with various mini-vacations, classes and time with friends and family. Where do I begin...

- The hubs and I decided to do a series of mini-trips instead of one long vacation. The hubs attended a week long conference in Vegas at the Bellagio, so of course I had to tag along. Pool, spa, gambling, shopping, and tasty dining was on the agenda --- this girl definitely enjoys her time in Vegas, baby! We then trekked down south to San Diego to visit friends (thanks Lisa & Howie for your oustanding hospitality), then finished the road trip at the St. Regis Monarch Beach in Dana Point.

- The SIL and her boyfriend were kind enough fly in from Jersey to house and puppy sit for us, and we were fortunate to spend time together before and after the trip...thanks Mel & Tom...you guys are welcome anytime!!!

- I started a 10 week digital photography course at UCLA. The more I learn, the more I realize how much I DON'T about using my camera! My classmates are great and our instructor, George, has great passion for his art and his enthusiasm is infectious. I'm not sure that you'll see an improvement in my photos, but at least I'll know how the camera gear works!

- We capped the month with a trip up to Pismo Beach for the wedding of our dear friends, Teresa & Jim. I've been really gun-shy about sharing this... I had the priviledge of making their wedding cake and cupcakes. This was the first time I baked at this scale, and the experience was fun, exciting, and anxiety-filled! Once I get my hands on some pictures, I'll definitely share them with you.

Anyways, I'm happy to get back in the rhythm of blogging...

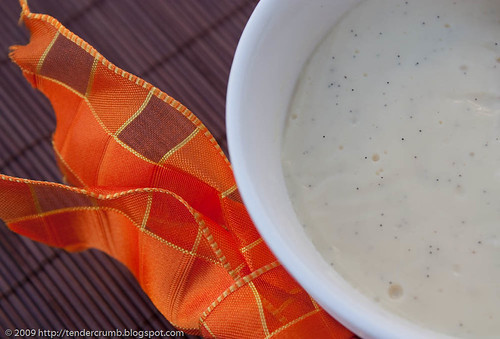
This weeks Tuesdays With Dorie recipe, Split Level Pudding, was a perfect way to ease back into my baking routine. Simple and comforting, this recipe consists of a chocolate ganache base topped with a rich vanilla pudding. To be just a little decadent, I used vanilla bean paste instead of extract. I love seeing those beautiful vanilla specks in the pudding:

Dorie's recipe calls for the use of a food processor. Although it can get messy tranferring the mixture back and forth from the saucepan to the processor, you are rewarded with a pudding that has a wonderfully silky smooth texture. This technique was previously used with her chocolate pudding recipe, and I was blown away by the results.

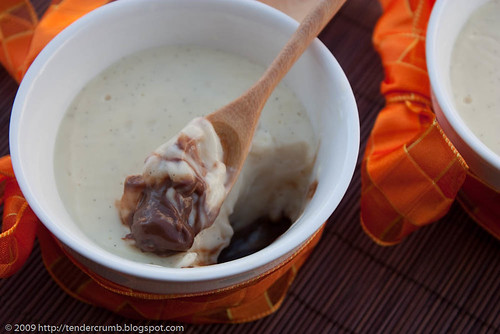
Once you dig into the silky smooth vanilla pudding, you get a wonderful chocolate surprise:

The base is a soft chocolate ganache, and I ended up using a delicious Baileys chocolate ganache leftover from the wedding cake/cupcakes.

You can find the complete recipe at Garrett's blog, Flavor of Vanilla. Also make sure to visit the TWD blogroll to see more delicious versions of this pudding.

Tuesday, July 28, 2009

Vanilla Ice Cream (TWD)

I think that Vanilla Ice Cream is the "little black dress" of the dessert world. It goes with almost anything - it can go fancy accompanying an elaborate dessert or be enjoyed simply on top of a sugar cone. Here is one of my favorite ways to enjoy vanilla ice cream....

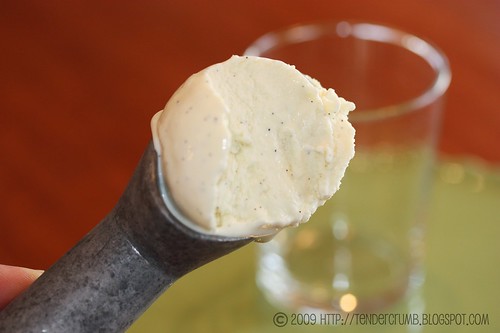
Take a glass and add one scoop of Dorie Greenspan's fantastic vanilla ice cream,
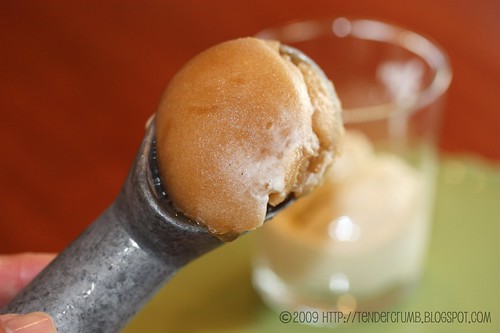
One scoop of root beer sorbet (too simple to make - heat one can/bottle of your favorite root beer and 1/4 C sugar, until the sugar dissolves. Cool, then freeze in your ice cream maker),
Next,
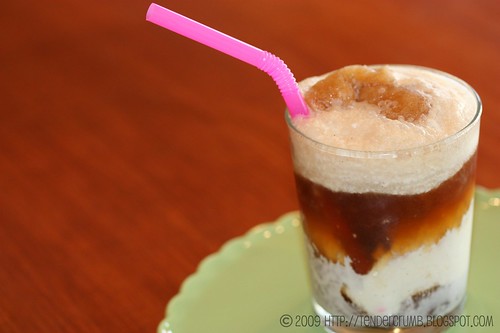
Top off the glass with root beer:
Wait, we're almost done:
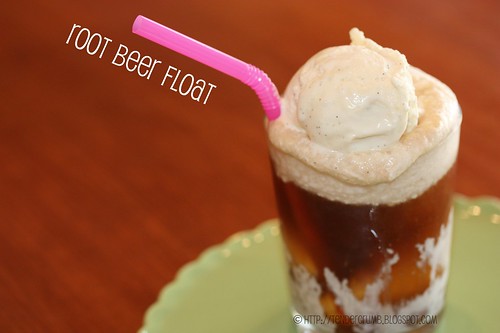
Ah yes, one more scoop of vanilla ice cream. Now, it's time to enjoy!
As I'm writing this post, I am craving the crazy delicious Root Beer Float at Michael Mina - home brewed root beer, sasparilla ice cream, and root beer granita. Served alongside this delicious concoction are warm chocolate chip cookies. My tummy is growling!

Dorie Greenspan's vanilla ice cream is delicious! Her recipe uses a 50/50 ratio of milk and heavy cream, which is unlike the heavy cream dominant recipes that I'm typically used to. The ice cream is wonderfully rich and creamy, and for what it's worth, I'm happy to save a few fat calories going with the 50/50 ratio.

Thank you Lynne of Cafe LynnyLu for a perfect summer dessert recipe! If you'd like the recipe, please visit Lynne's blog. My fellow TWD bakers have also been churning up a storm, so make sure to peruse the TWD blogroll.

Saturday, February 28, 2009

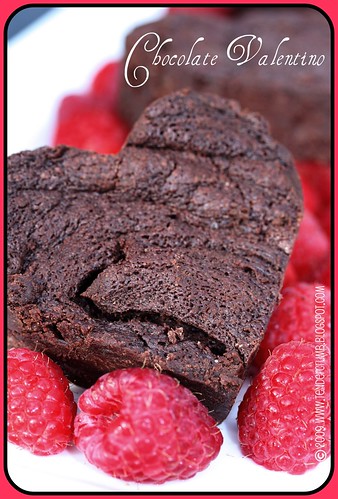
Chocolate Valentino & 7 Bean Vanilla Ice Cream (DB)


This month's Daring Bakers Challenge showcases how a few simple yet high quality ingredients can be transformed into a special, decadent dessert...and a perfect sweet treat for Valentines Day!

The February 2009 challenge is hosted by Wendy of WMPE's blog and Dharm of Dad ~ Baker & Chef. We have chosen a Chocolate Valentino cake by Chef Wan; a Vanilla Ice Cream recipe from Dharm and a Vanilla Ice Cream recipe from Wendy as the challenge.

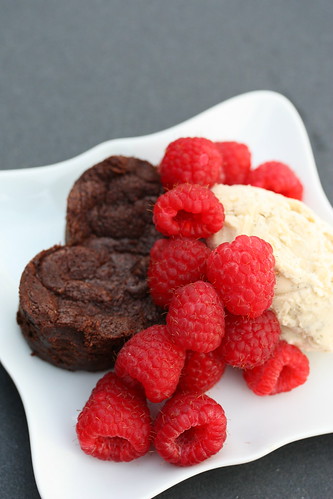
Chocolate Valentino is essentially a flourless chocolate cake composed of three basic ingredients: chocolate, butter and eggs. The end result is an extremely fudgey cake (more like a brownie than a cake), and a little portion delivers HUGE chocolate flavors. I followed the recipe instructions as written, baking the cake in an 8" springform pan. Once the cake cooled, I used a heart shape cookie cutter to portion out individual servings.

Vanilla Ice Cream is part two of this month's challenge. For those of you who know me, I LOVE making (and eating) homemade ice cream, and I happily pulled out my ice cream maker for the occasion. I've been itching to make 7 Bean Vanilla Ice Cream from Sherry Yard's terrific book, Desserts By The Yard.

The cake and ice cream served as a perfect ending for my hubby and me on Valentine's Day. We really enjoyed the cake, as it wasn't sugary sweet and it delivered a huge punch in chocolate flavor (definitely use high-quality chocolate for this recipe). The ice cream was full of vanilla flavor (7 vanilla pods--- I would have been disappointed if it wasn't), and it really worked well with the cake. I could have easily eaten the entire batch by myself! :p It's definitely a small investment using 7 vanilla pods, but it's definitely worth making for a special occassion.

Chocolate Valentino
Preparation Time: 20 minutes

Ingredients

16 ounces (1 pound) (454 grams) of semisweet chocolate, roughly chopped (I used Valrhona 60%)
½ cup (1 stick) plus 2 tablespoons (146 grams total) of unsalted butter
5 large eggs, separated

Instructions

1. Put chocolate and butter in a heatproof bowl and set over a pan of simmering water (the bottom of the bowl should not touch the water) and melt, stirring often.

2. While your chocolate butter mixture is cooling. Butter your pan and line with a parchment circle then butter the parchment.

3. Separate the egg yolks from the egg whites and put into two medium/large bowls.

4. Whip the egg whites in a medium/large grease free bowl until stiff peaks are formed (do not over-whip or the cake will be dry).

5. With the same beater beat the egg yolks together.

6. Add the egg yolks to the cooled chocolate.

7. Fold in 1/3 of the egg whites into the chocolate mixture and follow with remaining 2/3rds. Fold until no white remains without deflating the batter.

8. Pour batter into prepared pan, the batter should fill the pan 3/4 of the way full, and bake at 375F/190C

9. Bake for 25 minutes until an instant read thermometer reads 140F/60C. (Note – If you do not have an instant read thermometer, the top of the cake will look similar to a brownie and a cake tester will appear wet.)

10. Cool cake on a rack for 10 minutes then unmold.

~~~~~~~~~~~~~~~~~~~~~~~~~~~~~~~~~~~~~~~~~~~~~~

7 Bean Vanilla Ice Cream
adapted from Desserts By The Yard by Sherry Yard
makes 1 quart

1 cups milk
3 cups heavy cream
7 vanilla beans - split, seeds scraped out; seeds and beans reserved
3/4 cup sugar
4 large egg yolks
pinch of salt

1. Place a 1 quart freezer container in the freezer. Prepare an ice bath: fill a large bowl with ice and a little water and nestle ia medium bowl in the ice.

2. In a medium nonreactive saucepan, combine the milk, cream, vanillaseeds and beans and half the sugar. Place the pan over medium heat and bring the mixture to a boil. Turn off the heat, cover tightly with plastic wrap, and allow the milk and cream to infuse for 20 minutes (I let it sit for 1 hour).

3. While the milk and cream are infusing, comvbine the egg yolks and the remaining 6 tablespoons sugar in a medium bowl and whisk them together until lemony yellow.

4. After infusing the cream mixture, remove the plastic wrap and return the mixture to the heat. When the milk and cream come to a simmer, remove from the heat and slowly whisk 1/2 cup into the egg yolks. Once the cream is incorporated into the yolks, whisk the yolks back into the cream. Be sure to scrape all the yolks into the pan with a rubber spatula.

5. Place the pan over low heat and immediately begin to stir the custard. After about 2 minutes, the custard will begin to thicken. Keep stirring until the consistency is like thick cream. The custard is done when the temperature reaches 180F degrees. Test for readiness with your spatula: dip it into the custard, pull it out, and run your finger across the back of the spatula. Your finger should leave a clear trail adn the rest of the spatula should remain coated with custard. If the custard does not run into the finger trail, it is thick enough and can be taken off the heat. If it does run, cook the custard for another minute, or until the consistency is right.

6. Remove the custard from the heat and immediately pour through a fine-mesh strainer into the bowl in the ice bath. Rinse beans and reserve for another use. Add salt. Cool mixture (if you time, refrigerate custard for a least couple of hours). Transfer to an ice cream maker and freezee according to the manufacturer's directions. Transfer to the freezer container and place in the freezer for 2 hours, or until firm.
Blog Widget by LinkWithin