The left photo shows the mixture before heating. The right photo shows the thickened mixture just moments before I took it off the heat.

Now, this is the part where Dorie's recipe sets itself apart from other recipes. The mixture is cooled slightly, then strained into a blender or food processor. With the equipment on, you gradually add butter pieces. Once completed and chilled, you will be rewarded with the most velvety cream imaginable! The flavors of lime and ginger were fantastic, and I actually yearned for more of that zinginess from the ginger (note to self for next time). I slathered some of the leftover cream on a piece of toast and had it for breakfast --- totally decadent!
I prepared four 5 inch tartlet pans with a graham cracker crust. I didn't add any additional sugar to the crust, as I thought that there was enough sweetness in the cream.
For the meringue, I actually heated the egg whites and sugar slightly over a bain marie before whisking. As I was planning to torch the meringue (vs baking in the oven), I wanted to avoid undercooked egg whites.

How did we enjoy this pie? I think Siena expressed it the best:
 Lip smacking delicious!!!
 Thank you
Laurie for all of your dedication and hard work to keep TWD going...I've enjoyed making the 70+ recipes that we've made to date, and look forward to at least that many more!
Please make sure to peruse the
TWD blogroll, as I guarantee that you will see many scrumptious pies this week. Thanks everyone for baking along with me!
~~~~~~~~~~~~~~~~~~~~~~~~~~~~~~~~~~~~~~~~
Creamiest Lime Cream Meringue Pie
From Baking: From My Home To Yours By Dorie Greenspan (pp 337-339)
Makes 8 servingsDorie's Notes: The look of this pie is sumptuous, its texture silky and its lime-ginger flavor big, bright and sassy. While I’m happy to have a lemon meringue pie any time of the year, I save this pie for summer because, as fresh as lime and ginger taste on their own, when they’re mixed together, they turn uber-zingy and so cool you’d think they’d been in the deep freeze. It may be an illusion, but one you’ll be happy to play along with on a sweltering day.Serving: The pie is best served chilled and in generous wedges. Storing: Meringue-topped pies are at their best the day they are made. Kept longer, the risk of weepy meringue gets higher.FOR THE FILLING
1 cup sugar
Grated zest of 3 limes
4 large eggs, preferably at room temp
¾ cup fresh lime juice (from about 6 limes)
A 1 inch chunk of fresh ginger, peeled and finely grated
2 teaspoons cornstarch
2 ½ sticks (10 ounces) unsalted butter, cut into tablespoon size pieces, at room temperature
Getting ready: Have an instant-read thermometer, a strainer and a blender (first choice) or food processor at hand.
Bring a few inches of water to a simmer in a saucepan.
Put the sugar and zest into a heatproof bowl that can be set over the pan of simmering water. Off the heat, rub the sugar and zest between your fingertips for a few minutes, until the sugar is moist and the fragrance of lime is strong.
Whisk in the eggs, then whisk in the juice, ginger and cornstarch.
Set the bowl over the pan and start stirring with the whisk as soon as the mixture feels tepid to the touch. Cook the lime cream until it reaches 180 degrees F. As you whisk- you must whisk constantly to keep the eggs from scrambling – you’ll see that the cream will start out light and foamy, then the bubbles will get bigger, and then, as it gets closer to 180 degrees F, it will start to thicken and the whisk will leave tracks. Heads up at this point – the tracks mean the cream is almost ready. Don’t stop whisking or checking the temperature, and have patience – depending on how much heat you’re giving the cream, getting to temp can take as long as 10 minutes.
As soon as it reaches 180 degrees F, remove the cream from the heat and strain the cream into the container of the blender (or food processor); discard the rest.
Let it cool until it reaches 140 degrees F, about 10 minutes.
Turn the blender to high speed (or turn on the processor) and add the butter a few pieces at a time. Scrape down the sides of the container as needed as you incorporate the butter. After all the butter is in, continue to blend the cream for another 3 minutes. If you find the machine is getting really hot, work in 1-minute intervals, giving the machine a little rest in between beats.
Pour the cream into a container, press a piece of plastic wrap against the surface and refrigerate the cream for at least 4 hours, or overnight. (The cream can be packed airtight and frozen for up to 2 months; thaw overnight in the refrigerator.)
FOR THE CRUST (2 options)
Graham Cracker Crust
makes a 9-inch crust
1 3/4 cups graham cracker crumbs
3 tablespoons sugar
Pinch of salt
1/2 stick (4 tablespoons) unsalted butter, melted
Butter a 9-inch pie plate.
Stir the crumbs, sugar and salt together in a medium bowl. Pour over the melted butter and stir until all of the dry ingredients are uniformly moist. Turn the ingredients into the pan and use your fingers to pay an even layer of crumbs over the bottom of the pan. Put the pan in the freezer while you preheat the oven. (The crust can be covered and frozen for up to 2 months.)
Center a rack in the over, preheat the oven to 350 degrees F and place the pan on a baking sheet. Bake for 10 minutes. Set the crust aside to cool on a rack.
Good For Almost Everything Pie Dough
makes one 9-inch crust
1 1/2 cups all·purpose flour
2 tablespoons sugar
3/4 teaspoon salt
1 1/4 sticks (10 tablespoons) very cold (frozen is fine) unsalted butter, cut into tablespoon-size pieces
2 1/2 tablespoons very cold (frozen is even better) vegetable shortening, cut into 2 pieces
About 1/4 cup ice water
Put the flour, sugar and salt in a food processor fitted with a metal blade; pulse just to combine the ingredients. Drop in the butter and shortening and pulse only until the butter and shortening are cut into the flour. Don't overdo the mixing—what you're aiming for is to have some pieces the size of fat green peas and others the size of barley. Pulsing the machine on and off, gradually add about 3 tablespoons of water—all a little water and pulse once, add some more water, pulse again and keep going that way. Then use a few long pulses to get the water into the flour. If after a dozen or so pulses, the dough doesn't look evenly moistened or form soft curds, pulse in as much of the remaining water as necessary, or even a few drops more, to get a dough that will stick together when pinched. Big pieces of butter are fine. Scrape the dough out of the work bowl and onto a work surface.
Gather the dough into a ball, flatten the ball into a disk and wrap in plastic. Refrigerate the dough for at least 1 hour before rolling. (If your ingredients were very cold and you worked quickly, though, you might be able to roll the dough immediately: the dough should be as cold as if it had just come out of the fridge.)
To Roll Out the Dough: Have a buttered 9-inch pie plate at hand. You can roll the dough out on a floured surface or between sheets of wax paper or plastic wrap or in a rolling slipcover. (I usually roll this dough out on the floured counter.) If you're working on a counter, turn the dough over frequently and keep the counter floured. If you are rolling between paper, plastic or in a slipcover, make sure to turn the dough over often and to lift the paper, plastic or cover frequently so that it doesn't roll into the dough and form creases. If you've got time, slide the rolled-out dough into the fridge for about 20 minutes to firm up.
To Make the Crust: Fit the dough into the pie plate and, using a pair of scissors, but the excess dough to a 1/4- to 1/2 inch overhang. Fold the dough under itself, so that it hangs over the edge just a tad, and flute or pinch the crust to make a decorative edge. Alternatively, you can finish the crust by pressing it with the tines of a fork.
To Partially or Fully Bake the Crust: Refrigerate the crust while you preheat the oven to 400 degrees F. Butter the shiny side of a piece of aluminum foil, fit the foil, buttered side down, tightly against the crust and fill with dried beans or rice or pie weights. Put the pit plate on a baking sheet and bake the crust for 25 minutes. Carefully remove the foil and wights and, if the crust has puffed, press it down gently with the back of a spoon. For a partially baked crust, return the pie plate to the oven and bake for about 8 minutes more, or until the crust is very lightly colored. To fully bake the crust, bake until golden brown, about another 10 minutes. Transfer the pie plate to a rack and cool to room temperature before filling.
FOR THE MERINGUE
4 large egg whites, at room temperature
½ cup sugar
To finish the pie with the meringue: Preheat the broiler.
Whisk the cream to loosen it and spoon it into the pie shell. Place the pie plate on a baking sheet.
Working in a clean dry mixer bowl with the clean whisk attachment, or in a large bowl with a hand mixer, whip the egg whites at medium speed until opaque. With the mixer running , add the sugar in a slow stream and continue to beat until the whites are glossy and form firm peaks.
Spread the meringue over the lime filling, swirling it if you’d like. Make sure the meringue comes all the way to the edges of the crust, because it will shrink when it bakes.
Run the pie under the broiler until the meringue is golden and the tips are dark brown (Or, if you’ve got a blowtorch, use it to brown the meringue.) Remove the pie from the oven and let it cool for about 15 minutes, then refrigerate for at least 3 hours before serving.
Playing Around – Gingered Lime and Mango Meringue Pie
Peel a ripe mango, cut it into small cubes and sprinkle with a little lime juice. Spread about one third of the lime cream into the crust, top with the diced mango and cover with the remaining cream. Chill and finish with meringue as directed. Or omit the meringue and top the pie with long, elegant slices of mango and a gloss of quince or apple jelly: boil about ¼ cup jelly with ½ teaspoon water, then brush the glaze over the pie.
 I need to up my blogging game. I've been baking and photographing, but am totally behind on getting all of my posts up. Sure, I have lame excuses for my procrastination, but I won't bore you with the details...at least for today.
 I love cakey cookies, and this cookie was right up my alley. I am so glad that I added the candied ginger, as it gave a nice spicy flavor and a nice chew. This recipe begs to be played with, and next time I'm going to nix the raisins and try a combination of dried pineapple and candied ginger, as well as substituting some of the butter with applesauce to reduce the fat content.
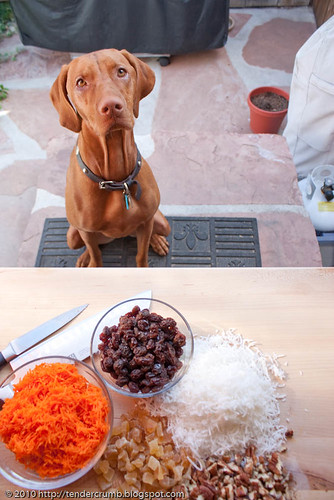

 With this gift of time, I took the opportunity to catch up on some baking that I've been postponing. This is a late
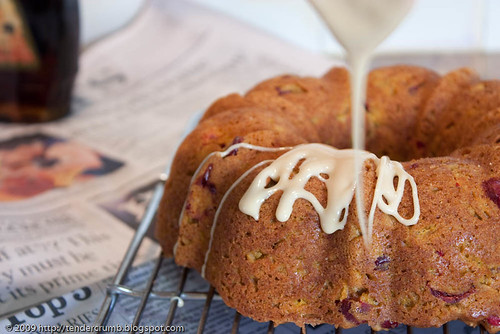


 Thank you Britin of The Nitty Britty for this delicious
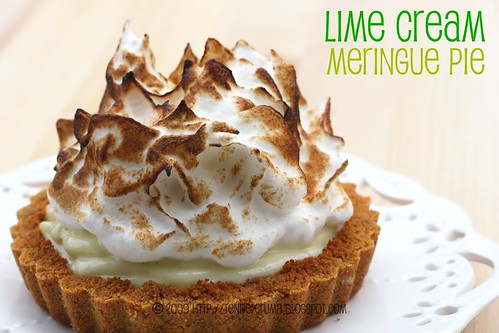
 Dorie Greenspan's technique to make this velvety cream is definitely worth taking note. The instructions for the cream starts with a mixture of sugar, eggs, lime, ginger. As the mixture cooks over a bain marie, the liquid mixture thickens and transforms into a curd.
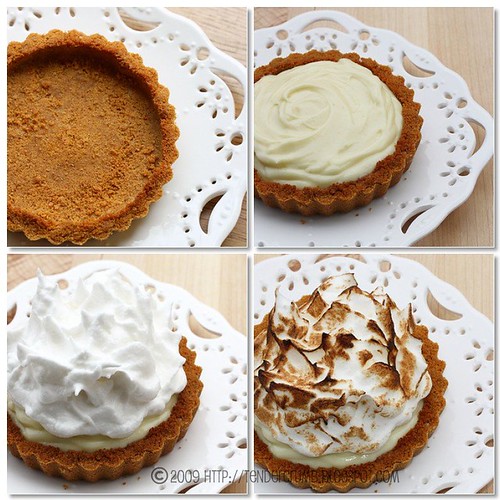

 I also reduced the frosting recipe by half. My only slight issue with the frosting was its intense sweetness (and I didn't even use the full amount of powdered sugar in the recipe). This could have resulted from my substitution of crystalized ginger for fresh. To balance the sweetness, I added more cream cheese. Instead of an icing to drizzle on the cake layers, I ended up with a more traditional cream cheese frosting. The little golden bits you see in the frosting is the chopped crystalized ginger:
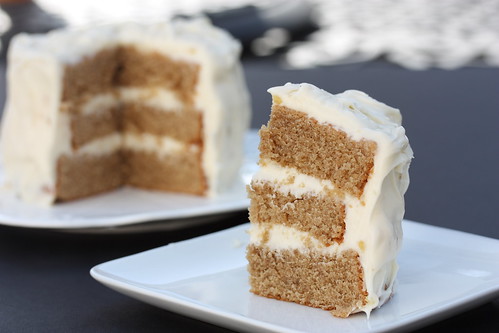
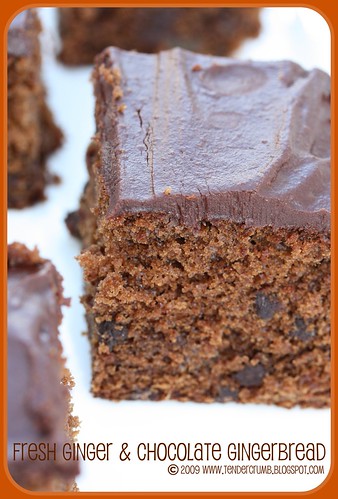
 I love ginger, but I'm not huge fan of gingerbread (go figure), so I'm not the best person to judge this recipe. Personally, I thought there was a bit much going on with the strong flavors of ginger, molasses, spices, and chocolate. I must be in the minority, as my taste testers thoroughly enjoyed this cake with their morning cup of java.