Saturday, February 28, 2009

Chocolate Valentino & 7 Bean Vanilla Ice Cream (DB)


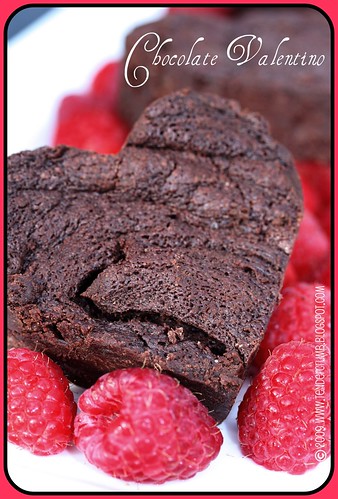
This month's Daring Bakers Challenge showcases how a few simple yet high quality ingredients can be transformed into a special, decadent dessert...and a perfect sweet treat for Valentines Day!

The February 2009 challenge is hosted by Wendy of WMPE's blog and Dharm of Dad ~ Baker & Chef. We have chosen a Chocolate Valentino cake by Chef Wan; a Vanilla Ice Cream recipe from Dharm and a Vanilla Ice Cream recipe from Wendy as the challenge.

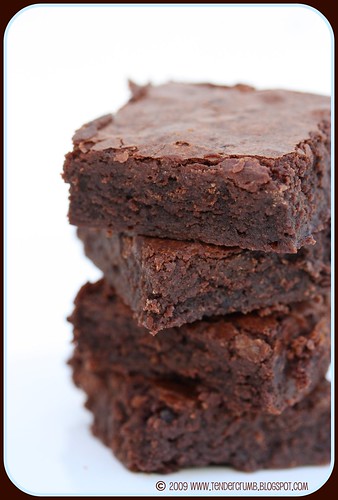
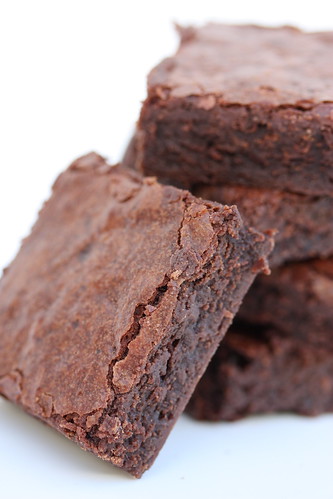
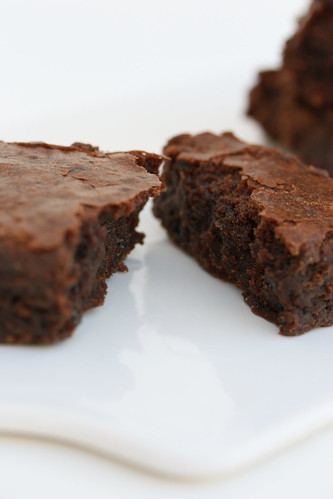
Chocolate Valentino is essentially a flourless chocolate cake composed of three basic ingredients: chocolate, butter and eggs. The end result is an extremely fudgey cake (more like a brownie than a cake), and a little portion delivers HUGE chocolate flavors. I followed the recipe instructions as written, baking the cake in an 8" springform pan. Once the cake cooled, I used a heart shape cookie cutter to portion out individual servings.

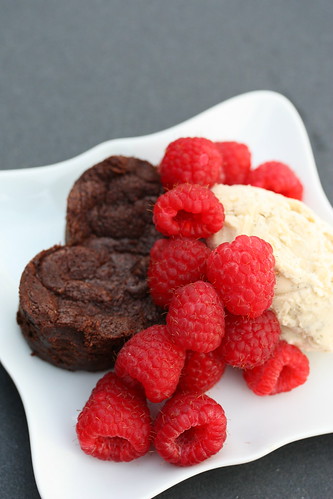
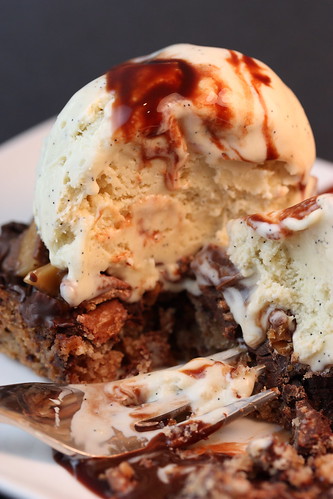
Vanilla Ice Cream is part two of this month's challenge. For those of you who know me, I LOVE making (and eating) homemade ice cream, and I happily pulled out my ice cream maker for the occasion. I've been itching to make 7 Bean Vanilla Ice Cream from Sherry Yard's terrific book, Desserts By The Yard.

The cake and ice cream served as a perfect ending for my hubby and me on Valentine's Day. We really enjoyed the cake, as it wasn't sugary sweet and it delivered a huge punch in chocolate flavor (definitely use high-quality chocolate for this recipe). The ice cream was full of vanilla flavor (7 vanilla pods--- I would have been disappointed if it wasn't), and it really worked well with the cake. I could have easily eaten the entire batch by myself! :p It's definitely a small investment using 7 vanilla pods, but it's definitely worth making for a special occassion.

Chocolate Valentino
Preparation Time: 20 minutes

Ingredients

16 ounces (1 pound) (454 grams) of semisweet chocolate, roughly chopped (I used Valrhona 60%)
½ cup (1 stick) plus 2 tablespoons (146 grams total) of unsalted butter
5 large eggs, separated

Instructions

1. Put chocolate and butter in a heatproof bowl and set over a pan of simmering water (the bottom of the bowl should not touch the water) and melt, stirring often.

2. While your chocolate butter mixture is cooling. Butter your pan and line with a parchment circle then butter the parchment.

3. Separate the egg yolks from the egg whites and put into two medium/large bowls.

4. Whip the egg whites in a medium/large grease free bowl until stiff peaks are formed (do not over-whip or the cake will be dry).

5. With the same beater beat the egg yolks together.

6. Add the egg yolks to the cooled chocolate.

7. Fold in 1/3 of the egg whites into the chocolate mixture and follow with remaining 2/3rds. Fold until no white remains without deflating the batter.

8. Pour batter into prepared pan, the batter should fill the pan 3/4 of the way full, and bake at 375F/190C

9. Bake for 25 minutes until an instant read thermometer reads 140F/60C. (Note – If you do not have an instant read thermometer, the top of the cake will look similar to a brownie and a cake tester will appear wet.)

10. Cool cake on a rack for 10 minutes then unmold.

~~~~~~~~~~~~~~~~~~~~~~~~~~~~~~~~~~~~~~~~~~~~~~

7 Bean Vanilla Ice Cream
adapted from Desserts By The Yard by Sherry Yard
makes 1 quart

1 cups milk
3 cups heavy cream
7 vanilla beans - split, seeds scraped out; seeds and beans reserved
3/4 cup sugar
4 large egg yolks
pinch of salt

1. Place a 1 quart freezer container in the freezer. Prepare an ice bath: fill a large bowl with ice and a little water and nestle ia medium bowl in the ice.

2. In a medium nonreactive saucepan, combine the milk, cream, vanillaseeds and beans and half the sugar. Place the pan over medium heat and bring the mixture to a boil. Turn off the heat, cover tightly with plastic wrap, and allow the milk and cream to infuse for 20 minutes (I let it sit for 1 hour).

3. While the milk and cream are infusing, comvbine the egg yolks and the remaining 6 tablespoons sugar in a medium bowl and whisk them together until lemony yellow.

4. After infusing the cream mixture, remove the plastic wrap and return the mixture to the heat. When the milk and cream come to a simmer, remove from the heat and slowly whisk 1/2 cup into the egg yolks. Once the cream is incorporated into the yolks, whisk the yolks back into the cream. Be sure to scrape all the yolks into the pan with a rubber spatula.

5. Place the pan over low heat and immediately begin to stir the custard. After about 2 minutes, the custard will begin to thicken. Keep stirring until the consistency is like thick cream. The custard is done when the temperature reaches 180F degrees. Test for readiness with your spatula: dip it into the custard, pull it out, and run your finger across the back of the spatula. Your finger should leave a clear trail adn the rest of the spatula should remain coated with custard. If the custard does not run into the finger trail, it is thick enough and can be taken off the heat. If it does run, cook the custard for another minute, or until the consistency is right.

6. Remove the custard from the heat and immediately pour through a fine-mesh strainer into the bowl in the ice bath. Rinse beans and reserve for another use. Add salt. Cool mixture (if you time, refrigerate custard for a least couple of hours). Transfer to an ice cream maker and freezee according to the manufacturer's directions. Transfer to the freezer container and place in the freezer for 2 hours, or until firm.

Tuesday, February 24, 2009

Caramel Crunch Bars (TWD)

This week's Tuesdays With Dorie recipe, Caramel Crunch Bars, was selected by Whitney of What's Left On The Table (please visit Whitney's blog for the recipe).

This cookie is essentially a shortbread with morsels of chocolate (I used bittersweet) distributed throughout and topped with more chocolate and toffee candy (I hand-chopped Skor toffee bars).

Instead of using a 9x13" pan (as instructed in the recipe), I used a square muffin pan to make individual cookies.

Dorie Greenspan notes that these cookies are great for ice cream sandwiches. With that in mind, I added a scoop of 7 bean vanilla ice cream (I will be sharing this over-the-top recipe later this week):
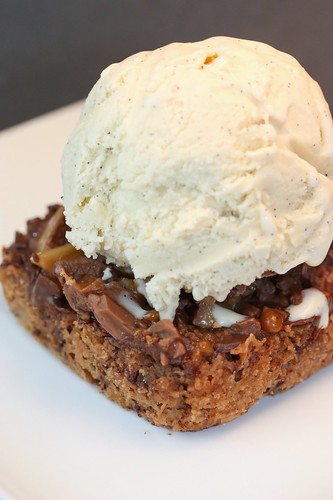
Then, I drizzled slightly warmed chocolate sauce on top:
This cookie is delicious on its own. Who knew that little ice cream and chocolate sauce would elevate this into a spectacular dessert --- YUM!

Friday, February 20, 2009

Southern Coconut Cake (The Cake Slice)

This month's installment of The Cake Slice features Southern Coconut Cake. So far, every recipe that I've made out of Sky High: Irresistible Triple-Layer Cakes has exceeded my expectations, and I highly recommend that you go out and treat yourself to this cookbook.

Impossibly moist white cake layers are subtly flavored with unsweetened coconut milk, enveloped by a cream cheese buttercream frosting (I gained 5 pounds just typing those words) and covered with sweetened flaked coconut (oops, another 5 pounds).

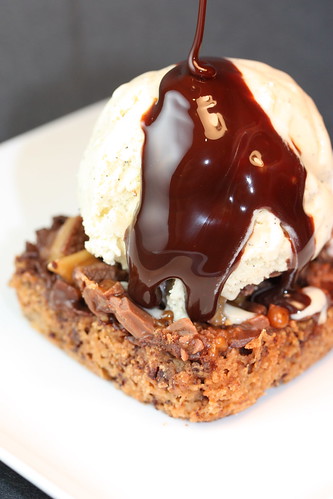
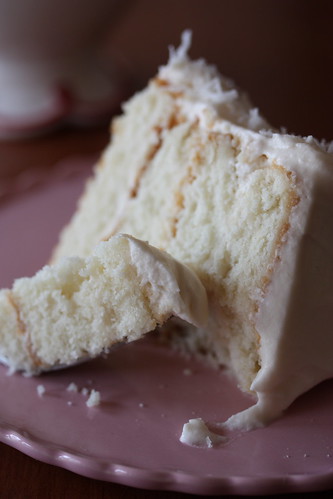
With all of the cake making happening in my kitchen this month, I cut the recipe in half and baked the cake layers in two 6" round pans. The instructions for the cake were pretty straightforward, and the layers were baked without a hitch.

The cream cheese buttercream frosting is a bit more involved to coordinate the whipping of the egg whites and heating of the sugar, but the efforts will be rewarded with a frosting that has all the flavor of your traditional cream cheese frosting but with a lighter, fluffier consistency. Good grief, I could have eaten an entire batch this frosting right out of the bowl!

The assembled cake is really beautiful, and I thought the coconut flavor in the cake was nice and subtle. Again, the frosting was out of this world delicious and it wasn't coyingly sweet or rich...perfect!!
This recipe is on my short list for my friends J&T. You see, they are getting married this September, and I've been honored with the responsibility for their wedding cupcakes and dessert display. Am I just a bit panicked? --- absolutely!!! Aside from the nervousness, I'm really excited about the opportunity to create something delicious for people that I adore. I'm going to try this recipe out in cupcake form and see how it turns out... wish me luck!


Southern Coconut Cake
Makes an 8-inch triple layer cake


For the cake:
5 large egg whites
½ cup of milk
2 teaspoons of vanilla extract
3 cups of cake flour
2 and 1/3 cup sugar
4 ½ teaspoons of baking powder
½ teaspoon of salt
2 sticks of unsalted butter (8oz.) at warm room temperature
1 cup unsweetened coconut milk
2 ½ cups of sweetened flaked coconut for garnishing cake
Preheat the oven to 350F degrees. Butter the bottoms of three 8-inch round cake pans. Line the bottom of each pan with a parchment circle and butter the circle.

Put the egg whites in a bowl and whisk slightly. Add the ½ cup of milk and the vanilla and whisk to mix thoroughly; set aside.

In a large mixer bowl, combine the flour, sugar, baking powder, and salt. With the mixer on low, beat dry ingredients well in order to break up any lumps. Add the butter and coconut milk on low speed and beat just to combine. Raise the speed to medium and beat until light and fluffy about 2 minutes.

Add the egg white mixture in 2 or 3 additions, scraping the sides of the bowl after each addition. Divide the batter among the pans.

Bake for 30 minutes or until a cake taster inserted in the middle comes out clean. Allow the cakes to cool in their pans for 10 minutes. Then turn the cakes out and place on a wire rack to cool completely.

To assemble the cake, place one layer, flat side up, on an 8-inch cake round. Cover this layer with 1 cup of the buttercream frosting. Spread it evenly all the way to edge of the cake. Then sprinkle ½ cup of shredded coconut on top. Add the second layer and repeat the process. Top with the final layer of cake and frost the top and sides of the cake.

Place the remaining 1 ½ cups shredded coconut on a large baking tray. Pick up the cake and hold it on the palm of one hand over the tray. Using the other hand scoop up the coconut and press it to the sides of the cake. Continue with this process until the sides of the cake are covered. Set the cake on a serving plate and sprinkle any remaining coconut on top of cake. Chill cake for at least one hour to allow frosting to firm up a bit.

Cream cheese buttercream frosting

12 ounces of cream cheese, slightly chilled
1 stick of butter plus 6 tablespoons of butter (7 ounces) unsalted butter at room temperature
1 cup of confectioners sugar, sifted after measuring
2 teaspoons vanilla extract
1 cup granulated sugar
¼ cup of water
3 egg whites
Place the cream cheese in the bowl of a mixer and beat on medium speed until slightly fluffy and smooth. Add the butter 1-2 tablespoons at a time, mixing until smooth. Add the confectioner’s sugar and vanilla and mix until fluffy. Set aside at room temperature while buttercream is made.

Combine the granulated sugar and water in a small heavy saucepan and bring to a boil over medium heat, stirring to dissolve sugar. Continue to cook without stirring until the syrup reaches the softball stage 228 degrees F on a candy thermometer.

Meanwhile, place the egg whites in mixer bowl and have the mixer ready to go. When the syrup is ready, turn the mixer on med-low and begin mixing the egg whites. Slowly add the hot syrup to the whites taking care not to pour onto the beaters, it may splash. When all the syrup is incorporated, raise the speed on the mixer to med-high and beat the egg whites until mixture has cooled and stiff meringue forms.

With the mixer on low, begin adding the cream cheese mixture by the spoonful. When all is incorporated, raise the speed to medium and whip until frosting is smooth and fluffy.

Tuesday, February 17, 2009

My Search For The Perfect Brownie Begins...


Someone recently asked me what I would select as my all-time favorite sweet treat. Without hesitation, I responded --- BROWNIES! In fact, my first childhood baking experience was making brownies with a Pillsbury box mix. Eventually, I graduated to homemade and haven't looked back, especially as it is so easy to make brownies from scratch (most are one/two bowl = minimal dish washing = yippeee!!).

Everyone has their brownie preferences: fudgy vs. cakey, with nuts vs. without, bittersweet vs semisweet, etc. My personal brownie preferences are definitely simple and straightforward -densely cakey (borderline fudgy), no nuts, intense chocolate flavor.

Over time, I've accumulated dozens of clippings/bookmarks of brownie recipes, and it's now time to pull them out and do some brownie baking & tasting. I'll definitely blog about my kitchen experiments here, so without further adieu let's get baking...
My latest favorite brownie recipe comes from Baked: New Frontiers In Baking. This recipe has been awarded best brownie honors from America's Test Kitchen, The Today Show, and Oprah's O Magazine. Does it live up to it's hype? --- for me, I would say a resounding YES! The brownie's chocolate flavor is really deep and intense, and the moist, chewy texture is absolute perfection.

THE BAKED BROWNIE
from Baked: New Frontiers In Baking by Matt Lewis and Renato Poliafito
Yield: 24 brownies
Baked Note: A great brownie is easy to make, but you have to be aware of several factors. 1. Use a dark cocoa powder, like Valrhona. A pale, light-colored cocoa does not have enough depth. 2. Make sure your eggs are room temperature and do not overbeat them into the batter, and 3. Make sure you check your brownies often while baking. Once the brownies have been overbaked slightly, they have reached the point of no return.

1 1/4 cups flour
1 teaspoon salt
2 Tablespoons dark cocoa powder
11 ounces quality dark chocolate (60-72%), chopped coarsely
8 ounces butter (2 sticks), cut into 1 inch cubes
1 tsp instant espresso powder
1 ½ cups sugar
½ cup light brown sugar
5 large eggs, room temperature
2 teaspoons vanilla extract

Preheat oven to 350 degrees.

Butter the sides and bottom of a glass or light colored metal pan 9x13x2 pan.

In a medium bowl, whisk together the flour, the salt, and cocoa powder.

Configure a large sized double boiler. Place the chocolate, the butter, and the instant espresso powder in the bowl of the double boiler and stir occasionally until the chocolate and butter are completely melted and combined. Turn off the heat, but keep the bowl over the water of the double boiler and add both sugars. Whisk the sugars until completely combined and remove the bowl from the pan. Mixture should be room temperature.

Add three eggs to the chocolate/butter mixture and whisk until just combined. Add the remaining eggs and whisk until just combined. Add the vanilla and stir until combined. Do not over beat the batter at this stage or your brownies will be cakey.

Sprinkle the flour/cocoa/salt mix over the chocolate. Using a spatula (DO NOT USE A WHISK) fold the dry into the wet until there is just a trace amount of the flour/cocoa mix visible.

Pour the mixture into the pan and smooth the top with your spatula. Bake the brownies for 30 minutes (rotate the pan half-way through baking) and check to make sure the brownies are completely done by sticking a toothpick into the center of the pan. The brownies are done when the toothpick comes out with a few moist crumbs.

Cool the brownies completely before cutting and serving.

Devil's Food White Out Cake (TWD)


The Tuesdays With Dorie bakers can let out a collective cheer --- someone finally chose the cover cake!! Many thanks to Stephanie of Confessions of a City Eater, as she selected Devil's Food White-Out Cake for this week's recipe from Dorie Greenspan's Baking: From My Home to Yours.

Dorie Greenspan describes this dessert as "a dig-into kind of cake, not one meant to be cut daintily or eaten with restraint". Well, with that kind of introduction, who wouldn't want to make this! The cake recipe consists of a super moist chocolate cake that is studded with chunks of chocolate. The dense, fudgy cake layers are then covered with a fluffy white frosting.

As I had a quite a bit of other dessert making planned this weekend, I opted to make half of the recipe. I followed the recipe as written, using Callebaut bittersweet for the melted and chunked chocolate, as well as Hershey's unsweetened cocoa powder.

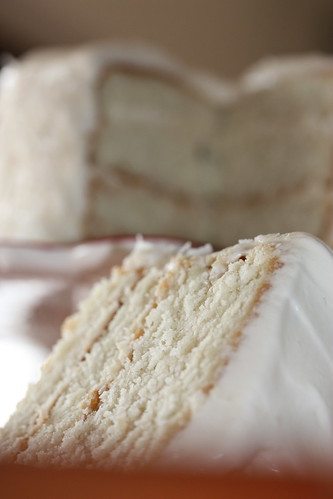
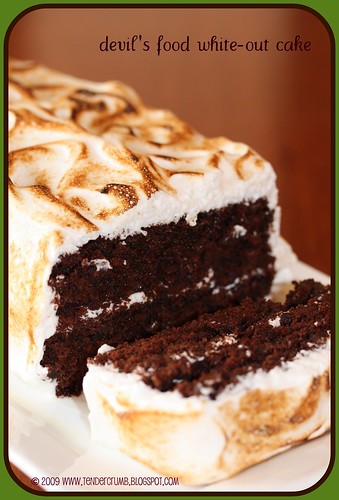
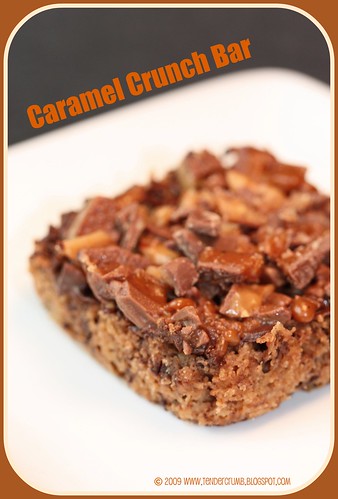
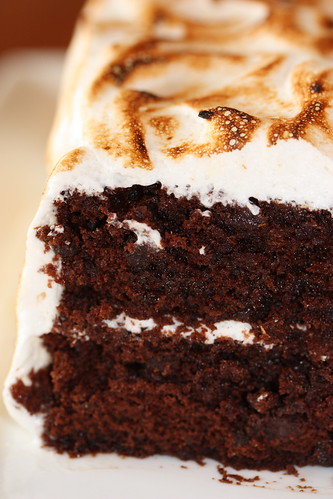
The cake batter was poured and baked in an 8" square pan. Once cooled, I cut the square in half and stacked the two halves to create this rectangular loaf. I didn't bother cutting the cake crossswise for more layers --- I'll admit I was being lazy about the process, but I do prefer having a higher cake to frosting ratio, so the thicker cake layers are much more preferable to me. I loved making the frosting --- it never ceases to amaze me how a few egg whites, sugar and water can transform into this marshmallow-y goodness.
Instead of crumbling a cake layer to decorate the cake exterior, I couldn't resist reaching for my kitchen torch to toast the frosting on the finished cake.
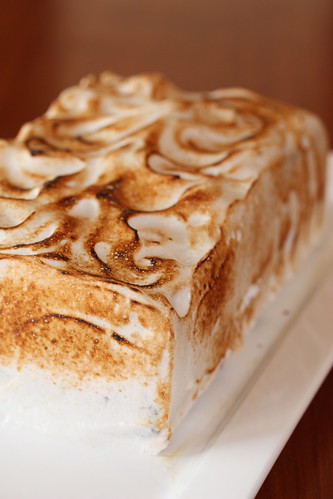
In a way, this cake reminded me of a favorite snack cake of my childhood, Hostess Suzy-Qs --- but a much more delicious, decadent version (and without the transfats and artificial flavorings/stablizers).
The cake layers were perfectly moist and tender, with an intensely deep chocolate flavor. The light and airy marshmallow frosting is a fantastic complement to the cake. I wouldn't change a thing about this combination.
Thanks Stephanie for a terrific pick this week --- for the recipe, please visit Stephanie's blog or visit NPR (which highlighted this recipe a while back). Also, be sure to check out the TWD blogroll to see other delicious versions of this cake.

Tuesday, February 3, 2009

World Peace Cookies (TWD)

For this weeks Tuesdays With Dorie, Jessica of CookBookHabit selected World Peace Cookies. Not many words are required to describe this treat --- This is one hellava delicious cookie! I've made this cookie numerous times without fail (as evidenced by the stain splattered page in my copy of BFMHTY), and everyone raves about how delicious it tastes.
The ingredient list and instructions are really simple --- it's essentially a chocolate shortbread with bits of chocolate and sea salt strewn throughout. I typically follow the recipe as written, as I think it's perfect as is. My baking notes:

Chocolate: I used Valhrona bittersweet mini-chips and cocoa powder

Sea Salt: I used fleur de sel. I also sprinkled additional fleur de sel on top of the sliced dough before baking --- it adds just a touch more saltiness, which is so unbelievably addictive with the chocolate.

Dough: Instead of shaping the dough into a round log, I shaped it into a 2" square log. The shape makes it easier for me to slice the dough. As my cookies are slightly larger, I ended up with two dozen cookies (versus the three dozen indicated in the book).

My favorite way to enjoy this cookie:
For the recipe, please head to Jessica's blog. For more delicious versions of this recipe, check out the TWD blogroll.

Blog Widget by LinkWithin