Showing posts with label spoon desserts. Show all posts

Tuesday, May 18, 2010

Apple-Apple Bread Pudding (TWD)

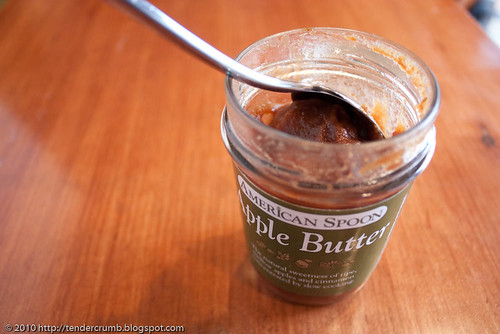
This week's Tuesdays With Dorie recipe for Apple-Apple Bread Pudding is all about comfort food that warms your tummy. This recipe takes a traditional bread pudding and adds a double dose of apples - sauted sliced apples and apple butter.
I did take some liberties with this recipe (you can find the complete original recipe at Liz's terrific blog, Cake or Death? ):

- I halved the recipe to accommodate a 8x3 loaf pan.

- Challah was my bread of choice. The bread was cut into thick slices, liberally slathered with apple butter, and then cut into cubes.

- 1/2 tsp of cinnamon was added to the custard mixture.

- Baking time was adjusted to 1 hour

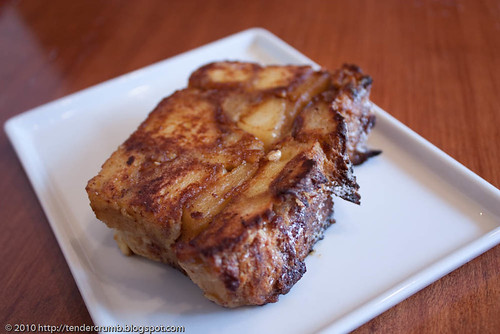
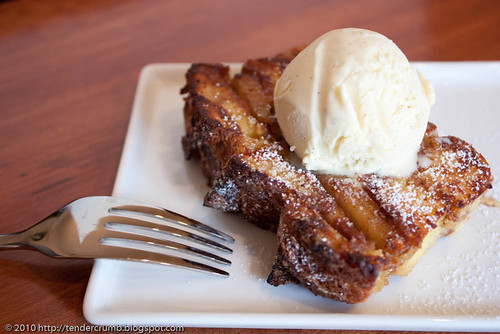
- Once out of the oven, I let the bread pudding cool to room temp. After unmolding from the pan, the bread pudding is sliced, and these slices are fried on both sides with a generous amount of butter (just like frying up french toast). Sure, this is a total fat bomb but boy o' boy is it delicious! Frying creates a beautiful crust, and its slight crunchy exterior gives in to the soft, rich interior. Although the fruit is no longer distinguishable, the apple flavor definitely shines. A little dusting of powdered sugar and a scoop of vanilla ice cream is all you need to complete this dessert.

Thank you Liz for this super delicious selection!

Sunday, February 28, 2010

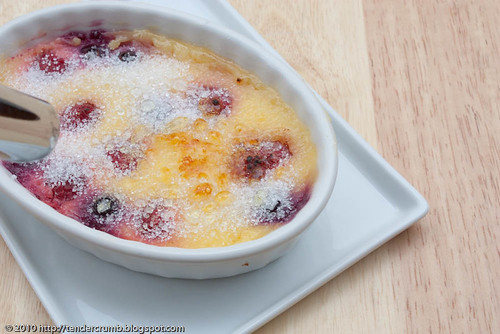
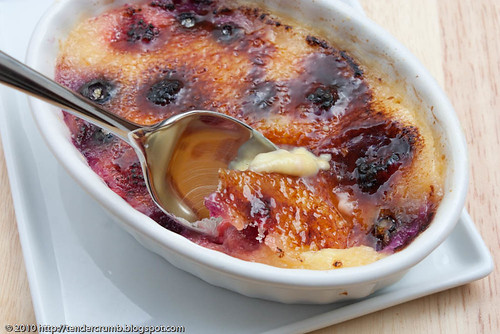
Meyer Lemon Creme Brulee w. Raspberries & Blueberries

I was recently gifted a bounty of gorgeous meyer lemons from LA baking maven and lover of all things bundt Mary (aka The Food Librarian). The beautiful fruit came right off of trees in the backyard of Mary's dad --- Thank you Mary and Poppa Food Librarian!!! I knew I couldn't use all of this precious fruit right away, so I prepared most of them for the freezer.

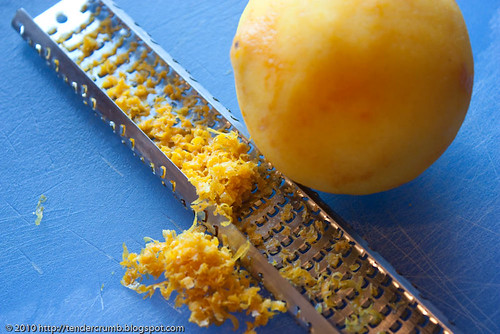
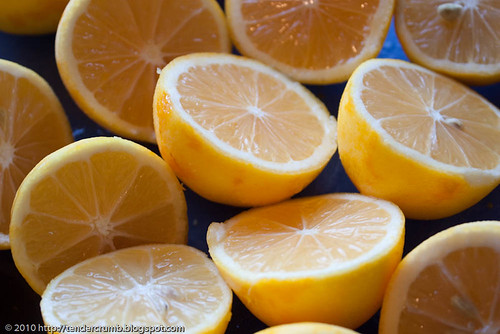
I zested,
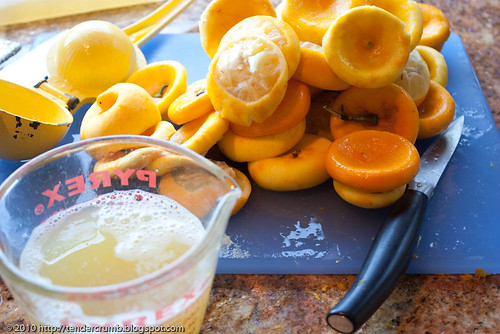
halved the zested lemons,
then did some serious juice squeezing.
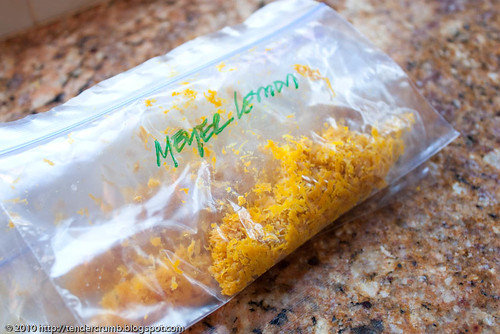
I used snack size zip top bags to store the zest (the zest of 3 lemons in each bag),
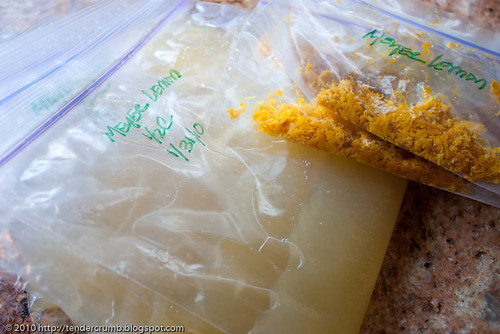
and portioned the juice into 1/2 cup packages in sandwich bags. After marking the bags with a sharpie, they go into a large freezer bag and into the deep freeze. Now, I can enjoy fresh meyer lemon juice any time of the year!
I did set aside a handful of fruit for some immediate meyer lemon gratification. I've been reading through Karen DeMasco's book, The Craft of Baking, and her recipe for Lemon Raspberry Creme Brulee was calling my name.

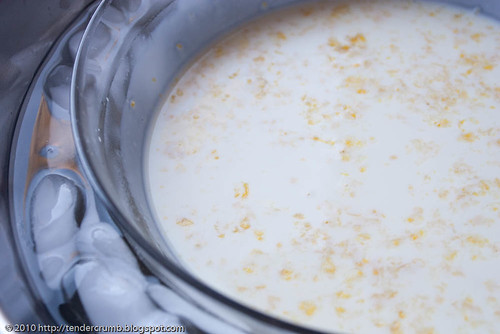
The recipe calls for steeping the cream with lemon zest, cooling the mixture in an ice bath, adding lemon juice and salt, then resting the mixture overnight in the fridge.
Instead of tempering the eggs with the hot cream mixture (as I'm accustomed to), the eggs are whisked in to the cold lemon infused cream. The mixture is strained, and ready for the ramekins.

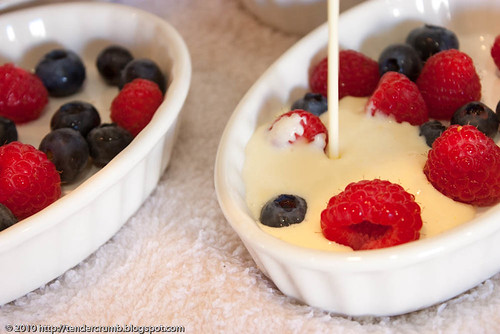
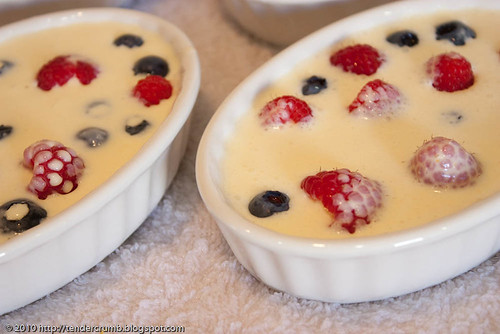
A handful of raspberries are scattered in each ramekin (I also added a few blueberries), and the custard mixture is poured into the prepared dishes.
These babies are ready for the oven.
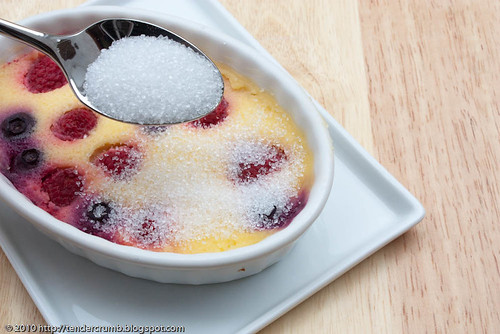
Once the custard is set, it is chilled in the fridge overnight. Now, my favorite part - the brulee! After sprinkling some sugar on top,
the top is torched to melt the sugar and to create that scrumptious crunchy top.
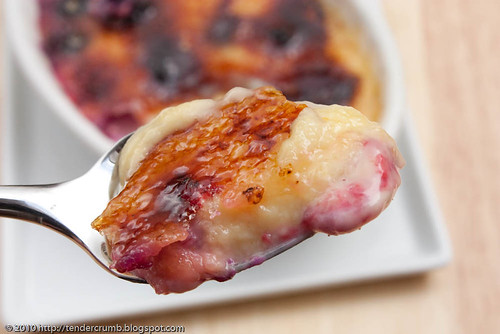
My favorite part of this dessert is cracking the crunchy top, which yields to the creamy goodness underneath.
The custard delivers a nice refreshing tang from the meyer lemon, and has a wonderfully soft texture, which is a great contrast to the crunchy sugar top. The berries are soft and jammy, and provides a wonderful complement to the lemon flavor.
If you're a lover of all things lemon, I highly recommend that you take this recipe for a spin!


Meyer Lemon Creme Brulee w. Raspberries & Blueberries
adapted from The Craft of Baking by Karen DeMasco
Serves 6

2 C. heavy cream
1/4 c. plus 2 tbsp sugar
1/2 tsp pure vanilla extract
finely grated zest of 4 meyer lemons
1/2 c. strained fresh meyer lemon juice
1/2 tsp kosher salt
4 large egg yolks
1 c. raspberries
1 c. blueberries
additional sugar

Prepare an ice bath in a large bowl.

In a medium saucepan, bring the cream, sugar, vanilla and meyer lemon zest just to a boil. Remove the pan from the heat and pour the mixture ino a medium bowl. Set the bowl into the ice bath and stir until the mixture has cooled. Once cooled, removed the bowl from the ice bath, and whisk in the lemon juice and salt. Cover, and refrigerate overnight.
In a large bowl, whisk the egg yolks. Pour about one third of the chilled cream mixture into the yolks, and whisk together well. Add the remaining cream mixture and whisk to combine. Strain the mixture through a fine-mesh sieve into a bowl.

Position a rack in the center of the oven and preheat oven to 300F.

Place 6 ramekins in 9x13x2 baking pan. scatter the raspberries and blueberries in a single layer in each ramekin. Divide the custard mixture among the ramekins. Place the prepared baking pan in the oven, and carefully pour enough hot water into the pan to come halfway up the ramekins. Be careful not to dilute the custard mixture with the hot water.

Bake in the water bath for 30 minutes, or until just set.
Let the custards cool to room temperature, then chill until they are ready to be served.

Just before serving, sprinkle sugar evenly over the tops of each custad and caramelize with a torch or under a broiler. Serve immediately.

Tuesday, October 6, 2009

Split Level Pudding (TWD)

I'm back... after a month long haitus, I ready to get my blogging mojo on! September was an action-packed month for me, with various mini-vacations, classes and time with friends and family. Where do I begin...

- The hubs and I decided to do a series of mini-trips instead of one long vacation. The hubs attended a week long conference in Vegas at the Bellagio, so of course I had to tag along. Pool, spa, gambling, shopping, and tasty dining was on the agenda --- this girl definitely enjoys her time in Vegas, baby! We then trekked down south to San Diego to visit friends (thanks Lisa & Howie for your oustanding hospitality), then finished the road trip at the St. Regis Monarch Beach in Dana Point.

- The SIL and her boyfriend were kind enough fly in from Jersey to house and puppy sit for us, and we were fortunate to spend time together before and after the trip...thanks Mel & Tom...you guys are welcome anytime!!!

- I started a 10 week digital photography course at UCLA. The more I learn, the more I realize how much I DON'T about using my camera! My classmates are great and our instructor, George, has great passion for his art and his enthusiasm is infectious. I'm not sure that you'll see an improvement in my photos, but at least I'll know how the camera gear works!

- We capped the month with a trip up to Pismo Beach for the wedding of our dear friends, Teresa & Jim. I've been really gun-shy about sharing this... I had the priviledge of making their wedding cake and cupcakes. This was the first time I baked at this scale, and the experience was fun, exciting, and anxiety-filled! Once I get my hands on some pictures, I'll definitely share them with you.

Anyways, I'm happy to get back in the rhythm of blogging...

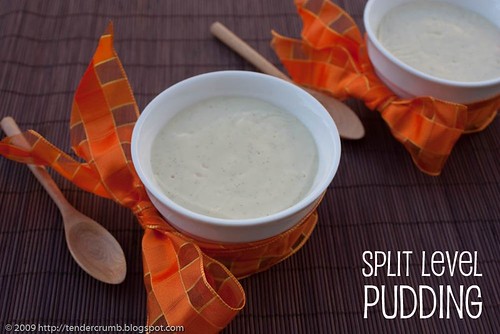
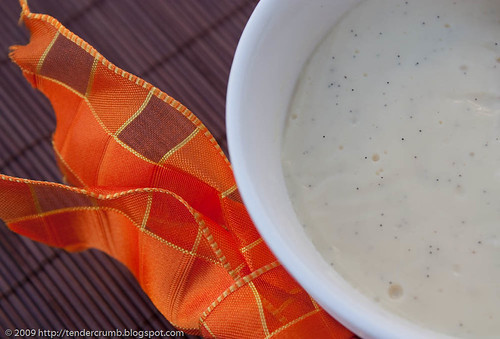
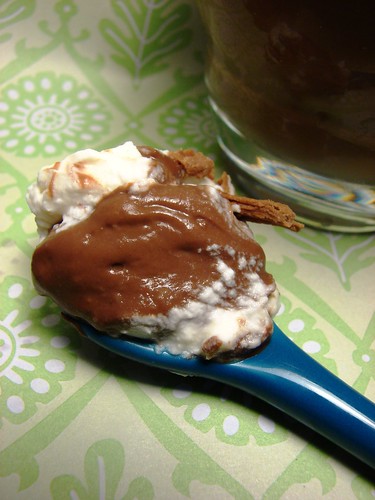
This weeks Tuesdays With Dorie recipe, Split Level Pudding, was a perfect way to ease back into my baking routine. Simple and comforting, this recipe consists of a chocolate ganache base topped with a rich vanilla pudding. To be just a little decadent, I used vanilla bean paste instead of extract. I love seeing those beautiful vanilla specks in the pudding:

Dorie's recipe calls for the use of a food processor. Although it can get messy tranferring the mixture back and forth from the saucepan to the processor, you are rewarded with a pudding that has a wonderfully silky smooth texture. This technique was previously used with her chocolate pudding recipe, and I was blown away by the results.

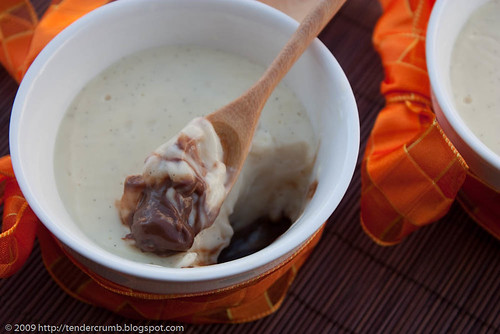
Once you dig into the silky smooth vanilla pudding, you get a wonderful chocolate surprise:

The base is a soft chocolate ganache, and I ended up using a delicious Baileys chocolate ganache leftover from the wedding cake/cupcakes.

You can find the complete recipe at Garrett's blog, Flavor of Vanilla. Also make sure to visit the TWD blogroll to see more delicious versions of this pudding.

Monday, July 20, 2009

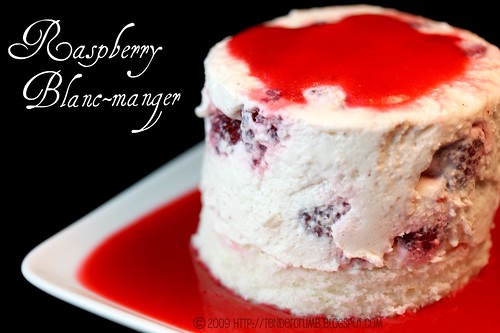
Raspberry Blanc-Manger (TWD)

When I read that Susan of Sticky, Gooey, Creamy, Chewy selected Raspberry Blanc-Manger as this week's TWD recipe, I immediately had a flashback to this:I was a total new wave music fanatic in high school, and this recipe totally sent me into 80's flashback mode! :) But I digress...

Until this week, I had no idea what a blanc-manger was. I did a little research on wikipedia, and this is what I found:
Blanc-manger is a sweet dessert commonly made with milk or cream and sugar thickened with gelatin, cornstarch or Irish moss, and often flavored with almonds. It is usually set in a mould and served cold. Although traditionally white, blancmanges are frequently given a pink color as well. Some similar desserts are Bavarian cream, vanilla pudding (in US usage), panna cotta, and haupia.

The historical blancmange originated some time in the Middle Ages and usually consisted of capon or chicken, milk or almond milk, rice and sugar and was considered to be an ideal food for the sick.
Without question, Dorie Greenspan's version is infinitely better than that from the Middle Ages (blech)! I loved the simplicity in the preparation, and with a little effort, you are rewarded with a sophisticated looking and very delicious dessert. I also loved that this recipe didn't require turning on the oven.

Thank you Susan for this perfect summer pick! If you'd like to get your hands on this recipe, please visit Susan's blog. Not only is Susan a talented baker, but her photography is absolutely beautiful - total food porn!

Tuesday, May 5, 2009

Tiramisu Cake (TWD)

I was so happy to see that Megan of My Baking Adventures selected Tiramisu Cake for this week's Tuesdays With Dorie recipe. For a while, tiramisu was considered THE dessert, and it was included on almost every restaurant menu. Trendy or not, tiramisu has always been one of my favorite desserts.

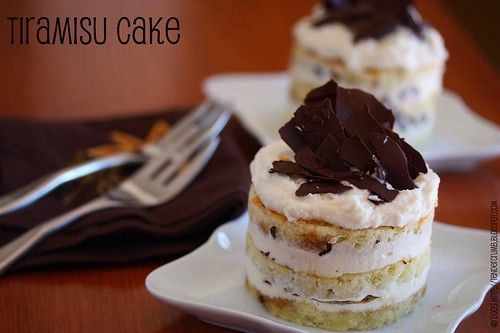
In BFMHTY, Dorie Greenspan developed a twist to the traditional recipe, transforming the trifle-like dessert into a layer cake. Instead of making a whole cake, I reduced the recipe in half, and made individual layer cakes.

My recipe notes and adjustments are as follows (for the full recipe, please visit Megan's blog):

- I used one 9" round pan to bake the cake, and used 3 inch ring molds to cut out individual cakes. I also cut the cake rounds crosswise to get thinner layers. This yielded enough to make 4 triple layer mini cakes.

- Instead of figuring out how to halve 3 eggs and 1 yolk, I went ahead and used 2 whole eggs. The cake turned out just fine.

- I brushed a mixture of 1 tbsp espresso syrup and 1/4 C sweet marsala wine on the cake layers.
- Chopped bittersweet chocolate was nestled between the layers

- For me, the mascarpone filling is the best part of any tiramisu, so I made a full batch. I used about 2/3 of the batch for this recipe. The remaining filling will not go to waste; I'll use it as a delicious topping for some gorgeous strawberries that I picked up over the weekend.

- Definitely serve the dessert at room temperature. Chilling the cake will change the texture of the mascapone filling.

I had some leftover cake and mascarpone filling, and just for fun I created one traditional style tiramisu in a small trifle dish:

Regardless of the presentation, Dorie Greenspan's riff on this classic dessert is fantastic! The layer cake version was easy to make and assemble, and even more a treat to eat.

The yellow cake was nice and dense like a pound cake, and the layers kept its shape after a healthy brushing (i.e. soaking) with the espresso/marsala syrup.

The mascarpone filling / frosting was different from the zabaglione filling that I'm familiar with. I would give the the traditional filling a slight edge in terms of texture and flavor, but I wholeheartly welcomed this no cook version.Thanks Megan for this great 90's flashback! Make sure check out the TWD blogroll to see the handiwork of some amazing bakers.

Tuesday, April 21, 2009

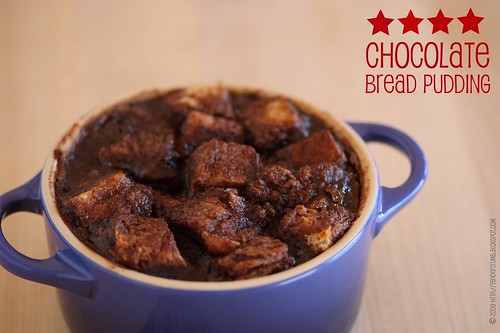
Four-Star Chocolate Bread Pudding (TWD)

This week's Tuesdays With Dorie recipe, Four Star Bread Pudding, is one of the more un-photogenic desserts that I've made (I hesitate to tell you what I think this really looks like). Still, don't judge a book by it's cover, as this dessert tastes WAY better than it looks.
This recipe takes the traditional bread pudding and elevates the richness (and deliciousness) with the addition of bittersweet chocolate to the rich custard mix.
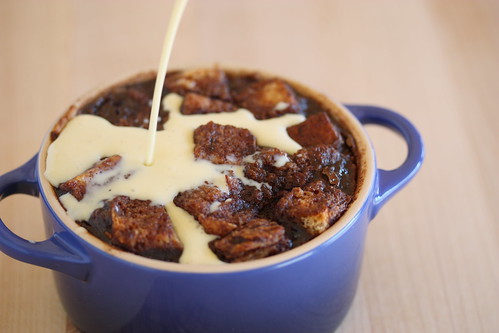
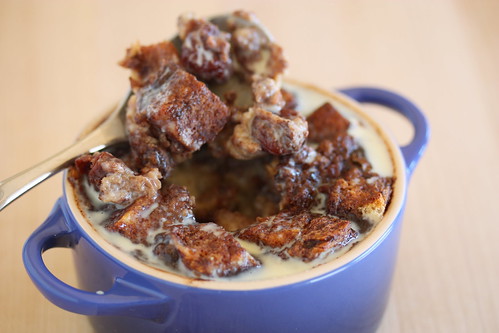
I downsized and made 1/3 of the recipe recipe, which yielded enough for 3 individual ramekins. I used Trader Joe's Cinnamon Swirl Bread (if you haven't tried this, it is AMAZING for french toast or plain ole cinnamon toast) and tossed in a small handful of dried tart cherries. Going with the cherry theme, I added 1 tbsp of kirsch to the custard mixture. Cherries and chocolate - you can't go wrong with that combination.
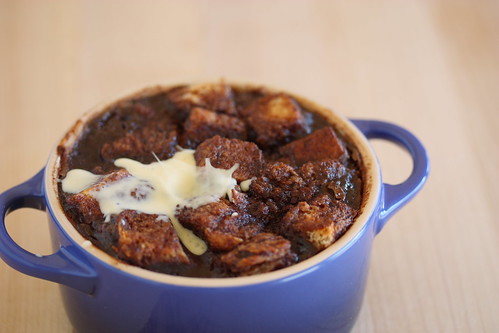
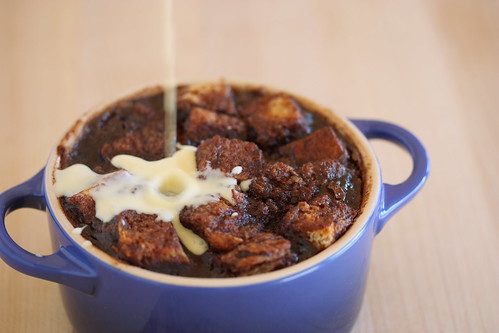
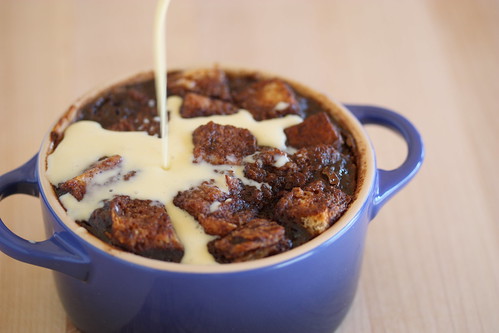
With the individual ramekins, it only required 20 minutes in the oven in a hot water bath for the custard to set. Once the individual puddings are allowed to rest and cool slightly, I poured creme anglaise on top and let the creamy goodness seep into the still warm pudding. At this point, I'm at the caloric point of no return with all of the cream, eggs and sugar, so a little more fat from the creme anglaise won't hurt, would it?
If you're seriously jonesin' for chocolate, this dessert should satisfy that craving. I thought the pudding had a better consistency when eaten warm (at room temp, the pudding had a funky rubbery texture). My favorite part of the dessert was the dried cherries, as the tartness helped to balance out the richness of the dessert.
Thanks to Lauren of Upper East Side Chronicle for selecting this ultimate comfort food. For the recipe, please visit Lauren's blog or you can find it at Leite's Culinaria. To feast your eyes on more bread puddings, make sure to check out the TWD blogroll.

Tuesday, November 18, 2008

Arborio Rice Pudding - Chocolate & Chai (TWD)

Rice pudding is on the menu for this week’s Tuesdays With Dorie. I was looking forward to making this recipe, selected by Isabelle of Les gourmandises d’Isa. Rice pudding is the epitome of comfort food, and for me it is best eaten when curled up on the couch with my favorite blanket and catching up on TIVO (Top Chef, House, Grey’s Anatomy marathon, anyone?).

The recipe itself is pretty simple and straightforward. I noted a couple of major differences between this recipe and others that I’ve tried: (1) parboiling the rice first and (2) no eggs. I decided to follow the recipe as written too see how things would turn out. For flavor, I added a cinnamon stick (broken in two) to the mixture.

Dorie Greenspan personally reached out to the TWD group to highlight a correction on the recipe, which is to cook the pudding for 45-55 minutes (not the 30 minutes noted in the book). Even after cooking over a low heat for one hour, the pudding mixture barely thickened (could I have parboiled for too long, stripping the starch out of the rice?).

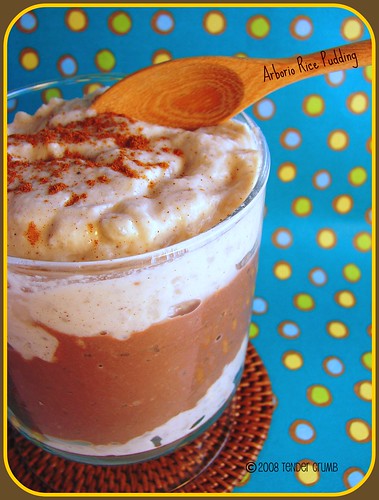
After taking the pudding off the stove, I divided the pudding into two containers and flavored one with 2 oz bittersweet chocolate (it melted into the still hot pudding beautifully) and the other with vanilla extract and chai spices (cinnamon, cardamom, cloves, ginger).

The chocolate version thickened nicely overnight. I couldn’t say the same for the chai version as it was still watery and soupy (blech!). I ended up reheating that portion, tempered in one egg and cooked it for a few minutes, allowing the mixture to thicken. After re-cooling and refrigerating, I finally got the thick, creamy texture that I was looking for.

Taste-wise, I thought that both versions were quite delicious. I was particularly really happy with the chocolate version, as for whatever reason chocolate in rice pudding didn’t really excite me.

I liked the simplicity of this recipe (and would make a mental note to temper in two eggs for the full recipe), but I don’t think this will trump my go-to rice pudding recipe. For the recipe, please check out Isabelle’s charming site. To see rice pudding by the hundreds, check out the TWD blogroll.

Tuesday, September 30, 2008

Creme Brulee (TWD)

I don't know of a single soul who doesn't swoon over creme brulee, do you? I was really happy that Mari of Mevrouw Cupcake selected this FABULOUS dessert for this week's Tuesdays With Dorie. To elaborate further, let me say that I was happy...my DH was really over-the-moon happy about this week's selection. You see, creme brulee is one of his all time favorite desserts, and he made sure that I didn't slack off this week.

For those of you who are debating the purchase of a kitchen torch, I would absolutely recommend it. I purchased this torch apparatus and canned butane at Surfas a couple years ago (cost of the torch attachment ~$20, butane ~$3). Honestly, I've never regretted this purchase, as I've definitely put this tool to good use. The torch attachment easily screws on the butane can, and this apparatus delivers a pretty powerful flame:

Anyways, I digress...back to the creme brulee. The literal translation of this is "burnt cream", and creme brulee is essentially a flavored custard topped with a hard caramel.

You can infuse a variety of flavors to the custard (vanilla, chocolate, coffee, chai ---just to name a few). Vanilla is my favorite flavor for this dessert. I prefer using vanilla beans in recipes that call for its flavor to come center stage, so I made one adjustment to the ingredients, omitting the vanilla extract and instead adding the beans and scraped pods of two vanilla beans to the heated cream. I covered the pot and let the cream and vanilla steep for 1 hour before continuing with the recipe.

Dorie Greenspan's technique is a bit different that what I'm used to doing in the following ways:

- baking at a low temperature (200F) for a longer time period (~ 1 hour). I bake at a temperature of 300F and a baking period of 20-25 minutes.
- no water bath --- you place the ramekins straight on a baking sheet. I typically use a water bath or place a well soaked towel underneath the ramekins before they go in the oven.

I was definitely interested in trying Dorie's technique, so I followed her approach. I found that this technique resulted with a really silky smooth and surprisingly light custard. I did find that my custards took longer to set (1 hr 15 min), but I used larger ramekins (only used 4 ramekins) which may be the explanation.

Overall, I was really pleased with the results! Although this requires a longer baking time, I'm definitely going to adopt this technique going forward...Thank you Dorie!!!

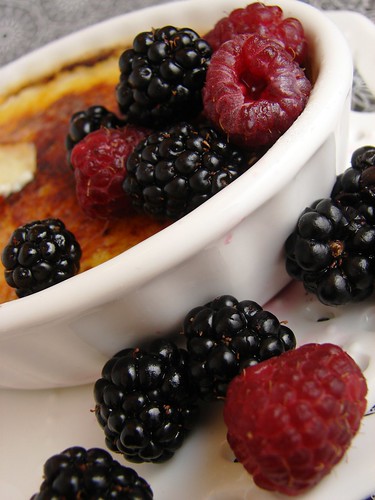
The perfect accompaniment to creme brulee - assorted berries (blackberries and raspberries pictured here):

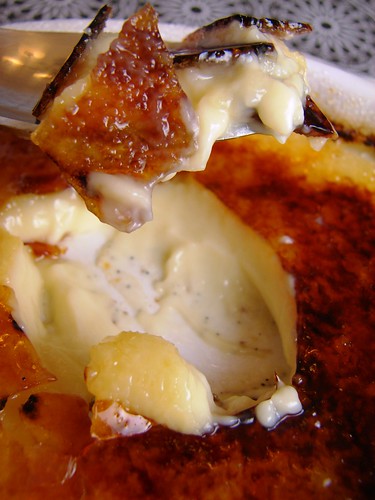
My favorite part of eating creme brulee is the first spoonful --- cracking into the burnt sugar crust, giving way to a rich creamy custard:

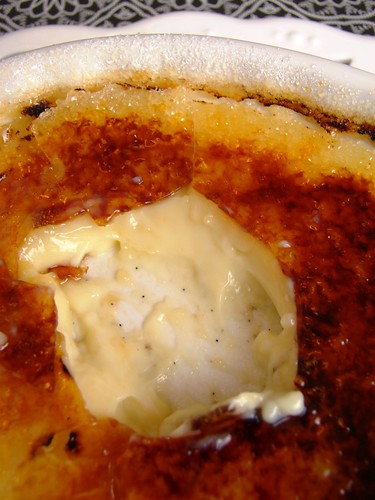
The combination of crunchy and creamy is heavenly! Here, you can see the vanilla beans distributed throughout the custard:

What a gratifying recipe selection this week...Thank you Mari! If you'd like the recipe, you can find it at Mari's lovely site. To see how all my fellow TWD bakers fared check out the blogroll.

Tuesday, July 22, 2008

Cherry Cobbler (TWD)

Since joining this fantastic cooking group Tuesday's With Dorie, I've had a wonderful time cooking thru Dorie Greenspan's baking book, and making recipes that I typically wouldn't have considered trying. With that expanding of horizons (and waistlines) came buying food items that typically wouldn't occupy my pantry. As a result, my cupboards have been overflowing with baking remnants from prior weeks. Not that these items would go to waste (hate the thought of that), I've been consciously trying to get thru these supplies before purchasing anything but the essentials at the market. This exercise was put to the test with this week's selection, Cherry Rhubarb Cobbler, which comes courtesy from Amanda from Like Sprinkles On A Cupcake.
Cobbler is a wonderfully flexible and forgiving recipe, where you can mix and match a variety of fruits. I could have gone to the farmers market with a TON a great summer fruit on display, but I was determined to not buy any additional ingredients for this recipe. I went with mini-cobblers in three small, shallow ramekins, so made only half the filling and one-third of the topping. I dug out an almost full bag of cherries from the freezer (Trader Joe's brand), and supplemented it with a small handful of frozen raspberries (aslo TJ's) to get the right quantity of fruit. I had the rest of the ingredients at home, so things were looking good! I've never seen or tasted rhubarb before...and it looks like I won't be experiencing it any time soon (couldn't even tell you where to find it in my area). To add the tartness that rhubarb would have provided, I added the zest and juice of one lime. Aside from adjusting the recipe size and the rhubarb substitution, I followed the recipe as written. As these were mini-cobblers, baking time was reduced to 30 minutes.

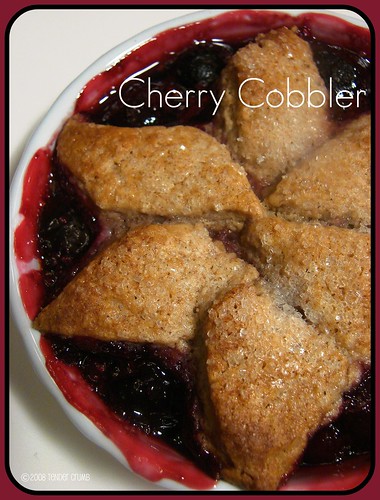
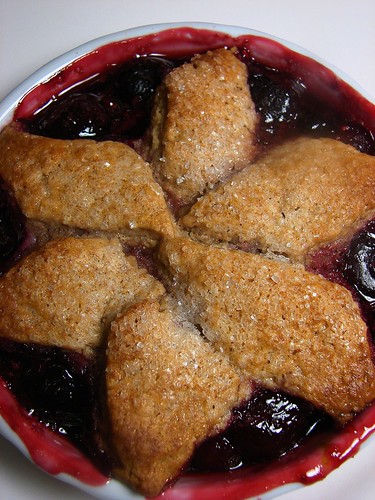
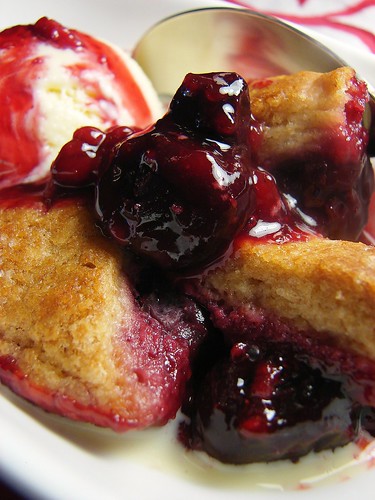
The smell in the house while the cobbler was baking was wonderful and comforting! I also loved pulling the just baked cobbler-ettes out of the oven, with the filling still bubbling and steam emitting from the dish:


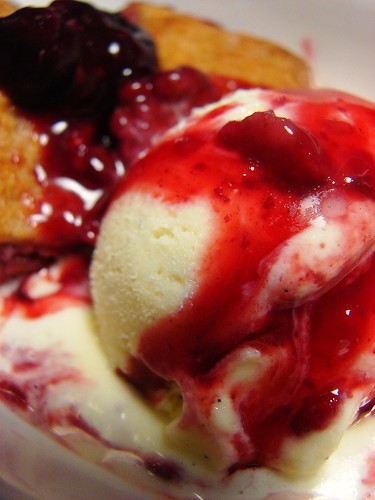
Naturally, this cobbler had to be served with a scoop of homemade vanilla bean ice cream. I spooned the still warm cherry filling over the ice cream, and I love how the ice cream melted into a creme anglaise sauce:

I have to admit that I really enjoyed this dessert (and I'm not a huge fan of cobblers). Just comparing the toppings, it definitely trumped the cobbler that I made a few weeks back. The topping in this recipe has more of a cakey texture, which I personally prefer over a biscuit topping, and I enjoyed the slight sharpness in flavor coming from the ginger. The cherry filling was delicious (couldn't tell that the fruit was frozen), and the lime added a terrific tartness. Next time, I think I'll play with the recipe to enhance the ginger flavor, maybe with some crystalized ginger (if my pantry can make room for it!).
To see the 200+ beautiful cobblers made by fellow TWD bakers, check out the blogroll. For the recipe, Amanda has it posted here.

Tuesday, July 15, 2008

Chocolate Pudding (TWD)

As a little kid, I remembered how excited I got when I discovered a snack-pak chocolate pudding in my lunch. That little can (I think I just dated myself) was worth it's weight in gold on the playground, and I could trade that for almost anything in the other kids' lunch bags...most of the time, I kept it for myself and savored every bite (okay, I didn't know any better back then)!

I chuckle about these memories, with chocolate pudding as this week's Tuesday's With Dorie recipe. Selected by Melissa of It's Melissa's Kitchen, this simple and delicious dessert is often overshadowed by other "fancy" desserts. Until just a couple of years ago, I never knew how easy and delicious homemade pudding can be, and far superior to the packaged instant stuff.


The ingredient list for this recipe is short and simple, and you definitely want to use the best cocoa you can find (I used Scharffen Berger), as that flavor will be center stage in this dessert. Unique to this recipe is the technique. A food processor is used twice, first to temper the eggs with the hot milk and then at the end to whip the pudding once it is cooked. Dorie Greenspan states that this technique will give the pudding a smooth velvety texture...let's see if it does make a difference...

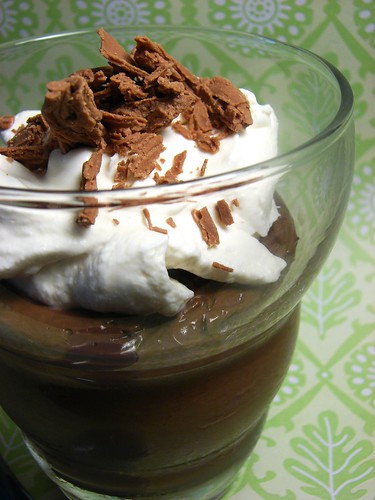
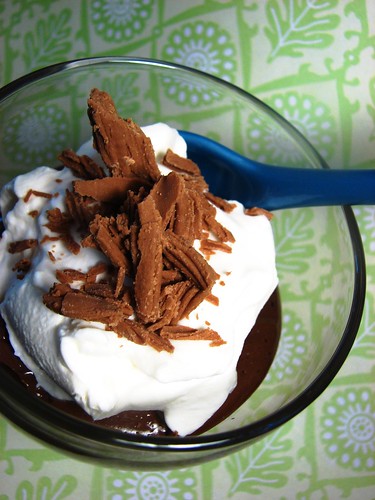
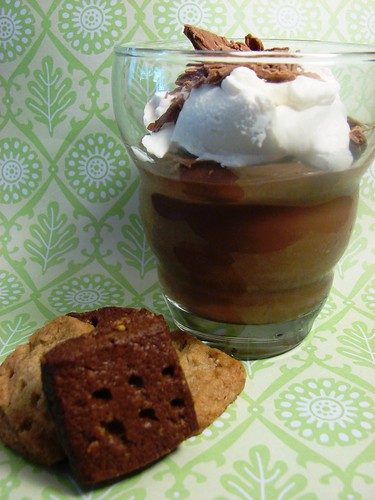
Once refrigerated and set, I topped the pudding with vanilla whipped cream and broken bits of a Flake Chocolate Bar. If you haven't had a Flake before, you must run out and try one...the sweet milk chocolate literally melts in your mouth as you eat these!!! I am digressing... Let's go ahead and dig in...
OMG...this pudding was light yet creamy, and it delivered a deep rich chocolate flavor!!! It definitely delivered on both counts of taste and texture. A very dangerous dessert indeed!

My only minor gripe about this recipe is the use of the food processor, as it requires one more thing to clean up. Also the transferring the mixture back and forth from the saucepan and processor could pose a messy proposition. Still, the results are worth the effort.

This luscious pudding was served with a couple of shortbread cookies. Click here if you are interested in reading about these delish cookies.
This recipe, and more importantly the technique is a keeper!! Dorie Greenspan has written about her pudding on her blog, and the link to the recipe is here. To see how the rest of the Tuesday's With Dorie gang fared with this dessert, check out the blogroll.

Tuesday, June 24, 2008

Peach Blackberry Cobbler & Crisp (TWD)

It was a friggin' hot this weekend in So Cal!!! I'll be the first to admit it...I'm a total weather wimp...anything that deviates from a sunny and temperate 75-80 degrees constitutes a climate crisis! We tried to be good citizens and not keep our air conditioning going around the clock to conserve electricity. One way to keep our house cool this weekend was to not cooking indoors (fruity, frosty cocktails by the pool didn't hurt either). The nice by product of our conservation efforts was doing a lot of great grilling on the barbeque. I almost made it through the entire weekend without turning on the range/oven...

This week's Tuesdays With Dorie selection, Mixed Berry Cobbler, was selected by Beth at Our Sweet Life. I missed out on making the peppermint cream puff ring last week, and was thinking of bailing this week as this recipe involved turning on the oven. I quickly changed my mind when I was at the farmers market, as I was inspired by all of the juicy and fragrant peaches, and decided to go for it and make a mini-cobbler.... and I'm so glad I did! Besides, the group is so much fun to bake with, I couldn't miss out on the action!
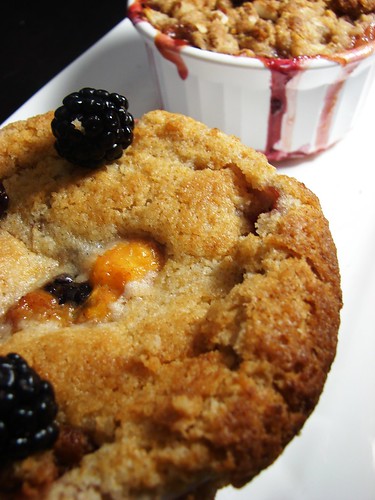

I don't frequently make or eat cobbler. I'm more of a fruit crisp person, as I like the flavor and crunch of the brown sugar, oats and nuts in a crisp topping. As I had extra fruit filling, I went ahead and made a mini crisp...after all, I had to put my taste buds to the test!

I decided to pass on the berries. Instead, I went with fresh peaches and blackberries, and put my own spin on the filling:

Fruit Filling
(this is enough for a 9x13" pan. I only used a quarter of the recipe to fill 2 small ramekins)
- 4 C peaches, large dice (if you cut up peaches too small, they will disentigrate when baking)
- 1 1/2 C blackberries
- 1/8 C honey
- 1/8 C maple syrup
- 1 tbsp lemon juice
- 1-2 tbsp quick tapioca (depending on juiciness of fruit)
- 2 tsp cinnamon
- 1/2 tsp nutmeg
- 1/4 tsp almond extract
- dash of salt

I prepared the topping as written, but quartered the recipe. I did add just a 1/8 tsp of cinnamon for a little spice. The mini cobbler only took 22 minutes to finish in the oven at 375 degrees.

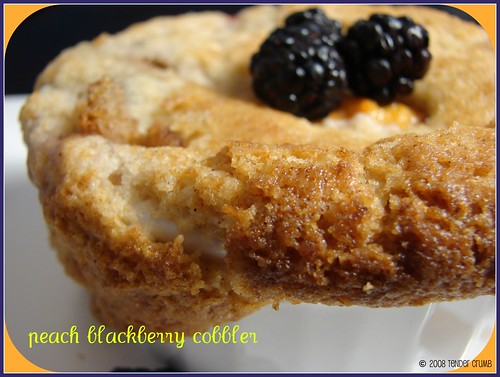
I was a little worried by the initial feedback about this recipe, but I really enjoyed the final product! I thought the topping had a nice flakey, crunchy biscuit texture and I didn't think it was too doughy or bland. I think of cobbler toppings as a vehicle to highlight the fruit, so I'm glad that it didn't overwhelm the delicious peach and blackberry filling. Also, perhaps it's a function of the topping, but I also liked that the blackberries held their shape and didn't disentigrate (it was a whole diffent story on the crisp...read on below).


I had some mascarpone ice cream in the freezer, and it was a decadent experience to have this creamy delight melt into the still-warm cobbler.
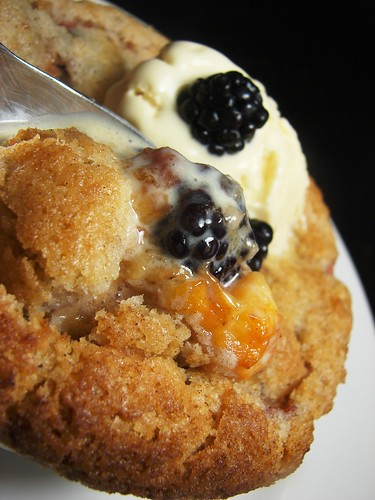

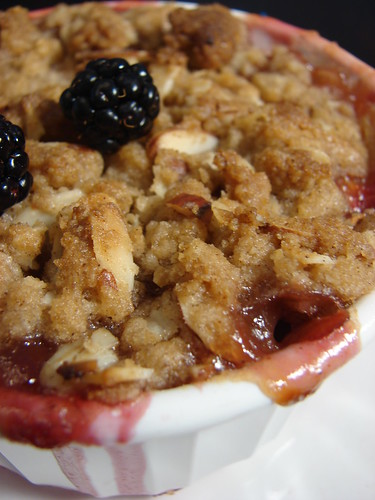
As mentioned above, I also made a mini-crisp, using the same fruit filling. For the topping, I went with my standby recipe, which follows below (only used a quarter of the recipe and still have some leftover):

Fruit Crisp Topping (makes enough to top a 9x13" pan)

- 6 tbsp butter
- 1/2 C flour
- 1 C quick oats
- 3/4 C brown sugar
- 1 tsp cinnamon
- dash of salt
- 1/2 C sliced almonds

Combine the dry ingredients, then using your fingers incorporate int the butter. Do not overmix, as the mixture should have a crumbly texture. Crumble on top of fruit filling. The mini-crisp took 22 minutes to bake at 375 degrees.

I loved the texture of the crunchy topping with the warm syrupy fruit underneath. Unlike the cobbler, the blackberries kinda exploded and disentigrated into the peaches, creating a reddish pink filling. Tastewise, the fruit was just as flavorful.
So, has this week's experience changed my love for fruit crisps? Not exactly, but I'm willing to give this cobbler recipe another chance in the near future. If you're interesting in taking this recipe for a spin, Dorie Greenspan shares the original recipe for Mixed Berry Cobbler here. To see more delicious cobbler creations, check out the Tuesdays With Dorie blogroll.
Blog Widget by LinkWithin