Showing posts with label vegetable. Show all posts

Thursday, August 19, 2010

Zucchini, Carrot, and Cranberry Muffins

zucchini carrot muffins-6
I purchased The SoNo Baking Company Cookbook eons ago, and it has sadly been collecting dust on my bookshelf until now. John Barricelli is one heckuva pastry chef, and I totally admire his accomplishments. With Martha Stewart complementing and backing his talents, you know that he is a pastry rock star.

Yes, I fantasize about opening a bakery like his...

There are so many delicious sounding recipes and drool-worthy photos in the book. Which recipe should I try first? It only took a few page flips to decide.

I love zucchini bread. I love carrot cake. This recipe for Zucchini, Carrot, and Cranberry Muffins combines the best of both worlds.
zucchini carrot muffins-1
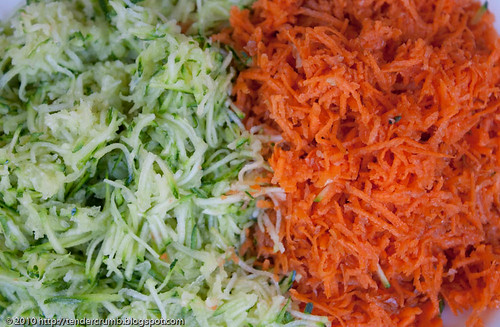
The recipe calls for a equal portion of shredded zucchini and carrots.zucchini carrot muffins-2
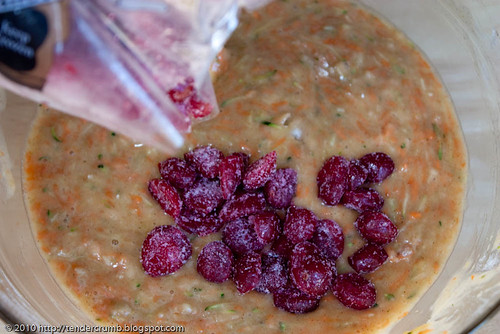
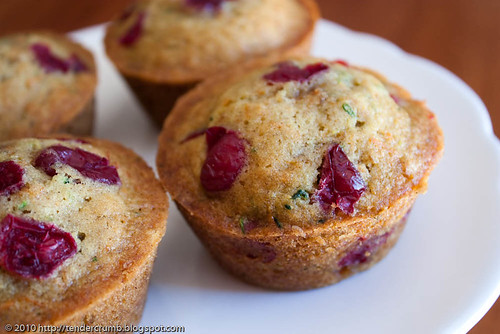
A generous help of cranberries (frozen Trader Joe's cranberries here) are folded in batter. I used Trader Joe's frozen cranberries in this instance, but I think any tart berry or fruit would be a perfect substitution. I might try this with frozen raspberries next time.
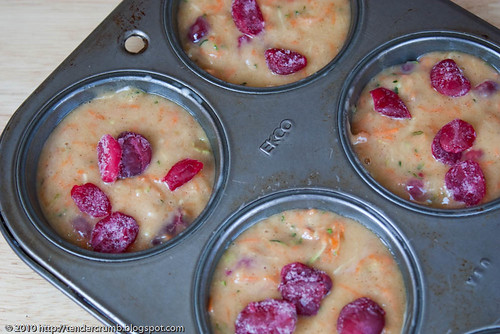
zucchini carrot muffins-3
The muffins smelled heavenly as they baked in the oven. After a quick rest on the cooling rack, I couldn't wait to sink my teeth into one of these babies.
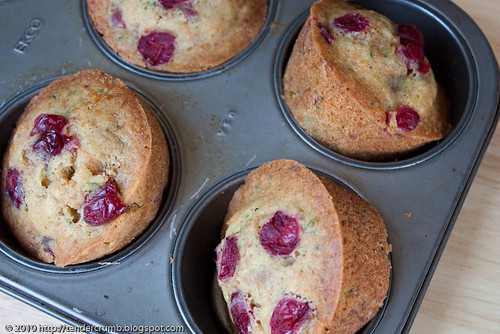
zucchini carrot muffins-5
Yum! The orange and green flecks from the shredded veggies are so pretty, and they gave the muffin a nice, moist texture. The cranberries were really yummy, and I enjoyed the tartness from the fruit.
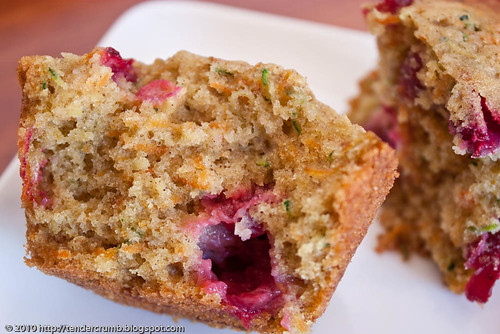
zucchini carrot muffins-8
Wow, I regret that I waited so long to bake from this book.

Better late than never. I can't wait to try more recipes going forward...
zucchini carrot muffins-7

Zucchini, Carrot, and Cranberry Muffins
barely adapted from The SoNo Baking Company Cookbook by John Barricelli
makes 12 muffins

2 C AP flour
3/4 tsp baking powder
1/2 tsp baking soda
3/4 tsp kosher salt
3/4 tsp ground cinnamon
pinch ground nutmeg
1 C sugar
1 C canola oil
2 large eggs, room temp
3/4 C finely grated carrots (approx 1 medium)
3/4 C finely grated zucchini (approx 1 medium)
1 1/2 tsp pure vanilla extract
1 C whole fresh or frozen (unthawed) cranberries

Preheat oven to 375F degrees. Grease a standard 12 cup muffin pan and set aside.

In a medium bowl, whisk together the flour, baking powder, baking soda, salt, cinnamon, and nutmeg. Set aside.

In a large bowl, whisk together the sugar, oil, eggs, and vanilla until combined. Mix in the grated zucchini and carrots.

Fold in the dry ingredients with a rubber spatula until combined. Fold in the cranberries.

Divide the batter evenly among the muffin cups.

Bake for 20-25 minutes, until the muffins are golden brown and a cake tester inserted in the center of a muffin comes out clean. Rotate the pan mid way through the baking time.

Transfer the pan to a wire rack to cool for 10 minutes. Turn out muffins on their side in the muffin cups, and let cool in the pan. Serve warm or at room temp.

Tuesday, August 3, 2010

Gingered Carrot Cookies (TWD)

I need to up my blogging game. I've been baking and photographing, but am totally behind on getting all of my posts up. Sure, I have lame excuses for my procrastination, but I won't bore you with the details...at least for today.

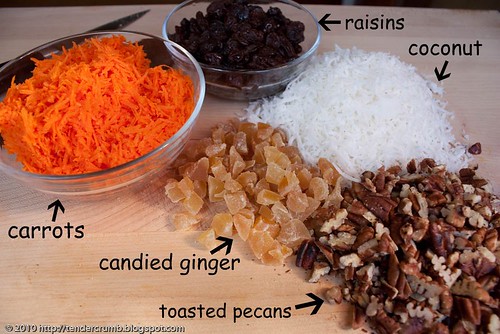
This week's Tuesdays With Dorie recipe for Gingered Carrot Cookies is essentially a carrot cake in a portable cookie form. You know that this will be a hearty cookie with its list of ingredients (you can find the complete recipe at Natalia's blog Gatti Fili e Farina):

I followed the recipe essentially as written, and my only variation was to substitute half of the raisins with chopped candied ginger.

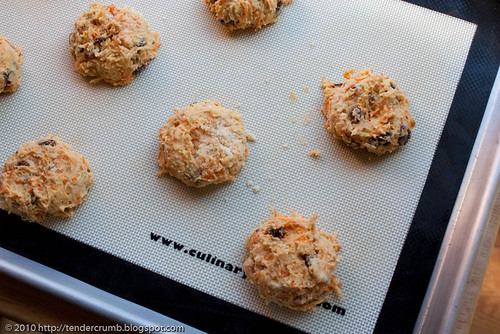
I used a large cookie scoop and ended up with 18 hefty sized cookies. These cookies don't spread at all when baking, so would recommend that you flatten the scooped dough before popping the cookies in the oven.
I love cakey cookies, and this cookie was right up my alley. I am so glad that I added the candied ginger, as it gave a nice spicy flavor and a nice chew. This recipe begs to be played with, and next time I'm going to nix the raisins and try a combination of dried pineapple and candied ginger, as well as substituting some of the butter with applesauce to reduce the fat content.
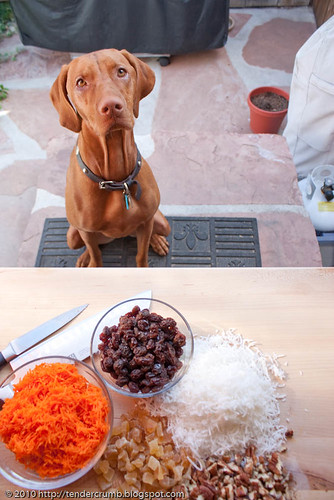
Thanks to Natalia for a delicious TWD pick this week!

...and just because, I wanted to share a photo of Siena closely supervising my photography session.

Wednesday, November 25, 2009

Sweet Potato Pie


HAPPY THANKSGIVING! When I originally wrote this post, it started something like this: "I'm taking a quick break as it's time for our yearly Thanksgiving sojurn to Vegas". For the past 10+ years, the hubs and I have spent the Thanksgiving holiday week in Vegas with single-minded goal of indulging ourselves silly.

Well, this post has been revised...we've crapped out and our Vegas streak is over.

We were frantically packing and printing our boarding passes for our morning flight when we discovered our dog getting sick in the backyard...then on her bed...then in the hallway (sorry for the gross details)! After a trip to our vet, a viral infection diagnosis, and a $350 vet bill, we saw our Vegas trip circling the proverbial drain.

It would have sucked for Siena to sit at the boarding facility in isolation, and quite frankly we didn't have the heart to leave her alone to recuperate. After swallowing a very big bitter pill, the hubs looked at me and asked "so what are we cooking for Thanksgiving?"

I haven't cooked Thanksgiving dinner in over a decade, so this would be an interesting challenge. Where do I start...how about dessert?
A Thanksgiving feast isn't complete without a slice of delicious pie to end the meal with a sweet note and send dinner guests into food comas. Apple, pecan, pumpkin...everyone has a favorite pie for the holiday weekend.
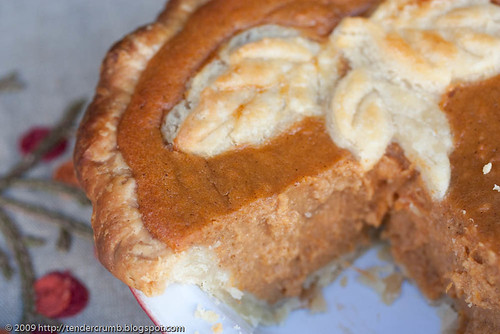
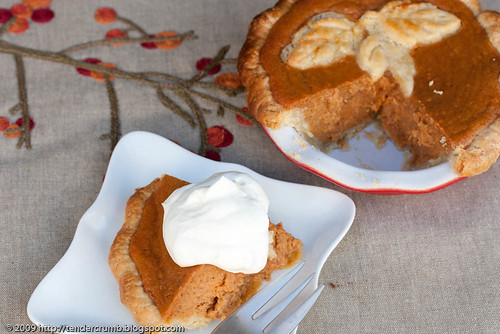
At the Tender Crumb house, we're partial to pumpkin and sweet potato pies. I know a lot of people tell me that they can't tell the difference between the two. The hubs and I can definitely tell the difference between the two pies.

From my personal experience, the primary difference between the two fillings is flavor. Sweet potato has a natural sweetness and earthiness, and it doesn't need a lot of sugar and spice to enhance its flavor. People also talk about a difference in texture, with pumpkin having a more custardy texture, but that isn't as noticeable to me.

Tell me, do you think there is a difference between the two pies?

This Thanksgiving, I want to share my recipe for sweet potato pie. A post for pumpkin pie will follow in the next day or two --- we're drowning our sorrows in two pies. I love this recipe because it is simple to prepare and oh so tasty and satisfying to eat.

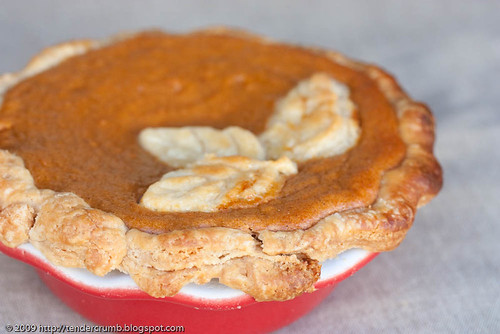
Note: What you're seeing in these pictures is a 4 inch baby pie. If you halve the recipe below, it will make enough for two of these mini-pies and a little extra filling (which you can bake separately in a ramekin and enjoy separately).
Sweet Potato Pie
makes one 9 inch pie

Crust
Dorie Greenspan's Good For Almost Everything Pie Dough, partially baked - you can find the recipe here

Filling
2 large red-skinned sweet potatoes
3/4 cup (packed) golden brown sugar (if you like a sweeter filling, increase to 1 cup)
1 cup whipping cream
3 large eggs
1 tablespoon maple syrup
1 teaspoon vanilla extract
1/2 teaspoon ground cinnamon
1/2 teaspoon freshly ground nutmeg
1/4 teaspoon salt
1 large egg white, beaten to blend

For filling:
Pierce potatoes with fork. Bake in a 375F degrees oven until cooked through (45-60 minutes). Once throughly cooked, cool completely.

Press the cooled sweet potato through a potato ricer (this step is KEY for a smooth filling). Measure enough potato puree to equal 1 1/2 cups.

Position rack in bottom third of oven; preheat to 400F degrees.

Place pureed sweet potato in large bowl. Whisk in brown sugar and next 7 ingredients.

Brush partially baked crust with beaten egg white. Transfer filling to the crust.

Bake pie until filling is puffed around edges and set in center, about 45 minutes. Transfer to rack and cool.

Tuesday, November 24, 2009

Roasted Veggies with Pomegranate Vinaigrette

Cauliflower, brussels sprouts, sweet potato --- the mere mention of these vegetables had my brothers and I groaning with disgust at the dinner table. I'm a big girl now, and my palate has evolved to appreciate and enjoy the flavor of these veggies. Aside from taste, these veggies are packed with nutrition and high in fiber, so you can totally load your plate guilt-free with these gems.

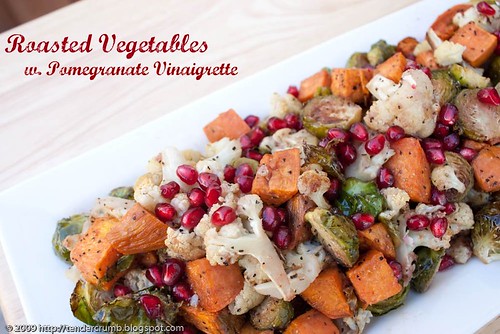
This recipe is a fantastic way to highlight these underappreciated vegetables, and it is super easy to prepare. This is a delicious and nutritious side dish for the Thanksgiving table.

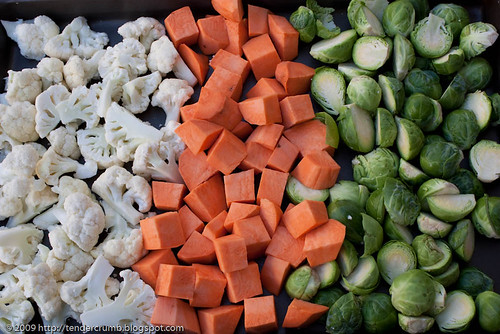
The most time consuming part is cleaning and cutting the veggies:
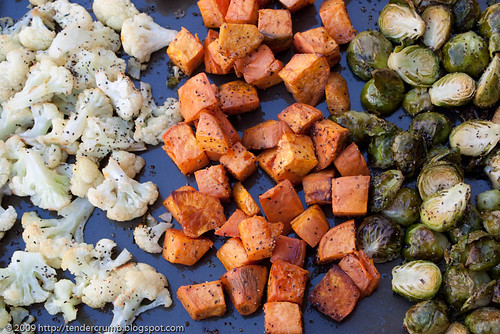
Roast the prepared veggies until they are cooked through and golden brown:
While the veggies are roasting, you can whip up the vinaigrette. A few months back, the nice people from POM Wonderful sent me a box of their fantastic pomegranate juice, which I put into good use in this recipe. Along with the pomegranate juice, I added just a smidge of pomegranate molasses, which delivers an essential pungent and tart flavor to the vinaigrette. After tossing the still warm veggies with the vinaigrette, top the dish with a generous handful of pomegranate seeds, and...
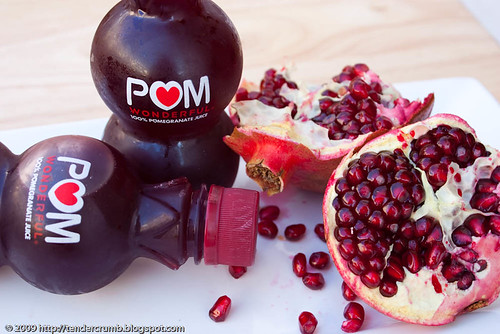
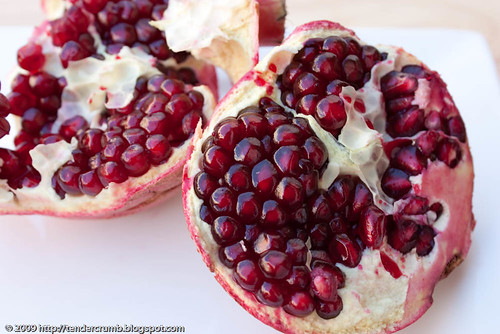
...enjoy! Easy, isn't it?

Roasted Vegetables with Pomegranate Vinaigrette
adapted from Martha Stewart Living - November 2009

For the Roasted Vegetables
1/2 head cauliflower, cut into small florets
1 sweet potato, peeled and cut
1/2 lb brussels sprouts, halved
2 tbsp olive oil
salt and pepper

For the Vinaigrette
1/3 cup pomegranate juice
1 tsp pomegranate molasses (if you can't find this ingredient, you can omit)
1/4 cup olive oil
salt and pepper
1/2 cup pomegranate seeds
Preheat the oven to 425F degrees.

Toss the vegetables and oil in a large bowl and season with salt and pepper. (To avoid washing another dish, I toss and season directly on the baking sheet) Roast for 20-30 minutes, until golden brown. Transfer veggies to a serving platter.

Make the vinaigrette. In a bowl mix the pomegranate juice and molasses. Pour in oil in a slow steady stream, whisking until emulsified. Season with salt and pepper.

Just before serving, drizzle vinaigrette over warm vegetables, and top with pomegranate seeds.

Serves 6


Tuesday, January 13, 2009

Savory Corn and Pepper Muffins (TWD)

This week's Tuesdays With Dorie takes a break from sweets with Savory Corn & Pepper Muffins. I don't know about you, but I totally welcomed a savory recipe, as I'm still recovering from the onslaught of candy, cookies, cakes etc from the holidays.

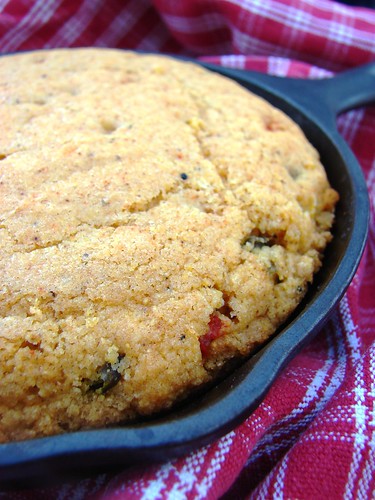
Selected by Rebecca of Ezra Pound Cake, this recipe embellishes on a traditional corn muffin recipe, adding a kick of spice with chili powder, jalapenos and cilantro. I halved the recipe and instead of a muffin tin, I used a mini cast iron skillet.

To accompany the cornbread, I made a Cuban-style black bean soup (not to digress, but the soup was DELICIOUS, and you can find the recipe here).

Overall, I liked the flavor and spice of this cornbread recipe, and it's definitely a departure from the sweeter style cornbread that I'm partial to. Next time, I would definitely double the amount of the corn, red pepper, and cilantro, as I really enjoyed the addition of these fresh ingredients. My only minor complaint... the texture. My cornbread turned out extremely crumbly and it was really messy to eat. Maybe it was the cornmeal I used --- didn't have stone ground, so used the box of Alber's sitting in my pantry.
Thanks Rebecca for a great selection this week!!! For the recipe, please visit Rebecca's site, and to see how my fellow bakers fared, check out the TWD blogroll.

Thursday, November 20, 2008

Sweet Potato Cake w. Orange Filling and Chocolate Frosting (TCS)

This is my second post for The Cake Slice, which is a lovely group that is baking its way through Sky High: Irresistible Triple-Layer Cakes by Alisa Huntsman and Peter Wynne. Baking through this book has been treat, as it gives me an excuse every month to make delicious, interesting and ginormous triple layer cakes (DH and my work colleagues get to benefit from the sweet windfall of my baking endeavors).

This month’s recipe for The Cake Slice bakers is Sweet Potato Cake. Now, I’ve had sweet potato pie, but sweet potato in a cake? This would be a first for me. I was intrigued by the combination of sweet potato, spices, orange and chocolate flavors, and was very curious to see how this would all come together.

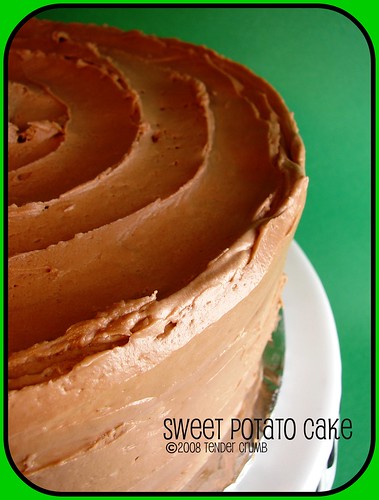
The cake, filling and frosting were a breeze to prepare (adjustments I made are highlighted in parentheses). The resulting cake was extremely delicious and it was impossibly moist --- YUM! I didn’t get much of a sweet potato flavor from the cake, as the predominant flavors came from the spices.

I did enjoy the orange filling, as it provided a nice complement to the spices and chocolate flavors. The frosting was your typical cream cheese frosting, with the addition of some melted chocolate. I cut back on the powdered sugar, and it was still a bit too sweet for my taste --- I think I’m going to cut the powdered sugar down by half the next time around…and there will definitely be a next time for this recipe!

To see beautiful and delicious versions of this recipe, check out The Cake Slice Bakers blogroll.


~~~~~~~~~~~~~~~~~~~~~~~~~~~~~~~~~~~

Sweet Potato Cake
From Sky High: Irresistible Triple-Layer Cakes by Alisa Huntsman and Peter Wynne (pp 178-181)
Makes a 9-inch triple layer cake, serves 16-20 people


Cake:
2 medium or 1 large sweet potato (12 ounces)
3 cups of cake flour
3 teaspoons of baking powder
1 and 1/2 teaspoons of ground cinnamon
3/4 teaspoon of ground nutmeg
1/4 teaspoon of cloves
5 eggs, separated
2 and 1/4 cups of sugar
1 stick plus 2 tablespoons of butter, at room temperature
1 and 1/2 teaspoons of vanilla
1 and 1/4 cups of milk

1. Preheat the oven to 400F degrees. Prick the sweet potatoes in 2-3 places, place on a small baking dish and bake for 1 hour or until the potatoes are very soft. Remove from the oven and cool slightly. (I baked the sweet potatoes the day before and kept them in the fridge)

2. Reduce the oven temperature to 350F degrees. Butter the bottoms and the sides of the pans and line with parchment paper. Butter the parchment paper also.

3. When the sweet potatoes are cool peel off the skin and remove any dark spots. Cut the potatoes into chunks and puree in a food processors. Puree until smooth. Measure out one cup of potato puree and set aside. (I skipped pureeing in the FP; instead I whipped the potatoes in the stand mixer using a paddle attachment, and then added the rest of the ingredients as written)

4. Sift the flour, baking powder, cinnamon, nutmeg, and ground cloves. Set aside.

5. In the bowl of electric mixer add the egg whites and attach whip attachment. Beat on medium speed until egg whites are frothy. Raise the speed to high and gradually beat in 1/4 cup of sugar. Continue to beat until the egg whites are moderately stiff.

6. In another large bowl with the paddle attachment, combine the sweet potato, butter, vanilla, and remaining sugar. Beat until light and fluffy. Add the egg yolks one at a time. Make sure to scrape the sides of the bowl after each egg yolk is added. With the mixer on low speed, add the dry ingredients and milk in alternately in 2-3 additions making sure to begin and end with the dry ingredients.

7. With a large spatula, fold in one fourth of the egg whites into the batter to lighten. Then fold in the remaining egg whites until no streaks remain. Making sure to not over mix or this will deflate the batter. Divide the batter among of the three pans.

8. Bake for 25-30 minutes or until a cake tester comes out clean. Let the cake layers cool in the pan for 10 minutes. Then turn out the cake layers onto a wire rack and cool completely at least 1 hour.

9. To assemble the cake, place one layer flat side up on to a cake stand. With a pastry bag fitted with a 1/2 inch round tip and filled with chocolate cream cheese icing, pipe border around the edge of the cake. Fill the center with the orange cream filling smoothing it to the edge of the border. Place the second layer on top and repeat the process. Place the third layer on top and use all the chocolate cream cheese frosting to cover the top and sides of the cake.

Chocolate Cream Frosting
makes 3 cups

10 ounces cream cheese at room temperature
1 stick of butter at room temperature
16 ounces of powdered sugar; sifted (decreased to 12 ounces)
1 and 1/2 ounces of unsweetened chocolate melted and slightly cooled (increased to 3 ounces)

1. In a large mixing bowl, beat together the cream cheese and butter until fluffy. Slowly add the powdered sugar to cream cheese butter mixture making sure to scrape down the sides the sides of the bowl. Then beat until light fluffy 2-3 minutes.

2. Measure out 1 cup of frosting and set aside.

3. Add the melted chocolate to the remaining icing in the bowl and beat until well combined.

Orange Cream Filling

1 cup of reserved cream cheese icing from above
2 tablespoons of frozen orange juice concentrate, thawed
1/4 teaspoon of orange extract (omitted)

1. Stir together all the ingredients until well mixed.

Tuesday, August 26, 2008

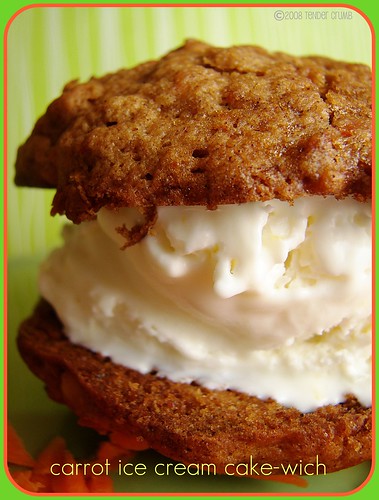
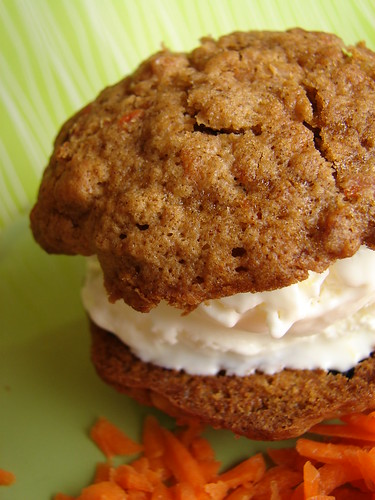
Carrot Ice Cream Cake-wich

Call me a bit obsessed...it's been a kick taking my favorite cakes and transforming them into portable ice cream creations. After having success with my red velvet ice cream sandwiches, I turned to riff on another favorite cake of mine---carrot cake! I had more than enough cheesecake ice cream leftover and thought that it act as the perfect foil for a moist cookie that incorporated all of the elements of carrot cake. The cookie recipe was adapted from epicurious, and I've made and enjoyed this soft chewy cookie on its own on more than one occasion. The experience of pairing this moist, cakey cookie with the tart, creamy ice cream --- pure heaven!
The ice cream recipe can be found on my red velvet post.

Carrot Cake Cookies
adapted from epicurious.com
makes approx 24 cookies

Ingredients
1 1/8 cups all-purpose flour
1 tsp cinnamon
1/4 tsp nutmeg
1/4 tsp cloves
1/2 tsp baking soda
1/2 tsp salt
1/2 cup unsalted butter, softened
1/3 cup packed light brown sugar
1/3 cup granulated sugar
1 large egg
1/2 teaspoon vanilla
1 cup coarsely grated carrots
1/2 cup chopped walnuts
1/2 cup sweetened shredded coconut
1/2 cup raisins

Directions
- preheat oven to 375°F.
- line 2 baking sheets with parchment.
- whisk together flour, spices, baking soda, and salt in a bowl.
- beat together butter, sugars, egg, and vanilla in a bowl with an electric mixer at medium speed until pale and fluffy, about 2 minutes.
- mix in carrots, nuts, coconut and raisins at low speed, then add flour mixture and beat until just combined.
- drop 1 1/2 tablespoons batter per cookie 2 inches apart on baking sheets and bake, switching position of sheets halfway through baking, until cookies are lightly browned and springy to the touch, 12 to 16 minutes total. Cool cookies on sheets on racks 1 minute, then transfer cookies to racks to cool completely

Wednesday, April 30, 2008

Big Bill's Carrot Cake (TWD)


So many fantastic desserts to create...did I need to try another carrot cake recipe??? Everyone (including myself) claims to have a great carrot cake recipe, but I thought I would give it a go as Dorie has not let me down. Thank you to Amanda from Slow Like Honey for the selection for TWD.


The recipe was straightforward and easy to assemble. I was a bit skeptical about adding coconut and raisins (I like my carrot cakes really simple and straightforward) and limiting the spice to just cinnamon (my other recipe uses cinnamon, cloves and cardamom) . As the cupcakes came out of the oven, I thought hmmmm...a bit light in color (darn it, should I have added more spice?).


The final verdict? The finished product was quite delicious, flavorful and moist! My personal preference is for a less ingredients (coconut, nuts, raisins) and more spice, but this is a nice variation that I will put into my baking rotation.


Bill’s Big Carrot Cake
Baking: From My Home to Yours by Dorie Greenspan

Ingredients:

For the cake:
2 cups all purpose flour
2 teaspoons baking powder
2 teaspoons baking soda
2 teaspoons ground cinnamon
¾ teaspoon salt
3 cups grated carrots (about 9 carrots, you can grate them in food processor fitted w/ a shredding a blade or use a box grater)
1 cup coarsely chopped walnuts or pecans
1 cup shredded coconut (sweetened or unsweetened)
½ cup moist, plump raisins (dark or golden) or dried cranberries
2 cups sugar
1 cup canola oil
4 large eggs

For the frosting:
8 ounces cream cheese, room temperature
1 stick ( 8 tablespoons) unsalted butter, at room temperature
1 pound or 3 and ¾ cups confectioners’ sugar, sifted
1 tablespoon fresh lemon juice or ½ teaspoon pure lemon extract
½ cup shredded coconut (optional)
Finely chopped toasted nuts and/or toasted shredded coconut (optional)

Getting ready:
Position the racks to divide the oven into thirds and preheat the oven to 325 degrees Fahrenheit. Butter three 9-x-2-inch round cake pans, flour the insides, and tap out the excess. Put the two pans on one baking sheet and one on another.
To make the cake:
Whisk the flour, baking powder, baking soda, cinnamon and salt. In another bowl, stir together the carrots, chopped nuts, coconut, and raisins.
Working with a stand mixer, preferably fitted with a paddle attachment, or with a hand mixer in a large bowl, beat the sugar and oil together on a medium speed until smooth. Add the eggs one by one and continue to beat until the batter is even smoother. Reduce the speed to low and add the flour mixture, mixing only until the dry ingredients disappear. Gently mix the chunky ingredients. Divide the batter among the baking pans.
Bake for 40-50 minutes, rotating the pans from top to bottom and front to back at the midway point, until a thin knife inserted into the centers comes out clean. The cakes will have just started to come away from the sides of the pans. Transfer the cakes to cooling racks and cool for about 5 minutes, then run a knife around the sides of the cakes and unmold them. Invert and cool to room temperature right side up.
The cakes can be wrapped airtight and kept at room temperature overnight or frozen for up to 2 months.
To make the frosting:
Working with a stand mixer, preferably fitted with a paddle attachment or with a hand mixer in a large bowl, beat the cream cheese and butter together until smooth and creamy. Gradually add the sugar and continue to beat until the frosting is velvety smooth. Beat in the lemon juice or extract.
If you’d like coconut in the filling, scoop about half of the frosting and stir the coconut into this position.
To assemble the cake:Put one layer top side up on a cardboard cake round or a cake plate protected by strips of wax or parchment paper. If you added the coconut to the frosting, use half of the coconut frosting to generously cover the first layer (or generously cover with plain frosting). Use an offset spatula or a spoon to smooth the frosting all the way to the edges of the layer. Top with the second layer, this time placing the cake stop side down, and frost with the remainder of the coconut frosting or plain frosting. Top with the last layer, right side up, and frost the top- and the sides- of the cake. Finish the top with swirls of frosting. If you want to top the cake with toasted nuts or coconut, sprinkle them on now while the frosting is soft.
Refrigerate the cake for 30 minutes, just to set the frosting before serving.
Blog Widget by LinkWithin