Showing posts with label daring bakers. Show all posts

Tuesday, October 27, 2009

Chocolate Macarons (DB)

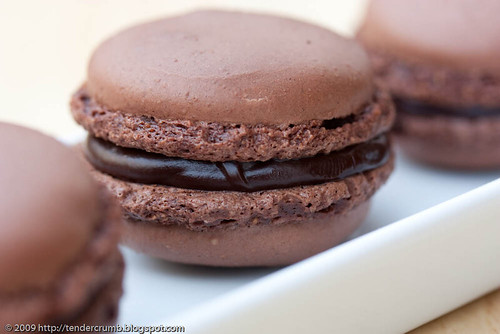
Thanks to this month's Daring Baker's Challenge, this was my first attempt at making macarons. I've assumed that these delicate European cookies were difficult and time consuming, so I never bothered to try making them at home. Besides, I'm fortunate to have Paulette Macarons within a short driving distance from mi casa. Paulette's macarons are works of art, and they are almost too pretty to eat (still, that hasn't stopped me from inhaling a box or two).
Confession time - I tried THREE times to make macarons using the recipe selected by our hostess Ami, and every attempt was a huge failure - ARGHHHH!!!! I had trouble getting the little "feet" on my cookies, and when cooled, they were as hard as rocks and pretty sad looking. I'm pretty sure that these failures were attributable to me and not the recipe, as the other DB'ers were sharing their picture perfect macarons using Claudia Fleming's recipe (which is included at the end of this post).

After taking a few minutes to swear like a sailor, I took a deep breath and decided to work with a different recipe. If this attempt didn't work, I vowed never to make macarons again. I went with a chocolate macaron recipe from David Lebovitz - the man has yet to fail me in the ice cream deparment, so I had faith in his recipe. The link to his recipe is here.

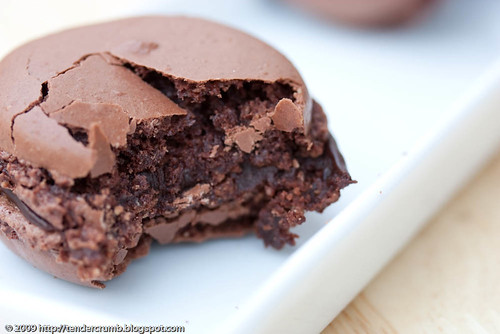
Voila - Macaron success!!!! The cookies had a nice crunchy exterior which gave into a nice chewy interior. The filling for these cookies is a simple bittersweet chocolate ganache.

I kicked back and relished in my macaron success with a plate of these sugary gems and a cup of tea.
Macarons
from The Last Course: The Desserts of Gramercy Tavern by Claudia Fleming

Ingredients
Confectioners’ (Icing) sugar: 2 ¼ cups (225 g, 8 oz.)
Almond flour: 2 cups (190 g, 6.7 oz.)
Granulated sugar: 2 tablespoons (25 g , .88 oz.)
Egg whites: 5 (Have at room temperature)

Directions:
1. Preheat the oven to 200°F (93°C). Combine the confectioners’ sugar and almond flour in a medium bowl. If grinding your own nuts, combine nuts and a cup of confectioners’ sugar in the bowl of a food processor and grind until nuts are very fine and powdery.

2. Beat the egg whites in the clean dry bowl of a stand mixer until they hold soft peaks. Slowly add the granulated sugar and beat until the mixture holds stiff peaks.

3. Sift a third of the almond flour mixture into the meringue and fold gently to combine. If you are planning on adding zest or other flavorings to the batter, now is the time. Sift in the remaining almond flour in two batches. Be gentle! Don’t overfold, but fully incorporate your ingredients.

4. Spoon the mixture into a pastry bag fitted with a plain half-inch tip (Ateco #806). You can also use a Ziploc bag with a corner cut off. It’s easiest to fill your bag if you stand it up in a tall glass and fold the top down before spooning in the batter.

5. Pipe one-inch-sized (2.5 cm) mounds of batter onto baking sheets lined with nonstick liners (or parchment paper).

6. Bake the macaroon for 5 minutes. Remove the pan from the oven and raise the temperature to 375°F (190°C). Once the oven is up to temperature, put the pans back in the oven and bake for an additional 7 to 8 minutes, or lightly colored.

7. Cool on a rack before filling.
Yield: 10 dozen.
~~~~~~~~~~~~~~~~~~~~~~~~~
The 2009 October Daring Bakers’ challenge was brought to us by Ami S. She chose macarons from Claudia Fleming’s The Last Course: The Desserts of Gramercy Tavern as the challenge recipe.

Monday, July 27, 2009

Milan Cookies (DB)

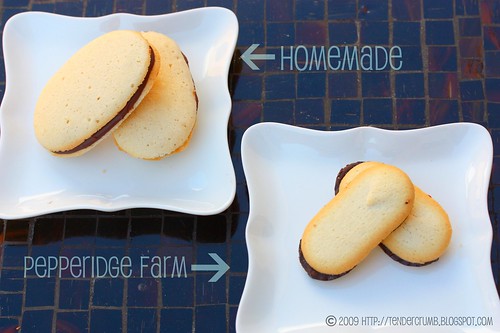
This month's Daring Bakers Challenge was to make homemade versions of a couple of grocery aisle cookie favorites, Milano Cookies and Mallomars. I'm pretty good about resisting temptation in the cookie aisle at the grocery store, but I definitely have a weakness for these two cookies. In college, both cookies provided essential nutrition (i.e. sugar and carbs) for my all night study sessions. Thanks to Nicole of Sweet Tooth for a great selection this month. Nicole graciously gave us the option of making one or both recipes. Due to some scheduling challenges, I opted to just make the Milano Cookies.

With a heatwave hitting full stride in Los Angeles, I was so happy to work on a recipe that minimizes baking time. I cheated a teeny bit and filled the cookies with Scharffen Berger milk chocolate ganache.
These homemade milanos were so tasty and easy to make! In fact, I may never go back to the packaged version.
Milan Cookies
Recipe courtesy Gale Gand, from Food Network website

Prep Time: 20 min
Inactive Prep Time: 0 min
Cook Time: 1 hr 0 min
Serves: about 3 dozen cookies

12 tablespoons (170grams/ 6 oz) unsalted butter, softened
2 1/2 cups (312.5 grams/ 11.02 oz) powdered sugar
7/8 cup egg whites (from about 6 eggs)
2 tablespoons vanilla extract
2 tablespoons lemon extract
1 1/2 cups (187.5grams/ 6.61 oz) all purpose flour
Cookie filling, recipe follows

Cookie filling:
1/2 cup heavy cream
8 ounces semisweet chocolate, chopped
1 orange, zested

1. In a mixer with paddle attachment cream the butter and the sugar.
2. Add the egg whites gradually and then mix in the vanilla and lemon extracts.
3. Add the flour and mix until just well mixed.
4. With a small (1/4-inch) plain tip, pipe 1-inch sections of batter onto a parchment-lined sheet pan, spacing them 2 inches apart as they spread.
5. Bake in a preheated 350 degree oven for 10 minutes or until light golden brown around the edges. Let cool on the pan.
6. While waiting for the cookies to cool, in a small saucepan over medium flame, scald cream.
7. Pour hot cream over chocolate in a bowl, whisk to melt chocolate, add zest and blend well.
8. Set aside to cool (the mixture will thicken as it cools).
9. Spread a thin amount of the filling onto the flat side of a cookie while the filling is still soft and press the flat side of a second cookie on top.
10. Repeat with the remainder of the cookies.

~~~~~~~~~~~~~~~~~~
The July Daring Bakers' challenge was hosted by Nicole at Sweet Tooth. She chose Chocolate Covered Marshmallow Cookies and Milan Cookies from pastry chef Gale Gand of the Food Network.

Wednesday, May 27, 2009

Apple Strudel (DB)

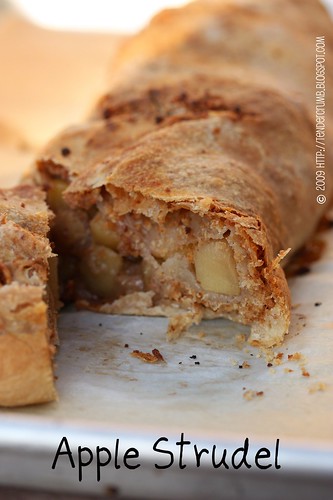
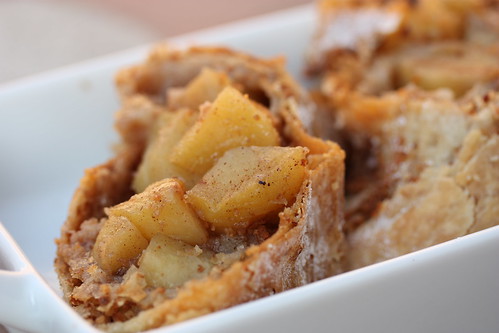
This month's Daring Bakers Challenge is Apple Strudel, and I was definitely excited about this recipe, as I've never attempted making strudel. As a matter of fact, I don't think I've tasted homemade strudel... until now.

The ingredient list is pretty simple, but the challenge definitely comes in making and stretching the dough to create the impossibly thin and flaky layers. I definitely had my challenge in getting the dough paper thin, and didn't even come close to getting the dough stretched to the 2'x3' dimensions indicated in the recipe (mine fell a little short at 18"x 24"). Once the dough was prepped, I made a simplified version of the apple filling (no nuts, no raisins).

At the end of this baking exercise, my kitchen was an absolute disaster area, but the clean up was definitely worth the effort. Who knew how delicious homemade strudel could be! Thanks to Linda of Make Life Sweeter! and Courtney of Coco Cooks for selecting this challenging but delicious recipe.
APPLE STRUDEL
from “Kaffeehaus – Exquisite Desserts from the Classic Cafés of Vienna, Budapest and Prague” by Rick Rodgers

Apple Filling
2 tablespoons (30 ml) golden rum (omitted)
3 tablespoons (45 ml) raisins (omitted)
1/4 teaspoon ground cinnamon
1/3 cup plus 1 tablespoon (80 g) sugar
1/2 cup (1 stick / 115 g) unsalted butter, melted, divided
1 1/2 cups (350 ml) fresh bread crumbs
strudel dough (recipe below)
1/2 cup (120 ml, about 60 g) coarsely chopped walnuts (omitted)
2 pounds (900 g) tart cooking apples, peeled, cored and cut into ¼ inch-thick slices (use apples that hold their shape during baking)

1. Mix the rum and raisins in a bowl. Mix the cinnamon and sugar in another bowl.

2. Heat 3 tablespoons of the butter in a large skillet over medium-high. Add the breadcrumbs and cook whilst stirring until golden and toasted. This will take about 3 minutes. Let it cool completely.

3. Put the rack in the upper third of the oven and preheat the oven to 400°F (200°C). Line a large baking sheet with baking paper (parchment paper). Make the strudel dough as described below. Spread about 3 tablespoons of the remaining melted butter over the dough using your hands (a bristle brush could tear the dough, you could use a special feather pastry brush instead of your hands). Sprinkle the buttered dough with the bread crumbs. Spread the walnuts about 3 inches (8 cm) from the short edge of the dough in a 6-inch-(15cm)-wide strip. Mix the apples with the raisins (including the rum), and the cinnamon sugar. Spread the mixture over the walnuts.

4. Fold the short end of the dough onto the filling. Lift the tablecloth at the short end of the dough so that the strudel rolls onto itself. Transfer the strudel to the prepared baking sheet by lifting it. Curve it into a horseshoe to fit. Tuck the ends under the strudel. Brush the top with the remaining melted butter.

5. Bake the strudel for about 30 minutes or until it is deep golden brown. Cool for at least 30 minutes before slicing. Use a serrated knife and serve either warm or at room temperature. It is best on the day it is baked.

Strudel Dough
1 1/3 cups (200 g) unbleached flour
1/8 teaspoon salt
7 tablespoons (105 ml) water, plus more if needed
2 tablespoons (30 ml) vegetable oil, plus additional for coating the dough
1/2 teaspoon cider vinegar

1. Combine the flour and salt in a stand-mixer fitted with the paddle attachment. Mix the water, oil and vinegar in a measuring cup. Add the water/oil mixture to the flour with the mixer on low speed. You will get a soft dough. Make sure it is not too dry, add a little more water if necessary.
Take the dough out of the mixer. Change to the dough hook. Put the dough ball back in the mixer. Let the dough knead on medium until you get a soft dough ball with a somewhat rough surface.

2. Take the dough out of the mixer and continue kneading by hand on an unfloured work surface. Knead for about 2 minutes. Pick up the dough and throw it down hard onto your working surface occasionally.
Shape the dough into a ball and transfer it to a plate. Oil the top of the dough ball lightly. Cover the ball tightly with plastic wrap. Allow to stand for 30-90 minutes (longer is better).

3. It would be best if you have a work area that you can walk around on all sides like a 36 inch (90 cm) round table or a work surface of 23 x 38 inches (60 x 100 cm). Cover your working area with table cloth, dust it with flour and rub it into the fabric. Put your dough ball in the middle and roll it out as much as you can.
Pick the dough up by holding it by an edge. This way the weight of the dough and gravity can help stretching it as it hangs. Using the back of your hands to gently stretch and pull the dough. You can use your forearms to support it.

4. The dough will become too large to hold. Put it on your work surface. Leave the thicker edge of the dough to hang over the edge of the table. Place your hands underneath the dough and stretch and pull the dough thinner using the backs of your hands. Stretch and pull the dough until it's about 2 feet (60 cm) wide and 3 feet (90 cm) long, it will be tissue-thin by this time. Cut away the thick dough around the edges with scissors. The dough is now ready to be filled.
~~~~~~~~~~~~~~~~~~~~~~~~~~~~~~~~~~~~~~~~~~~~~~~~~~~~~~~~~~~~~~~~~~~~~~~~~~~~~~~~

The May Daring Bakers’ challenge was hosted by Linda of make life sweeter! and Courtney of Coco Cooks. They chose Apple Strudel from the recipe book Kaffeehaus: Exquisite Desserts from the Classic Cafés of Vienna, Budapest and Prague by Rick Rodgers.

Sunday, March 29, 2009

Lasagne of Emilia-Romagna (DB)

The Daring Bakers took a savory detour for March's challenge with lasagne. The focus of this month's challenge is making homemade pasta, which is a first for me. I've always wanted to experiment making pasta by hand, but have always found a convenient excuse to flake. Usually, my energy and effort are usually focused on the components that accompany the pasta (i.e. sauce).

This month's recipe (which you will find below) consists of three components: pasta verde, bechamel sauce, and a country style ragu.
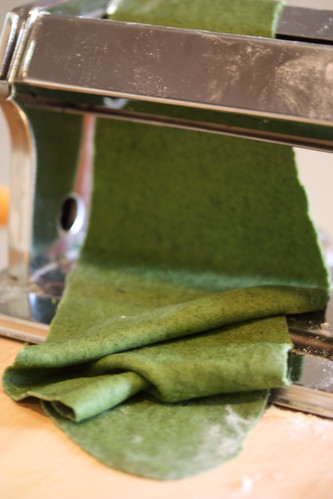
The dough is given a healthy amount of kneading (whew!), rested for a minimum of 30 minutes, then rolled out into sheets. We were given instructions to roll by hand using a rolling pin, and I can't imagine doing this by hand --- it's a serious workout for your arms! Instead, I pulled out my handy pasta machine for it's rare appearance. I've never made pasta with this contraption; instead, I've used to roll out cracker dough once every blue moon.
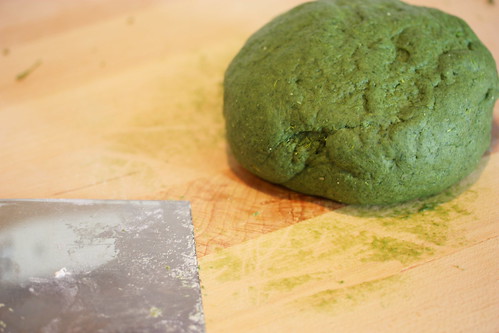
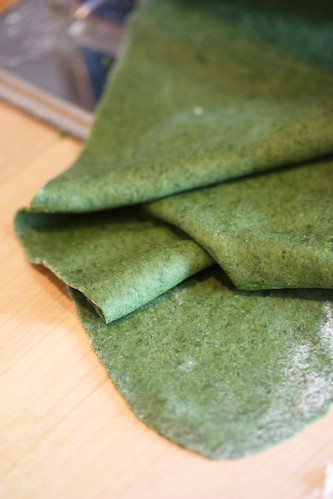
The pasta verde gets its vibrant green color from a healthy handful of spinach (I used frozen chopped spinach):
Being that I am such an accomplished procrastinator, I ended up making all the components, assembling and baking the lasagne in one afternoon. I would definitely NOT recommend this ---this is a pretty time consuming recipe.

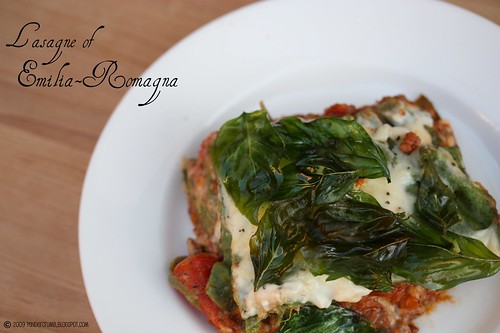
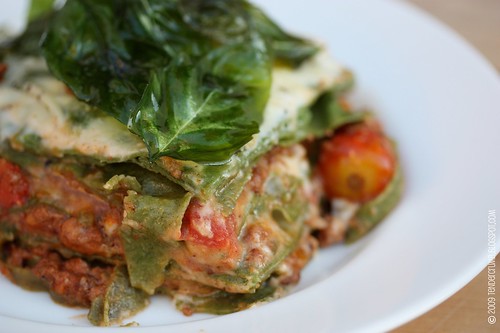
I garnished the lasagne with a handful of basil leaves quickly fried in olive oil:
Boy, was the effort worth it! I love lasagne to begin with, but I definitely think that the homemade pasta really made a difference. This lasagne reminds me of a lasagne verde served at one of my favorite local Italian restaurants, Angelini Osteria. Now, I'm happy to know that I don't need to leave home to satisfy my lasagne craving.

Thanks to the hosts for this month's terrific and delicious challenge: Mary of Beans & Caviar, Melinda of Melbourne Larder and Enza of Io Da Grande. Make sure to check out The Daring Bakers blogroll for more delicious and creative versions of this recipe.
~~~~~~~~~~~~~~~~~~~~~~~~~~~~~~~~~~

Lasagne of Emilia-Romagna (Lasagne Verdi al Forno)

From The Splendid Table by Lynne Rossetto Kasper
Serves 8 to 10 as a first course, 6 to 8 as a main dish)
Preparation Time: 15 minutes to assemble and 40 minutes cooking time

10 quarts (9 litres) salted water
1 recipe Spinach Pasta cut for lasagna (recipe follows)#1
1 recipe Bechamel Sauce (recipe follows)#2
1 recipe Country Style Ragu (recipe follows)#3
1 cup (4 ounces/125g) freshly grated Parmigiano-Reggiano

Method

Working Ahead:
The ragu and the béchamel sauce can be made up to three days ahead. The ragu can also be frozen for up to one month. The pasta can be rolled out, cut and dried up to 24 hours before cooking. The assembled lasagne can wait at room temperature (20 degrees Celsius/68 degrees Fahrenheit) about 1 hour before baking. Do not refrigerate it before baking, as the topping of béchamel and cheese will overcook by the time the center is hot.

Assembling the Ingredients:
Have all the sauces, rewarmed gently over a medium heat, and the pasta at hand. Have a large perforated skimmer and a large bowl of cold water next to the stove. Spread a double thickness of paper towels over a large counter space. Preheat the oven to 350 degrees Fahrenheit (180 degrees Celsius). Oil or butter a 3 quart (approx 3 litre) shallow baking dish.

Cooking the Pasta:
Bring the salted water to a boil. Drop about four pieces of pasta in the water at a time. Cook about 2 minutes. If you are using dried pasta, cook about 4 minutes, taste, and cook longer if necessary. The pasta will continue cooking during baking, so make sure it is only barely tender. Lift the lasagne from the water with a skimmer, drain, and then slip into the bowl of cold water to stop cooking. When cool, lift out and dry on the paper towels. Repeat until all the pasta is cooked.

Assembling the Lasagne:
Spread a thin layer of béchamel over the bottom of the baking dish. Arrange a layer of about four overlapping sheets of pasta over the béchamel. Spread a thin layer of béchamel (about 3 or 4 spoonfuls) over the pasta, and then an equally thin layer of the ragu. Sprinkle with about 1&1/2 tablespoons of the béchamel and about 1/3 cup of the cheese. Repeat the layers until all ingredients are used, finishing with béchamel sauce and topping with a generous dusting of cheese.

Baking and Serving the Lasagne:
Cover the baking dish lightly with foil, taking care not to let it touch the top of the lasagne. Bake 40 minutes, or until almost heated through. Remove the foil and bake another 10 minutes, or until hot in the center (test by inserting a knife – if it comes out very warm, the dish is ready). Take care not to brown the cheese topping. It should be melted, creamy looking and barely tinged with a little gold. Turn off the oven, leave the door ajar and let the lasagne rest for about 10 minutes. Then serve. This is not a solid lasagne, but a moist one that slips a bit when it is cut and served.

#1 Spinach Egg Pasta (Pasta Verde)
Preparation: 45 minutes
Makes enough for 6 to 8 first course servings or 4 to 6 main course servings, equivalent to 1 pound (450g) dried boxed pasta.


2 jumbo eggs (2 ounces/60g or more)
10 ounces (300g) fresh spinach, rinsed dry, and finely chopped; or 6 ounces (170g) frozen chopped spinach, defrosted and squeezed dry
3&1/2 cups (14 ounces/400g) all purpose unbleached (plain) flour (organic stone ground preferred)

Working by Hand:

Equipment
- A roomy work surface, 24 to 30 inches deep by 30 to 36 inches (60cm to 77cm deep by 60cm to 92cm). Any smooth surface will do, but marble cools dough slightly, making it less flexible than desired.
- A pastry scraper and a small wooden spoon for blending the dough.
- A wooden dowel-style rolling pin. In Italy, pasta makers use one about 35 inches long and 2 inches thick (89cm long and 5cm thick). The shorter American-style pin with handles at either end can be used, but the longer it is, the easier it is to roll the pasta.
Note: although it is not traditional, Enza has successfully made pasta with a marble rolling pin, and this can be substituted for the wooden pin, if you have one.
- Plastic wrap to wrap the resting dough and to cover rolled-out pasta waiting to be filled. It protects the pasta from drying out too quickly.
- A sharp chef’s knife for cutting pasta sheets.
- Cloth-covered chair backs, broom handles, or specially designed pasta racks found in cookware shops for draping the pasta.

Mixing the dough:
Mound the flour in the center of your work surface and make a well in the middle. Add the eggs and spinach. Use a wooden spoon to beat together the eggs and spinach. Then gradually start incorporating shallow scrapings of flour from the sides of the well into the liquid. As you work more and more flour into the liquid, the well’s sides may collapse. Use a pastry scraper to keep the liquids from running off and to incorporate the last bits of flour into the dough. Don’t worry if it looks like a hopelessly rough and messy lump.

Kneading:
With the aid of the scraper to scoop up unruly pieces, start kneading the dough. Once it becomes a cohesive mass, use the scraper to remove any bits of hard flour on the work surface – these will make the dough lumpy. Knead the dough for about 3 minutes. Its consistency should be elastic and a little sticky. If it is too sticky to move easily, knead in a few more tablespoons of flour. Continue kneading about 10 minutes, or until the dough has become satiny, smooth, and very elastic. It will feel alive under your hands. Do not shortcut this step. Wrap the dough in plastic wrap, and let it relax at room temperature 30 minutes to 3 hours.

Stretching and Thinning:
If using an extra-long rolling pin work with half the dough at a time. With a regular-length rolling pin, roll out a quarter of the dough at a time and keep the rest of the dough wrapped. Lightly sprinkle a large work surface with flour. The idea is to stretch the dough rather than press down and push it. Shape it into a ball and begin rolling out to form a circle, frequently turning the disc of dough a quarter turn. As it thins outs, start rolling the disc back on the pin a quarter of the way toward the center and stretching it gently sideways by running the palms of your hands over the rolled-up dough from the center of the pin outward. Unroll, turn the disc a quarter turn, and repeat. Do twice more.

Stretch and even out the center of the disc by rolling the dough a quarter of the way back on the pin. Then gently push the rolling pin away from you with one hand while holding the sheet in place on the work surface with the other hand. Repeat three more times, turning the dough a quarter turn each time.

Repeat the two processes as the disc becomes larger and thinner. The goal is a sheet of even thickness. For lasagne, the sheet should be so thin that you can clearly see your hand through it and see colours. Cut into rectangles about 4 by 8 inches (10 x 20 cm). Note: Enza says that transparency is a crucial element of lasagne pasta and the dough should be rolled as thinly as possible. She says this is why her housekeeper has such strong arms!

Dry the pasta at room temperature and store in a sealed container or bag.

#2 Bechamel
Preparation Time: 15 minutes

4 tablespoons (2 ounces/60g) unsalted butter
4 tablespoons (2 ounces/60g) all purpose unbleached (plain) flour, organic stone ground preferred
2&2/3 cups (approx 570ml) milk
Salt and freshly ground pepper to taste
Freshly grated nutmeg to taste

Using a medium-sized saucepan, melt the butter over low to medium heat. Sift over the flour, whisk until smooth, and then stir (without stopping) for about 3 minutes.

Whisk in the milk a little at a time and keep the mixture smooth. Bring to a slow simmer, and stir 3 to 4 minutes, or until the sauce thickens.

Cook, stirring, for about 5 minutes, until the sauce thickens. Season with salt, pepper, and a hint of nutmeg.

#3 Country Style Ragu’ (Ragu alla Contadina)

Preparation Time: Ingredient Prep Time 30 minutes and Cooking time 2 hours
Makes enough sauce for 1 recipe fresh pasta or 1 pound/450g dried pasta)

3 tablespoons extra virgin olive oil (45 mL)
2 ounces/60g pancetta, finely chopped
1 medium onion, minced
1 medium stalk celery with leaves, minced
1 small carrot, minced
4 ounces/125g boneless veal shoulder or round (didn't have time to find veal; instead used mild italian sausage)
4 ounces/125g pork loin, trimmed of fat, or 4 ounces/125g mild Italian sausage (made without fennel)
8 ounces/250g beef skirt steak, hanging tender, or boneless chuck blade or chuck center cut (in order of preference)
1 ounce/30g thinly sliced Prosciutto di Parma
2/3 cup (5 ounces/160ml) dry red wine
1 &1/2 cups (12 ounces/375ml) chicken or beef stock (homemade if possible)
2 cups (16 ounces/500ml) milk
3 canned plum tomatoes, drained (I went with an entire can of plum tomatoes w. it's juices)
Salt and freshly ground black pepper to taste

Browning the Ragu Base:
Heat the olive oil in a 12 inch (30cm) skillet (frying pan) over medium-high heat. Have a large saucepan handy to use once browning is complete.

Add the pancetta and minced vegetables and sauté, stirring frequently with a wooden spoon, 10 minutes, or until the onions barely begin to color.

Coarsely grind all the meats together, including the prosciutto, in a food processor or meat grinder. Stir into the pan and slowly brown over medium heat.

First the meats will give off a liquid and turn dull grey but, as the liquid evaporates, browning will begin. Stir often, scooping under the meats with the wooden spatula. Protect the brown glaze forming on the bottom of the pan by turning the heat down. Cook 15 minutes, or until the meats are a deep brown.

Turn the contents of the skillet into a strainer and shake out the fat. Turn them into the saucepan and set over medium heat.

Reducing and Simmering:
Add the wine to the skillet, lowering the heat so the sauce bubbles quietly. Stir occasionally until the wine has reduced by half, about 3 minutes. Scrape up the brown glaze as the wine bubbles. Then pour the reduced wine into the saucepan and set the skillet aside.

Stir ½ cup stock into the saucepan and let it bubble slowly, 10 minutes, or until totally evaporated. Repeat with another ½ cup stock. Stir in the last 1/2 cup stock along with the milk. Adjust heat so the liquid bubbles very slowly. Partially cover the pot, and cook 1 hour. Stir frequently to check for sticking.

Add the tomatoes, crushing them as they go into the pot. Cook uncovered, at a very slow bubble for another 45 minutes, or until the sauce resembles a thick, meaty stew. Season with salt and pepper.

~~~~~~~~~~~~~~~~~~~~~~~~~~~

The March 2009 challenge is hosted by Mary of Beans and Caviar, Melinda of Melbourne Larder and Enza of Da Grande. We have chosen Lasagne of Emilia-Romagna from The Splendid Table by Lynne Rossetto Kasper as the challenge.

Saturday, February 28, 2009

Chocolate Valentino & 7 Bean Vanilla Ice Cream (DB)


This month's Daring Bakers Challenge showcases how a few simple yet high quality ingredients can be transformed into a special, decadent dessert...and a perfect sweet treat for Valentines Day!

The February 2009 challenge is hosted by Wendy of WMPE's blog and Dharm of Dad ~ Baker & Chef. We have chosen a Chocolate Valentino cake by Chef Wan; a Vanilla Ice Cream recipe from Dharm and a Vanilla Ice Cream recipe from Wendy as the challenge.

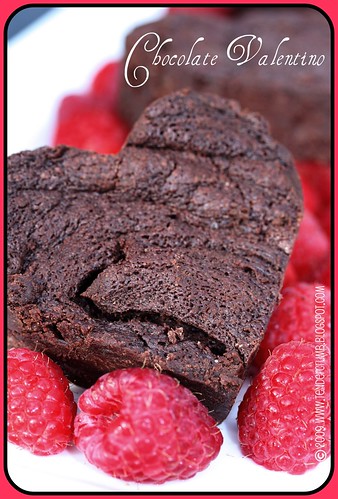
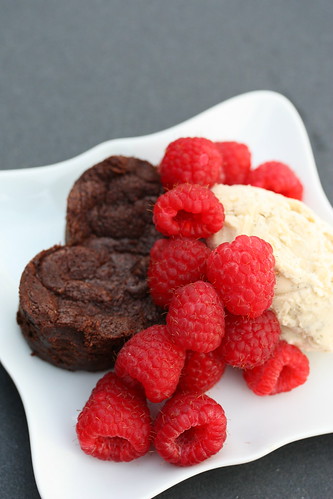
Chocolate Valentino is essentially a flourless chocolate cake composed of three basic ingredients: chocolate, butter and eggs. The end result is an extremely fudgey cake (more like a brownie than a cake), and a little portion delivers HUGE chocolate flavors. I followed the recipe instructions as written, baking the cake in an 8" springform pan. Once the cake cooled, I used a heart shape cookie cutter to portion out individual servings.

Vanilla Ice Cream is part two of this month's challenge. For those of you who know me, I LOVE making (and eating) homemade ice cream, and I happily pulled out my ice cream maker for the occasion. I've been itching to make 7 Bean Vanilla Ice Cream from Sherry Yard's terrific book, Desserts By The Yard.

The cake and ice cream served as a perfect ending for my hubby and me on Valentine's Day. We really enjoyed the cake, as it wasn't sugary sweet and it delivered a huge punch in chocolate flavor (definitely use high-quality chocolate for this recipe). The ice cream was full of vanilla flavor (7 vanilla pods--- I would have been disappointed if it wasn't), and it really worked well with the cake. I could have easily eaten the entire batch by myself! :p It's definitely a small investment using 7 vanilla pods, but it's definitely worth making for a special occassion.

Chocolate Valentino
Preparation Time: 20 minutes

Ingredients

16 ounces (1 pound) (454 grams) of semisweet chocolate, roughly chopped (I used Valrhona 60%)
½ cup (1 stick) plus 2 tablespoons (146 grams total) of unsalted butter
5 large eggs, separated

Instructions

1. Put chocolate and butter in a heatproof bowl and set over a pan of simmering water (the bottom of the bowl should not touch the water) and melt, stirring often.

2. While your chocolate butter mixture is cooling. Butter your pan and line with a parchment circle then butter the parchment.

3. Separate the egg yolks from the egg whites and put into two medium/large bowls.

4. Whip the egg whites in a medium/large grease free bowl until stiff peaks are formed (do not over-whip or the cake will be dry).

5. With the same beater beat the egg yolks together.

6. Add the egg yolks to the cooled chocolate.

7. Fold in 1/3 of the egg whites into the chocolate mixture and follow with remaining 2/3rds. Fold until no white remains without deflating the batter.

8. Pour batter into prepared pan, the batter should fill the pan 3/4 of the way full, and bake at 375F/190C

9. Bake for 25 minutes until an instant read thermometer reads 140F/60C. (Note – If you do not have an instant read thermometer, the top of the cake will look similar to a brownie and a cake tester will appear wet.)

10. Cool cake on a rack for 10 minutes then unmold.

~~~~~~~~~~~~~~~~~~~~~~~~~~~~~~~~~~~~~~~~~~~~~~

7 Bean Vanilla Ice Cream
adapted from Desserts By The Yard by Sherry Yard
makes 1 quart

1 cups milk
3 cups heavy cream
7 vanilla beans - split, seeds scraped out; seeds and beans reserved
3/4 cup sugar
4 large egg yolks
pinch of salt

1. Place a 1 quart freezer container in the freezer. Prepare an ice bath: fill a large bowl with ice and a little water and nestle ia medium bowl in the ice.

2. In a medium nonreactive saucepan, combine the milk, cream, vanillaseeds and beans and half the sugar. Place the pan over medium heat and bring the mixture to a boil. Turn off the heat, cover tightly with plastic wrap, and allow the milk and cream to infuse for 20 minutes (I let it sit for 1 hour).

3. While the milk and cream are infusing, comvbine the egg yolks and the remaining 6 tablespoons sugar in a medium bowl and whisk them together until lemony yellow.

4. After infusing the cream mixture, remove the plastic wrap and return the mixture to the heat. When the milk and cream come to a simmer, remove from the heat and slowly whisk 1/2 cup into the egg yolks. Once the cream is incorporated into the yolks, whisk the yolks back into the cream. Be sure to scrape all the yolks into the pan with a rubber spatula.

5. Place the pan over low heat and immediately begin to stir the custard. After about 2 minutes, the custard will begin to thicken. Keep stirring until the consistency is like thick cream. The custard is done when the temperature reaches 180F degrees. Test for readiness with your spatula: dip it into the custard, pull it out, and run your finger across the back of the spatula. Your finger should leave a clear trail adn the rest of the spatula should remain coated with custard. If the custard does not run into the finger trail, it is thick enough and can be taken off the heat. If it does run, cook the custard for another minute, or until the consistency is right.

6. Remove the custard from the heat and immediately pour through a fine-mesh strainer into the bowl in the ice bath. Rinse beans and reserve for another use. Add salt. Cool mixture (if you time, refrigerate custard for a least couple of hours). Transfer to an ice cream maker and freezee according to the manufacturer's directions. Transfer to the freezer container and place in the freezer for 2 hours, or until firm.

Wednesday, October 29, 2008

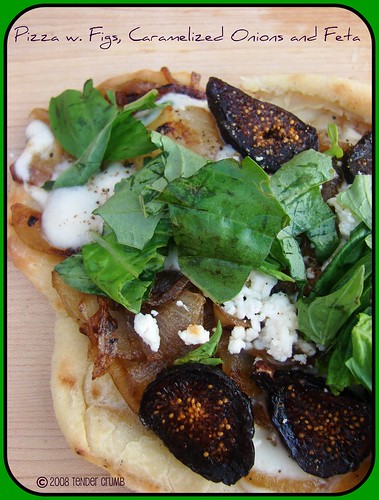
Pizza w. Figs, Caramelized Onions & Feta (Daring Bakers)

October's Daring Bakers Challenge was one that I couldn't refuse --- PIZZA!!! It has never dawned on me to make my own pizza dough, given the availability and convenience of using ready made refrigerated pizza dough (I'm partial to the dough available at Trader Joes).

As it's still summer weather in SoCal, I decided to skip the oven and grill the pizzas on the BBQ. This dough is definitely stickier that your typical bread dough, so I had a challenge getting the rolled (sorry, pizza tossing wasn't in the cards for me this time around) dough on to the grill in one piece and retaining its shape. I started with pretty pizza dough ovals...as I struggled to get them on the grill, they ended up looked like giant amoebas.

I ended up making two types of pizzas. The first was topped with dried figs (couldn't rationalize spending $5.99 at Whole Paycheck ---opps, I meant Whole Foods for a basket of fresh figs), carmelized onions, feta and fresh mozzarella cheese, and topped with basil (I prefer arugula, but I went with what I had in the fridge):
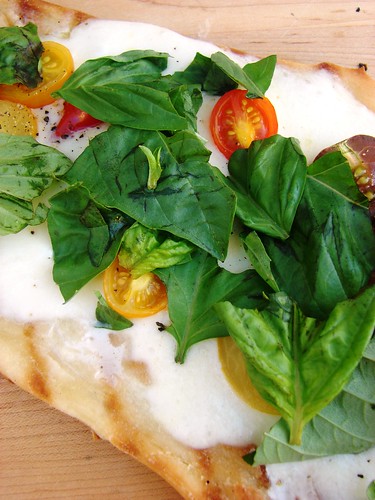
The second was a pizza margherita, made with fresh mozzarella, small heirloom tomatoes, and topped with fresh basil and cracked black pepper:

Both pizzas turned out delicious, despite their homely looking shapes. The pizza crust was definitely a differentiator, as it was nice and crispy, and wasn't too heavy and bread-y. It definitely blew the TJ's dough out of the water!! With a little planning on the front end, making homemade pizza dough is definitely worth the effort.

This was definitely a fun challenge--- Thanks very much to our hostess Rosa of Rosa's Yummy Yums! To see more delicious and creative pizzas, check out the Daring Bakers blogroll.

~~~~~~~~~~~~~~~~~~~
BASIC PIZZA DOUGH
Original recipe taken from “The Bread Baker’s Apprentice” by Peter Reinhart
Makes 6 pizza crusts (about 9-12 inches/23-30 cm in diameter)

Ingredients:
4 1/2 Cups (20 1/4 ounces/607.5 g) Unbleached high-gluten (%14) bread flour or all purpose flour, chilled -
1 3/4 Tsp Salt
1 Tsp Instant yeast
1/4 Cup (2 ounces/60g) Olive oil or vegetable oil (both optional, but it’s better with)
1 3/4 Cups (14 ounces/420g or 420ml) Water, ice cold (40° F/4.5° C)
1 Tb sugar
Semolina/durum flour or cornmeal for dusting

DAY ONE

Method:
1. Mix together the flour, salt and instant yeast in a big bowl (or in the bowl of your stand mixer).
2. Add the oil, sugar and cold water and mix well (with the help of a large wooden spoon or with the paddle attachment, on low speed) in order to form a sticky ball of dough. On a clean surface, knead for about 5-7 minutes, until the dough is smooth and the ingredients are homogeneously distributed. If it is too wet, add a little flour (not too much, though) and if it is too dry add 1 or 2 teaspoons extra water.

NOTE: If you are using an electric mixer, switch to the dough hook and mix on medium speed for the same amount of time.The dough should clear the sides of the bowl but stick to the bottom of the bowl. If the dough is too wet, sprinkle in a little more flour, so that it clears the sides. If, on the contrary, it clears the bottom of the bowl, dribble in a teaspoon or two of cold water.
The finished dough should be springy, elastic, and sticky, not just tacky, and register 50°-55° F/10°-13° C.

3. Flour a work surface or counter. Line a jelly pan with baking paper/parchment. Lightly oil the paper.

4. With the help of a metal or plastic dough scraper, cut the dough into 6 equal pieces (or larger if you want to make larger pizzas).

NOTE: To avoid the dough from sticking to the scraper, dip the scraper into water between cuts.

5. Sprinkle some flour over the dough. Make sure your hands are dry and then flour them. Gently round each piece into a ball.

NOTE: If the dough sticks to your hands, then dip your hands into the flour again.

6. Transfer the dough balls to the lined jelly pan and mist them generously with spray oil. Slip the pan into plastic bag or enclose in plastic food wrap.

7. Put the pan into the refrigerator and let the dough rest overnight or for up to thee days.

NOTE: You can store the dough balls in a zippered freezer bag if you want to save some of the dough for any future baking. In that case, pour some oil(a few tablespooons only) in a medium bowl and dip each dough ball into the oil, so that it is completely covered in oil. Then put each ball into a separate bag. Store the bags in the freezer for no longer than 3 months. The day before you plan to make pizza, remember to transfer the dough balls from the freezer to the refrigerator.

DAY TWO

8. On the day you plan to eat pizza, exactly 2 hours before you make it, remove the desired number of dough balls from the refrigerator. Dust the counter with flour and spray lightly with oil. Place the dough balls on a floured surface and sprinkle them with flour. Dust your hands with flour and delicately press the dough into disks about 1/2 inch/1.3 cm thick and 5 inches/12.7 cm in diameter. Sprinkle with flour and mist with oil. Loosely cover the dough rounds with plastic wrap and then allow to rest for 2 hours.

9. At least 45 minutes before making the pizza, place a baking stone on the lower third of the oven. Preheat the oven as hot as possible (500° F/260° C).

NOTE: If you do not have a baking stone, then use the back of a jelly pan. Do not preheat the pan.

10. Generously sprinkle the back of a jelly pan with semolina/durum flour or cornmeal. Flour your hands (palms, backs and knuckles). Take 1 piece of dough by lifting it with a pastry scraper. Lay the dough across your fists in a very delicate way and carefully stretch it by bouncing it in a circular motion on your hands, and by giving it a little stretch with each bounce. Once the dough has expanded outward, move to a full toss.

During the tossing process, if the dough tends to stick to your hands, lay it down on the floured counter and reflour your hands, then continue the tossing and shaping.

In case you would be having trouble tossing the dough or if the dough never wants to expand and always springs back, let it rest for approximately 5-20 minutes in order for the gluten to relax fully,then try again.
You can also resort to using a rolling pin, although it isn’t as effective as the toss method.

11. When the dough has the shape you want (about 9-12 inches/23-30 cm in diameter - for a 6 ounces/180g piece of dough), place it on the back of the jelly pan, making sure there is enough semolina/durum flour or cornmeal to allow it to slide and not stick to the pan.

12. Lightly top it with sweet or savory toppings of your choice.

NOTE: Remember that the best pizzas are topped not too generously. No more than 3 or 4 toppings (including sauce and cheese) are sufficient.

13. Slide the garnished pizza onto the stone in the oven or bake directly on the jelly pan. Close the door and bake for abour 5-8 minutes.

NOTE: After 2 minutes baking, take a peek. For an even baking, rotate 180°.

If the top gets done before the bottom, you will need to move the stone or jelly pane to a lower shelf before the next round. On the contrary, if the bottom crisps before the cheese caramelizes, then you will need to raise the stone or jelly.

14. Take the pizza out of the oven and transfer it to a cutting board or your plate. In order to allow the cheese to set a little, wait 3-5 minutes before slicing or serving.

Sunday, August 31, 2008

Chocolate Eclairs (DB)

No one needed to twist my arm to participate in this month's Daring Baker's challenge --- ECLAIRS. The hosts, Meeta of What's for Lunch, Honey? and Tony Hahhan, selected one of my all time favorite pastries, and I was looking forward to trying a recipe from Pierre Herme, pastry chef extrordinaire.

I think most people never think of making eclairs, as it looks like it would take skill and effort to replicate the pastry at home. Surprisingly, this recipe is really straightforward and not time consuming. Once you get down making the choux and tinkering with baking time, these puffy treats are worth making at home.
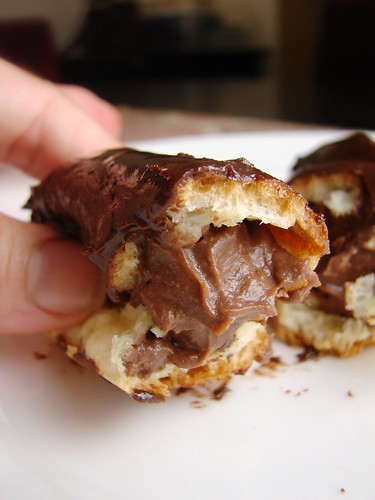
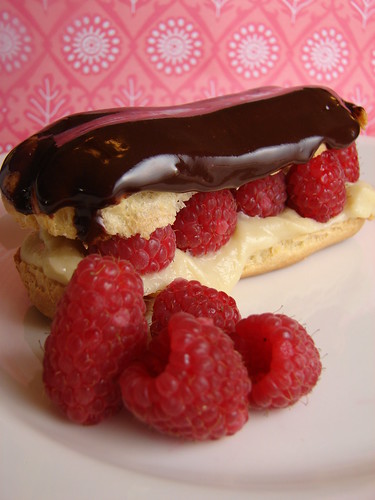
Once the choux is baked and cooled, now the fun begins...what do I fill them with? I decided to go with three pastry creams: chocolate, vanilla bean, and raspberry. I've heard many great things about Pierre Herme's chocolate pastry cream recipe, so had to go ahead and make the recipe (I did cut the recipe in half with no problem). Definitely use bittersweet, as it delivers a wonderfully intense chocolate punch! For the vanilla and raspberry creams, I used a basic pastry cream recipe, and enhanced the cream with vanilla bean and chambord.
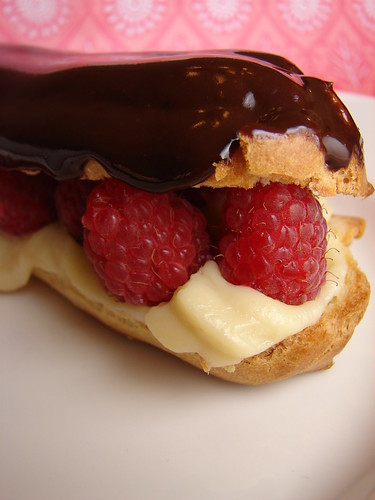
The chocolate and vanilla bean creams were piped into the choux (no slicing needed, just poke a small hole in the choux and pipe the pastry... the holes have been covered by the chocolate glaze). To complement the charmbord cream, I sliced the choux in half and stuffed it with the cream and fresh raspberries.

The results were unbelievably delicious, and I wholeheartedly recommend the Pierre Herme recipe. To see the delicious creations of the other DB'ers, check out the blogroll.
Pierre Hermé’s Chocolate Éclairs
Recipe from Chocolate Desserts by Pierre Hermé
(makes 20-24 Éclairs)•

Cream Puff Dough (see below for recipe), fresh and still warm

1) Preheat your oven to 375 degrees F (190 degrees C). Divide the oven into thirds bypositioning the racks in the upper and lower half of the oven. Line two baking sheets withwaxed or parchment paper.
2) Fill a large pastry bag fitted with a 2/3 (2cm) plain tip nozzle with the warm cream puff dough.Pipe the dough onto the baking sheets in long, 4 to 41/2 inches (about 11 cm) chubby fingers.Leave about 2 inches (5 cm) space in between each dough strip to allow them room to puff.The dough should give you enough to pipe 20-24 éclairs.
3) Slide both the baking sheets into the oven and bake for 7 minutes. After the 7 minutes, slip thehandle of a wooden spoon into the door to keep in ajar. When the éclairs have been in theoven for a total of 12 minutes, rotate the sheets top to bottom and front to back. Continuebaking for a further 8 minutes or until the éclairs are puffed, golden and firm. The total bakingtime should be approximately 20 minutes.

Notes:
1) The éclairs can be kept in a cool, dry place for several hours before filling.

Assembling the éclairs:•
Chocolate glaze (see below for recipe)•
Chocolate pastry cream (see below for recipe)

1) Slice the éclairs horizontally, using a serrated knife and a gently sawing motion. Set aside thebottoms and place the tops on a rack over a piece of parchment paper.
2) The glaze should be barely warm to the touch (between 95 – 104 degrees F or 35 – 40degrees C, as measured on an instant read thermometer). Spread the glaze over the tops ofthe éclairs using a metal icing spatula. Allow the tops to set and in the meantime fill thebottoms with the pastry cream.
3) Pipe or spoon the pastry cream into the bottoms of the éclairs. Make sure you fill the bottomswith enough cream to mound above the pastry. Place the glazed tops onto the pastry creamand wriggle gently to settle them.

Notes:
1) If you have chilled your chocolate glaze, reheat by placing it in a bowl over simmering water,stirring it gently with a wooden spoon. Do not stir too vigorously as you do not want to createbubbles.
2) The éclairs should be served as soon as they have been filled.

Pierre Hermé’s Cream Puff Dough
Recipe from Chocolate Desserts by Pierre Hermé
(makes 20-24 Éclairs)•

½ cup (125g) whole milk•
½ cup (125g) water•
1 stick (4 ounces; 115g) unsalted butter, cut into 8 pieces•
¼ teaspoon sugar•
¼ teaspoon salt•
1 cup (140g) all-purpose flour•
5 large eggs, at room temperature

1) In a heavy bottomed medium saucepan, bring the milk, water, butter, sugar and salt to theboil.
2) Once the mixture is at a rolling boil, add all of the flour at once, reduce the heat to mediumand start to stir the mixture vigorously with a wooden spoon. The dough comes together veryquickly. Do not worry if a slight crust forms at the bottom of the pan, it’s supposed to. Youneed to carry on stirring for a further 2-3 minutes to dry the dough. After this time the doughwill be very soft and smooth.
3) Transfer the dough into a bowl of a mixer fitted with the paddle attachment, or using yourhandmixer or if you still have the energy, continue by hand. Add the eggs one at a time,beating after each egg has been added to incorporate it into the dough.You will notice that after you have added the first egg, the dough will separate, once again donot worry. As you keep working the dough, it will come back all together again by the time youhave added the third egg. In the end the dough should be thick and shiny and when lifted itshould fall back into the bowl in a ribbon.
4) The dough should be still warm. It is now ready to be used for the éclairs as directed above.

Notes:
1) Once the dough is made you need to shape it immediately.
2) You can pipe the dough and the freeze it. Simply pipe the dough onto parchment-lined bakingsheets and slide the sheets into the freezer. Once the dough is completely frozen, transfer thepiped shapes into freezer bags. They can be kept in the freezer for up to a month.

Chocolate Pastry Cream
Recipe from Chocolate Desserts by PierreHermé

2 cups (500g) whole milk•
4 large egg yolks•
6 tbsp (75g) sugar•
3 tablespoons cornstarch, sifted•
7 oz (200g) bittersweet chocolate, preferably Velrhona Guanaja, melted•
2½ tbsp (1¼ oz: 40g) unsalted butter, at room temperature

1) In a small saucepan, bring the milk to a boil. In the meantime, combine the yolks, sugar and cornstarch together and whisk in a heavy‐bottomed saucepan.
2) Once the milk has reached a boil, temper the yolks by whisking a couple spoonfuls of the hot milk into the yolk mixture.Continue whisking and slowly pour the rest of the milk into the tempered yolk mixture.
3) Strain the mixture back into the saucepan to remove any egg that may have scrambled. Place the pan over medium heat and whisk vigorously (without stop) until the mixture returns to a boil. Keep whisking vigorously for 1 to 2 more minutes (still over medium heat).Stir in the melted chocolate and then remove the pan from the heat.
4) Scrape the pastry cream into a small bowl and set it in an ice‐water bath to stop the cooking process. Make sure to continue stirring the mixture at this point so that it remains smooth.
5) Once the cream has reached a temperature of 140 F remove from the ice‐water bath and stir in the butter in three or four installments. Return the cream to the ice‐water bath to continue cooling, stirring occasionally, until it has completely cooled. The cream is now ready to use or store in the fridge.

Notes:
1) The pastry cream can be made 2-3 days in advance and stored in the refrigerator.
2) In order to avoid a skin forming on the pastry cream, cover with plastic wrap pressed onto the cream.
3) Tempering the eggs raises the temperature of the eggs slowly so that they do not scramble.

Chocolate Glaze
Recipe from Chocolate Desserts by Pierre Hermé
(makes 1 cup or 300g)•

1/3 cup (80g) heavy cream •
3½ oz (100g) bittersweet chocolate, finely chopped•
4 tsp (20 g) unsalted butter, cut into 4 pieces, at room temperature•
7 tbsp (110 g)
Chocolate Sauce (recipe below), warm or at room temperature

1)In a small saucepan, bring the heavy cream to a boil. Remove from the heat and slowly begin to add the chocolate, stirring with a wooden spoon or spatula.
2) Stirring gently, stir in the butter, piece by piece followed by the chocolate sauce.

Notes:
1) If the chocolate glaze is too cool (i.e. not liquid enough) you may heat it briefly
 in the microwave or over a double boiler. A double boiler is basically a bowl sitting over (not touching) simmering water.
2) It is best to glaze the eclairs after the glaze is made, but if you are pressed for time, you can make the glaze a couple days ahead of time, store it in the fridge and bring it up to the proper temperature (95 to 104 F) when ready to glaze.

Chocolate Sauce
Recipe from Chocolate Desserts by Pierre Hermé
(makes 1½ cups or 525 g)•

4½ oz (130 g) bittersweet chocolate, finely chopped •
1 cup (250 g) water•
½ cup (125 g) crème fraîche, or heavy cream •
1/3 cup (70 g) sugar

1) Place all the ingredients into a heavy‐bottomed saucepan and bring to a boil, making sure to stir constantly. Then reduce the heat to low and continue stirring with a wooden spoon until the sauce thickens.
2) It may take 10‐15 minutes for the sauce to thicken, but you will know when it is done when it coats the back of your spoon.

Notes:
1) You can make this sauce ahead of time and store it in the refrigerator for two weeks. Reheat the sauce in a microwave oven or a double boiler before using.
2) This sauce is also great for cakes, ice-cream and tarts.

Sunday, June 29, 2008

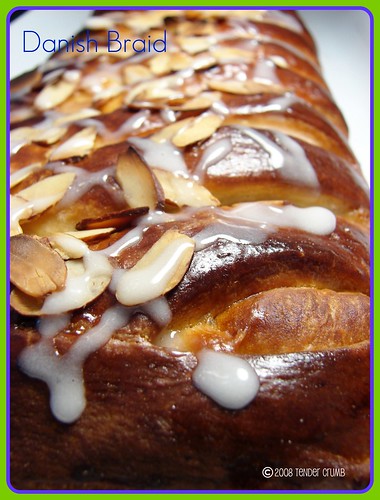
Danish Braid (DB)

Let's talk about rolling up my sleeves for my very first Daring Bakers challenge! For me, my goal in joining this fabulous baking group is to work with recipes that are typically out of my comfort zone. I was thrilled to see Danish Braid as this month's selection! I'll admit that I am the type to read these more complicated recipes, admire the pretty pictures, and make some excuse to not make the recipe. Now, I don't have an excuse! :)

Like making croissants and puff pastry, laminated dough is a time and labor intensive exercise. The first time I made croissants and puff pastry was in a pastry class this past winter, and I had to make both doughs one handed (I had broken my wrist a few weeks prior, so was in a cast....I finished a sweaty, floury mess, but the final baked items turned out pretty good! :)) I was happy to dive into this recipe...two handed!

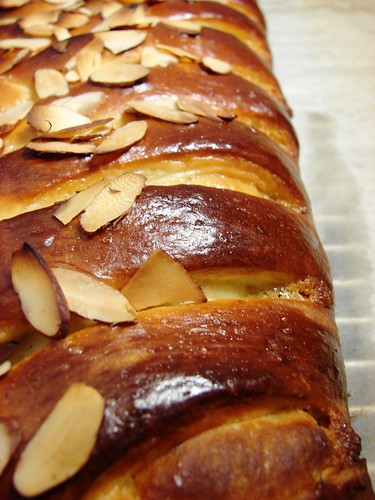
The trick is allocating enough time for the turns, resting and proofing. I started the dough Friday evening (the bonus is cooling temps to work with the dough) , finishing all four turns and preparing the filling before turning in for the evening. The next morning, I assembled the braid and baked it off. The beautiful thing about this recipe is that your hard work is rewarded with a GORGEOUS looking pastry that tastes better than anything you would find at the corner bakery.

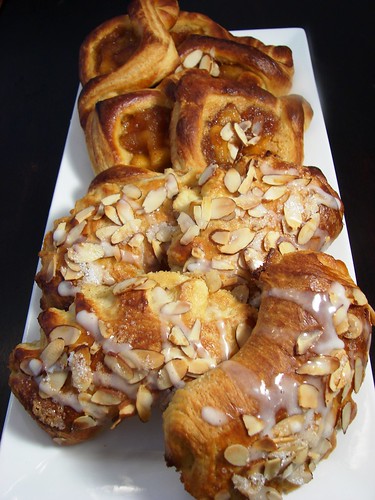
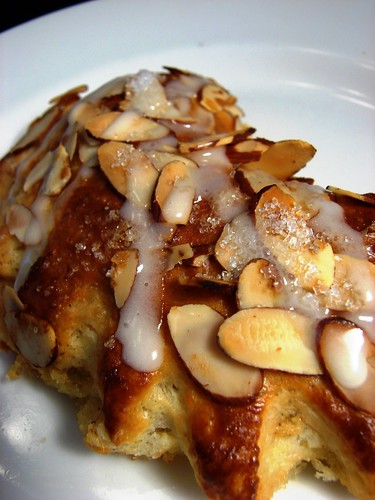
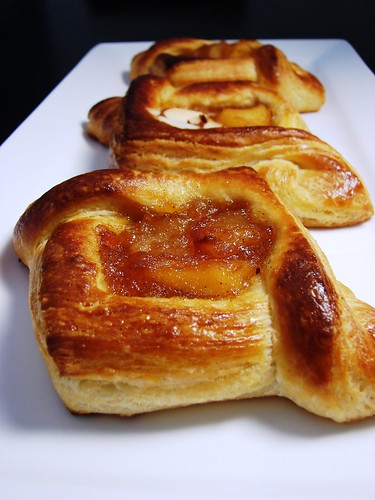
This recipe yielded enough dough for two braids. Instead of making a second braid, I opted to make some smaller pastries. With some of the dough, I made triangle twists and used the leftover apple mixture as the filling. I really love the beautiful shape, and the best part was that it was very easy to assemble!I also made bear claws, which was filled with a traditional remonce (almond filling)--- recipe is at the very end of this post). This was my absolute favorite pastry. The smell of the almond filling baking in the oven was intoxicating, and the pastry was light, fluffy and delicious.
~~~~~~~~~~~~~~~~~~~~~~~~~~~~~~
DANISH DOUGH
Makes 2-1/2 pounds dough

Ingredients

For the dough (Detrempe)
1 ounce fresh yeast or 1 tablespoon active dry yeast
1/2 cup whole milk
1/3 cup sugar
zest of 1 orange, finely grated
3/4 teaspoon ground cardamom
1-1/2 teaspoons vanilla extract
1/2 vanilla bean, split and scraped
2 large eggs, chilled
1/4 cup fresh orange juice
3 1/4 cups all-purpose flour
1 teaspoon salt

For the butter block (Beurrage)
1/2 pound (2 sticks) cold unsalted butter
1/4 cup all-purpose flour

DOUGH
- Combine yeast and milk in the bowl of a mixer fitted with the paddle attachment and mix on low speed. Slowly add sugar, orange zest, cardamom, vanilla extract, vanilla seeds, eggs, and orange juice. Mix well.
- Change to the dough hook and add the salt with the flour, 1 cup at a time, increasing speed to medium as the flour is incorporated. Knead the dough for about 5 minutes, or until smooth. You may need to add a little more flour if it is sticky.
- Transfer dough to a lightly floured baking sheet and cover with plastic wrap. Refrigerate for 30 minutes.
(Without a standing mixer: Combine yeast and milk in a bowl with a hand mixer on low speed or a whisk. Add sugar, orange zest, cardamom, vanilla extract, vanilla seeds, eggs, and orange juice and mix well. Sift flour and salt on your working surface and make a fountain. Make sure that the “walls” of your fountain are thick and even. Pour the liquid in the middle of the fountain. With your fingertips, mix the liquid and the flour starting from the middle of the fountain, slowly working towards the edges. When the ingredients have been incorporated start kneading the dough with the heel of your hands until it becomes smooth and easy to work with, around 5 to 7 minutes. You might need to add more flour if the dough is sticky.)

BUTTER BLOCK
- Combine butter and flour in the bowl of a mixer fitted with a paddle attachment and beat on medium speed for 1 minute. Scrape down the sides of the bowl and the paddle and then beat for 1 minute more, or until smooth and lump free. Set aside at room temperature.
- After the detrempe has chilled 30 minutes, turn it out onto a lightly floured surface. Roll the dough into a rectangle approximately 18 x 13 inches and ¼ inch thick. The dough may be sticky, so keep dusting it lightly with flour. Spread the butter evenly over the center and right thirds of the dough. Fold the left edge of the detrempe to the right, covering half of the butter. Fold the right third of the rectangle over the center third. The first turn has now been completed. Mark the dough by poking it with your finger to keep track of your turns, or use a sticky and keep a tally. Place the dough on a baking sheet, wrap it in plastic wrap, and refrigerate for 30 minutes.
- Place the dough lengthwise on a floured work surface. The open ends should be to your right and left. Roll the dough into another approximately 13 x 18 inch, ¼-inch-thick rectangle. Again, fold the left third of the rectangle over the center third and the right third over the center third. No additional butter will be added as it is already in the dough. The second turn has now been completed. Refrigerate the dough for 30 minutes.4. Roll out, turn, and refrigerate the dough two more times, for a total of four single turns. Make sure you are keeping track of your turns. Refrigerate the dough after the final turn for at least 5 hours or overnight. The Danish dough is now ready to be used. If you will not be using the dough within 24 hours, freeze it. To do this, roll the dough out to about 1 inch in thickness, wrap tightly in plastic wrap, and freeze. Defrost the dough slowly in the refrigerator for easiest handling. Danish dough will keep in the freezer for up to 1 month.

APPLE FILLING
Makes enough for two braids

Ingredients
4 Fuji or other apples, peeled, cored, and cut into ¼-inch pieces
1/2 cup sugar
1 tsp. ground cinnamon
1/2 vanilla bean, split and scraped
1/4 cup fresh lemon juice
4 tablespoons unsalted butter

Toss all ingredients except butter in a large bowl. Melt the butter in a sauté pan over medium heat until slightly nutty in color, about 6 - 8 minutes. Then add the apple mixture and sauté until apples are softened and caramelized, 10 to 15 minutes. If you’ve chosen Fujis, the apples will be caramelized, but have still retained their shape. Pour the cooked apples onto a baking sheet to cool completely before forming the braid. (If making ahead, cool to room temperature, seal, and refrigerate.) They will cool faster when spread in a thin layer over the surface of the sheet. After they have cooled, the filling can be stored in the refrigerator for up to 3 days. Left over filling can be used as an ice cream topping, for muffins, cheesecake, or other pastries.


DANISH BRAID
Makes enough for 2 large braids

Ingredients
1 recipe Danish Dough (see above)
2 cups apple filling, jam, or preserves (see above)
egg wash (1 large egg, plus 1 large egg yolk)

- Line a baking sheet with a silicone mat or parchment paper. On a lightly floured surface, roll the Danish Dough into a 15 x 20-inch rectangle, ¼ inch thick. If the dough seems elastic and shrinks back when rolled, let it rest for a few minutes, then roll again. Place the dough on the baking sheet.
- Along one long side of the pastry make parallel, 5-inch-long cuts with a knife or rolling pastry wheel, each about 1 inch apart. Repeat on the opposite side, making sure to line up the cuts with those you’ve already made.
- Spoon the filling you’ve chosen to fill your braid down the center of the rectangle. Starting with the top and bottom “flaps”, fold the top flap down over the filling to cover. Next, fold the bottom “flap” up to cover filling. This helps keep the braid neat and helps to hold in the filling. Now begin folding the cut side strips of dough over the filling, alternating first left, then right, left, right, until finished. Trim any excess dough and tuck in the ends.
- Egg Wash: Whisk together the whole egg and yolk in a bowl and with a pastry brush, lightly coat the braid.

Proofing and Baking
- Spray cooking oil onto a piece of plastic wrap, and place over the braid.
- Proof at room temperature or, if possible, in a controlled 90 degree F environment for about 2 hours, or until doubled in volume and light to the touch.
- Near the end of proofing, preheat oven to 400 degrees F. Position a rack in the center of the oven.3. Bake for 10 minutes, then rotate the pan so that the side of the braid previously in the back of the oven is now in the front. Lower the oven temperature to 350 degrees F, and bake about 15-20 minutes more, or until golden brown.
- Cool and serve the braid either still warm from the oven or at room temperature. The cooled braid can be wrapped airtight and stored in the refrigerator for up to 2 days, or freeze for 1 month.
~~~~~~~~~~~~~~~~~~~~~~~~~~~~~~~~~~~~~~~
Remonce (Almond Cream Filling)
Adapted from The Pie and Pastry Bible by Rose Levy Beranbaum

Ingredients
3 tbsp almond paste
1/4 C + 1 1/2 tsp sugar
4 tbsp butter
1 egg, room temp and slightly beaten
1/2 tsp vanilla
1 tbsp + 1 1/2 tsp flour

In a food processor, pulse together the almond paste and sugar until it looks like wet sand. Add butter and pulse 3-4 times until incorporated. Add the egg, vanilla, and flour and pulse just until incorporated. It will be a soft cream. Place in a piping bag and refrigerated until it is used (otherwise it may ooze from the pastry when baking)
Blog Widget by LinkWithin