Showing posts with label nuts. Show all posts

Tuesday, April 6, 2010

Mocha-Walnut Marbled Bundt Cake (TWD)


This week is a Tuesdays With Dorie two-fer! Along with a post for a delicious Coconut Lime Tea Cake, you can read all about a little incident at the Tender Crumb casa which derailed my plans for posting on time last week.

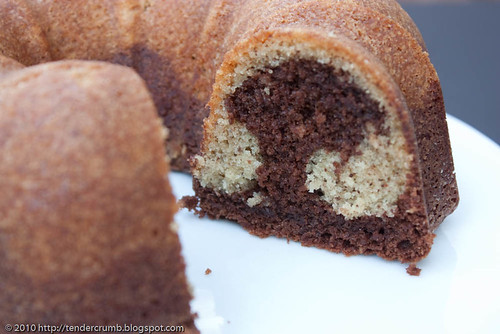
This week's TWD selection is a Mocha-Walnut Marbled Bundt Cake --- sounds pretty delicious doesn't it?
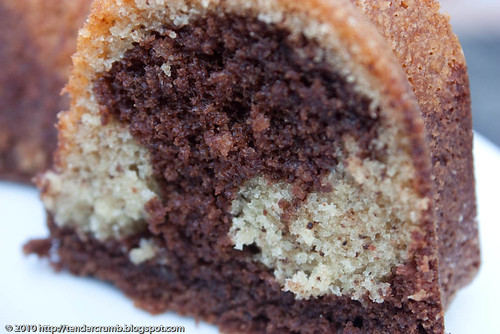
This bundt cake looks unassuming on the outside, but when you cut a slice you will be surprised with this beautiful marbling: the dark cake is flavored with bittersweet chocolate and coffee; light cake is flavored with vanilla.
Finely ground walnuts replace a portion of the flour as a dry ingredient. I added a little of the flour portioned for the recipe (1/4 cup) along with the walnuts to the food processor to grind them, as the flour will prevent the nuts from turning into a nut-butter.

I thought this cake was delicious, but was left wanting a bit more walnut flavor. You can definitely taste the chocolate, coffee and vanilla, which is a fantastic combination. If I didn't know about the walnuts, I would have had no idea that ground nuts were added to this cake.

Flavor aside, the cake is super moist, and it is definitely one that will keep for several days.

Setting aside my minor gripe about the flavor, this cake is definitely worth repeating, and I may experiment with a different nut next time.

For the complete recipe, please visit Erin's blog, When In Doubt...Leave It At 350.

Tuesday, March 31, 2009

Coconut Butter Thins (TWD)

This week's Tuesdays With Dorie recipe is Coconut Butter Thins. The foundation of this cookie is a shortbread dough, which is embellished with coconut, macadamia, and lime zest. These components are not necessarily in my top 10 list of favorite ingredients/flavors, and I confess that I wasn't excited about making these cookies.
The instructions for this cookie are pretty straightforward, and for the most part I followed the recipe as written. My only minor adjustment was finely grinding the coconut along with the macadamias.

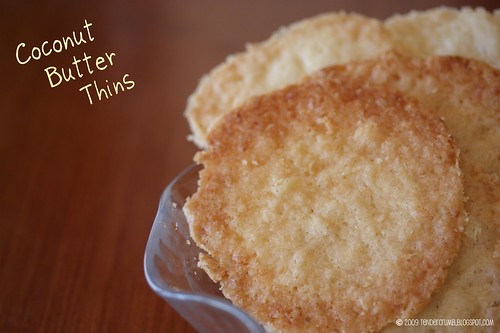
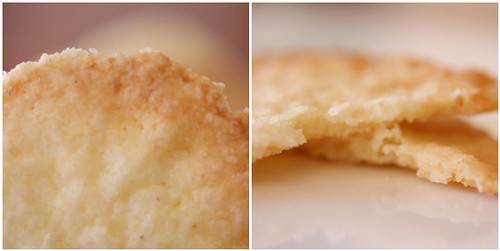
In the book, Dorie Greenspan describes these cookies as wafery and lacey. Even with that knowledge, I was surprised that my cookie dough squares spread like crazy in the oven! Either the spreading is intended, or else the overnight rest in the fridge and freezing the cut cookie dough didn't help the cookies retain its shape. Now, I'm curious to see how everyone else's cookies turned out.
So much for how they look...more importantly, how do they taste? After taking one bite of this cookie, I realized that I should keep an open mind --- these cookies are unbelievably flavorful and delicious!!!! The texture is a perfect balance of crispy and tender, and the coconut, macadamia and lime flavors are really wonderful together (I think next time I will increase the amount of lime zest --- loved the flavor). I will say that this gem is one of my favorite TWD recipes to date (and that's saying something, as the group has made some pretty terrific treats).

Thanks Jayne of The Barefoot Kitchen Witch for selecting this divine cookie! If you want to make this delicious cookie yourself, head over to Jayne's blog for the recipe. For more delicious cookies, check out the TWD blogroll.

Tuesday, January 20, 2009

Banana Cake w. Praline Filling & White Chocolate Ganache (TCS)

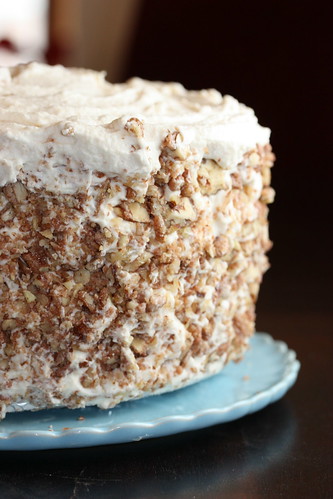
Here is another terrific installment of The Cake Slice. Our group has been baking through Sky High: Irresistable Triple Layer Cakes, and our selection for this month is this beauty. Less dense than banana bread, this cake only requires a 1/2 cup of mashed banana but produces big banana flavor.
Paired with sugary pecans (yes, they're fried, but with all of the butter, cream and chocolate in this cake, it really doesn't matter, does it?) and a whipped cream frosting lightly flavored with white chocoalate, this cake received thumbs up from all who tasted it. I'm not a big praline fan, so I'm not the best judge for taste.


To see how my fellow super-talented bakers fared, check out The Cake Slice blogroll.

~~~~~~~~~~~~~~~~~~~~~~~~~~~~~~~~~~~~~~~~

Banana Cake with Praline Filling and White Chocolate Ganache
from Sky High: Irresistable Triple Layer Cakes by Alisa Huntsman and Peter Wynne
makes a 9-inch triple layer cake

Ingredients

Cake:

3 cups of cake flour*
3 and 1/2 teaspoons of baking powder
1 and 1/2 teaspoons of cinnamon
1/2 teaspoon of salt
3/4 cup of milk
1/2 cup of ripe mashed bananas
8 ounces of softened unsalted butter
2 cups of sugar
7 egg whites

Praline Filling:
1 cup sugared pecans, cooled
1 and 1/2 cups white chocolate ganache

Sugared Pecans:
1 and 1/2 cups pecan halves
3 cups vegetable oil
1 cup confectioners sugar

White Chocolate Ganache:
8 ounces of white chocolate chopped
2 and 1/2 cups of heavy cream
1 and 1/2 teaspoons vanilla extract

Instructions

Cake:
Preheat the oven to 350F degrees.

Butter three 9-inch round cake pans. Line the bottom of each pan with parchment paper or wax paper.

Sift together the flour, baking powder, cinnamon, and salt. Set aside dry ingredients. In a food processor or blender, process the milk and banana into a smooth light puree. Set aside.

In a large bowl cream together the butter and sugar until light and fluffy. On medium high speed, beat in egg whites 2-3 at a time until smooth. Scraping down the sides of the bowl between egg additions.

With the mixer on low speed add the dry ingredients and banana puree alternately in 2-3 additions, beating until just blended. Scrape down the sides of the bowl and beat on medium-high speed for 1-minute. Divide the batter among the cake pans.

Bake for 20-25 minutes or until a cake tester comes out clean when inserted into the center of each cake. Let the cake layers cool in the pan for 10 minutes. Then turn out onto a wired rack and remove the paper liners. Then cool completely one hour.
To assemble the cake, put one layer, flat side up, on a cake stand or serving plate. Cover the top evenly with half of the praline filling, leaving a 1/4"-inch margin around the edges. place the second layer on top, again flat side up, cover it with remaining filling. Finally add the third layer and frost the sides and top with the white chocolate ganache. Garnish with sugared pecans.

Praline Filling
With a large chef's knife chop the pecans. Or pulse in a food processor being careful not to turn into paste.

Add the sugared pecans to the white chocolate ganache and stir to mix well.

Sugared Pecans
Place the pecans in a medium sauce pan, add water to cover, and heat to a boiling.

Boil the pecans slowly until they are swollen and soft 5-8 minutes. Drain the nuts well in a sieve for about 5 minutes. (Do not pat dry; the nuts must remain damp.)
While the nuts are draining, heat the oil in a large heavy saucepan or deep fat fryer t0 350F degrees.

Set half of the nuts aside. Dust the remaining nuts in the sieve with 1/2 cup of powdered sugar. Shake the sieve to coat the nuts evenly, letting any excess sugar fall away. Immediately add the coated nuts to the hot oil. Fry until golden brown about 2-3 minutes. Using a slotted spoon scoop the nuts out and drain them on several thickness of paper towels. Repeat the process with the remaining nuts.

White Chocolate Ganache
Put the white chocolate in a medium heat proof bowl. In a small sauce bring 1/2 cup of the cream to a boil. Pour the hot cream over the chocolate. Let stand for 1-minute, then whisk until smooth. Let the white chocolate cream stand until cooled to room temperature.

In a chilled bowl with chilled beaters beat the remaining 2 cups of heavy cream and vanilla until softly whipped. Stir in the white chocolate cream and beat until fairly stiff. taking care not over beat, which would cause the ganache to separate.

Tuesday, December 2, 2008

Linzer Sables (TWD)

Tis the season...I LOVE this time of year! Yes, I'm one of those crazy lunatics that loves to decorate the house top to bottom, play holiday music every chance I get (and successfully drive my hubby crazy), shop til I drop, and bake to my heart's content for family and friends.

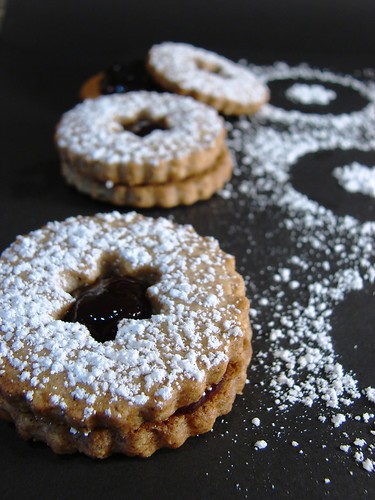
Linzer Sables are a perfect seasonal choice for this week's Tuesdays With Dorie. Selected by Noskos of Living The Life, these darling looking cookie gems are tender, nutty and so flavorful.I followed the recipe as written, with hazelnuts as my ground nut choice. I would definitely recommend freezing the rolled sheets of cookie dough before cutting, as the dough is really sticky and tough to work with otherwise. To get a nice golden brown color, I reduced the baking time to 9 minutes; at the recommended 11-13 minutes, the cookies were a bit well done.
I sandwiched the cookies with dollops of raspberry and blackberry jams. Dorie Greenspan's suggestion for a chocolate filling sounded divine (hazelnuts & chocolate --- how can you go wrong!), and I'll definitely keep that in mind for the next time.
This was the perfect recipe to kick off the holiday baking season. This was just a warm up --- I have quite the variety of cookies to make this month, and I definitely be sharing them with you in future posts.

If you'd like to make this yourself (which I highly recommend), Noskos has it available on his blog. To see the handiwork of 350+ TWD bakers, check out the blogroll.

Sunday, November 30, 2008

Thanksgiving Twofer Pie (TWD)


Apologies for being so out of pocket lately. Life has gotten in the way of my blog. Work and home life has been extraordinarily hectic this month, and things have been pretty chaotic all around.

The hubby and I did have an opportunity to escape for a bit R&R this past week with our ritual Thanksgiving week trek to Las Vegas. Relaxing in Vegas sounds a bit odd, but the combination of gambling (love blackjack and craps!!), great restaurants, nice spas, and excellent shopping does a lot for a positive attitude adjusment, and all is well in my world again.

The Tuesdays With Dorie gang was given the option of posting this week's recipe after the Thanksgiving holiday (and thus my posting this on Sunday). I was very grateful for the repreive, as there was no way that I was going to make it earlier this week.

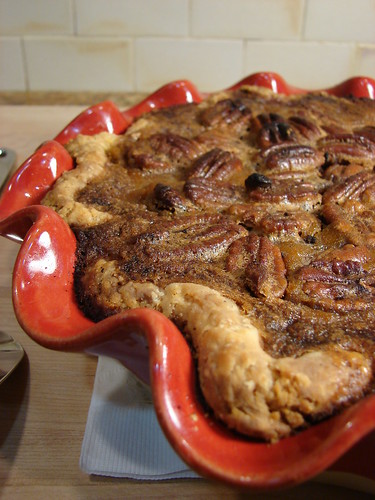
Selected by the lovely Vibi of La Casserole Carree, Thanksgiving Twofer Pie was a perfect selection for the season. Part pumpkin, part pecan, this recipe merges these two Thanksgiving favorites into one pie. This recipe starts with Dorie Greenspan's Good for Almost Everything Pie Dough, which is my all time favorite pie crust recipe:


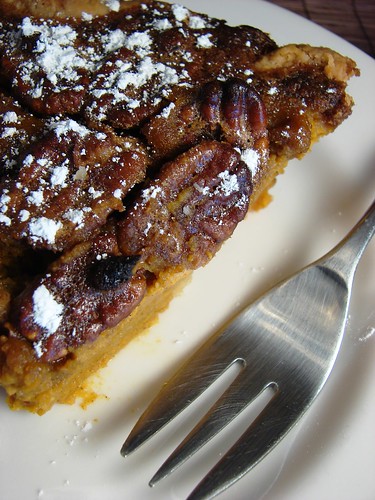
For whatever reason, I expected this pie to have a layer of pumpkin filling on the bottom and a gooey pecan layer on top (did anyone get two distinct layers?). Instead, I ended up with a pumpkin pie with nuts studded on the top:
My hubby and I love pumkpin pie and dislike pecan pie, so we were both a little unsure about the marriage of these two fillings. So, what did we think?
Bottom line, we both agreed that we like our pumpkin pie unadorned with nuts, so the pecans didn't do it for us. Also, the pumpkin filling fell a little flat on flavor (it needed more spice, molasses, maple syrup - something). I liked Dorie Greenspan's inspiration and intent with the recipe, but I'm going to stick with my tried and true pumpkin pie recipe. As I now owe my hubby (in his words) "a real pumpkin pie", I'll share the recipe w. pictures in the next couple of weeks.

For the recipe, you can find it at Vibi's site. To see the pie making talents of 350+ TWD bakers, check out the blogroll.

Tuesday, October 14, 2008

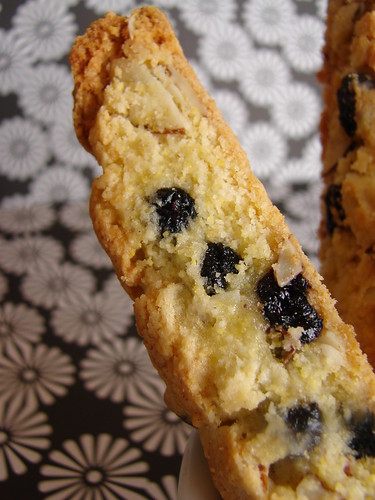
Lenox Almond Biscotti w. Dried Blueberries (TWD)

It's that time of the week again, so you know it's time for a Tuesdays With Dorie sweet treat. This week's hostess is Gretchen at Canela & Comino , and she selected Lenox Almond Biscotti for this week's baking exercise. BTW, Gretchen writes often about Peruvian food on her blog, and it's really fun and interesting to read about Peru's cuisine and culture...check it out!

I've been curious to try Dorie Greenspan's biscotti recipes since I purchased the book, and now I have an opportunity to try them out! I think biscotti is the perfect cookie to bake and share, as it:

1.) has a pretty decent shelf life (a week +)
2.) is sturdy and holds its shape
3.) is the perfect vehicle for a variety of flavors and ingredients.

For these reasons, it's the perfect "pack & ship" cookie for family and friends who don't live close by.

I've tried a wide variety of biscotti recipes, and have now narrowed my favorites down to two (which are both from epicurious.com): cranberry & pistachio and double chocolate walnut. I love both of these recipes as they are not overly sweet, crispy/crunchy in texture, easy and unfussy to bake, and loved by everyone who tries them! :)

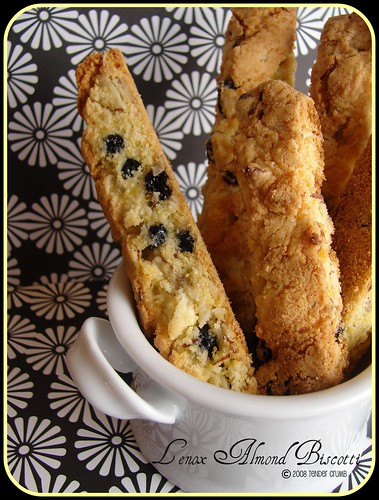
"Lenox" in the recipe title refers to the NYC restaurant from where Dorie obtained this recipe. The recipe looks like your typical biscotti recipe, except for the unusual addition of cornmeal. I decided to make the recipe as written, and folded in 1/2 cup of dried wild blueberries (from Trader Joes) along with the almonds.
So, what are my thoughts on the recipe? On the positive side, I liked the use of sliced almonds and I was pleasantly surprised by the crunchy texture that the cornmeal provided.

Speaking of slicing, I have a great tip to ensure pretty biscotti slices: when you take the cookie logs out after the first bake, spray the tops with H2O (or you can apply with a pastry brush) right before you slice them. This softens the top just enough, so the crust will not crumble when you cut into them, and you won't have jaggedy looking slices. Once they are baked a second time, the cookies will come out looking perfect and crunchy!

On the negative side, I had a couple of problems with the flavor and baking instructions. The cookies were too sweet for my taste (perhaps reducing the sugar to 2/3 cup would help) and the almond flavor was overwheming (next time, going to reduce the almond extract to 1/2 tsp). The baking times were also way off... the first baking time should have been much longer. The recipe calls for 15 minutes, but it took 30 minutes for my logs to bake through.

I'm going to try this recipe again, making the above adjustments. I don't think this will replace my go-to recipes, but I did find that the cornmeal provided and unexpected but enjoyable crunch and texture.
For the recipe, Gretchen has it on her site. To see how the other TWD bakers did, check out the blogroll.

Tuesday, October 7, 2008

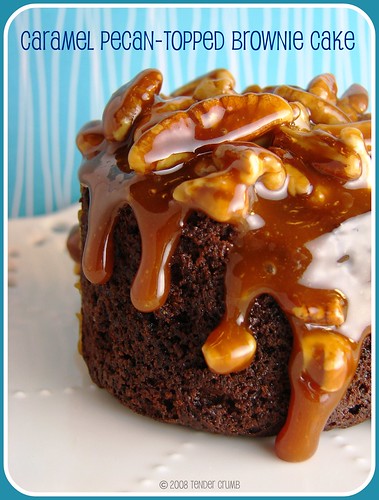
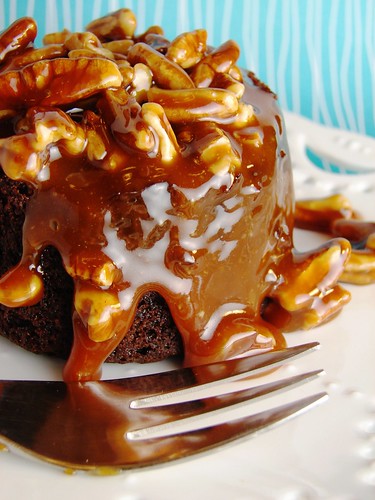
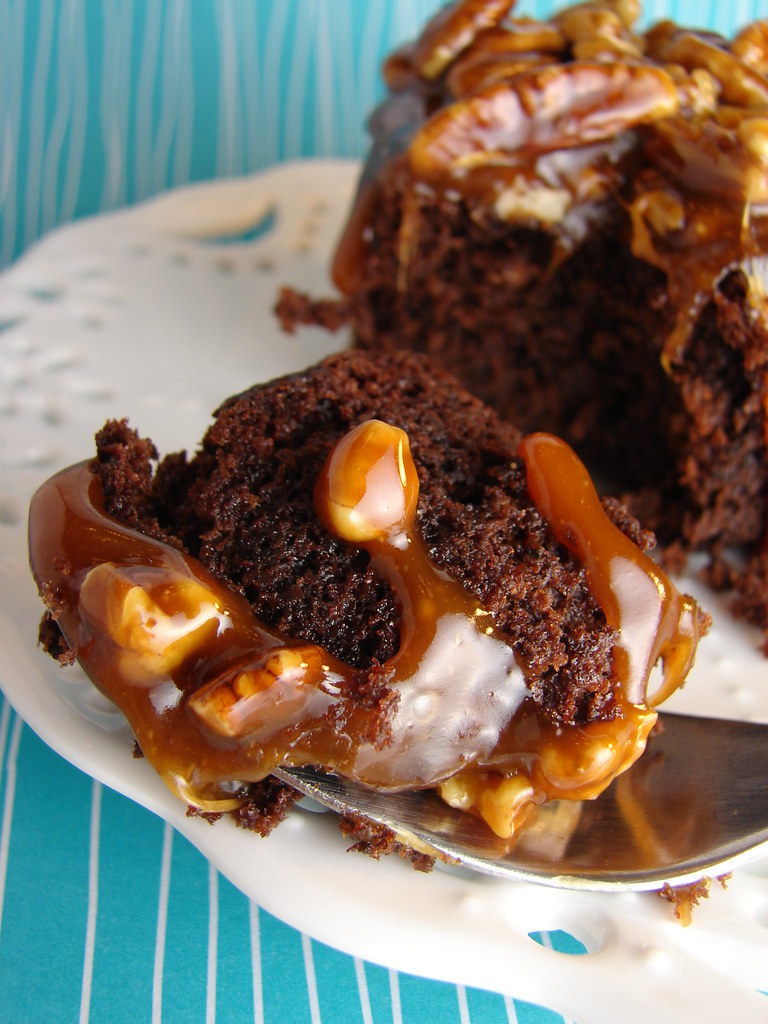
Caramel PECAN-Topped Brownie Cake (TWD)

Tammy from Wee Treats By Tammy made this terrific selection for this week's TWD baking exercise. Previously, I've made this cake on many occasions with great success during my PB (pre blogging) days, so I'm excited to finally have an opportunity to take pictures and write a post about this delicious cake. There is something so seductive about having a warm, gooey caramel sauce studded with nuts enveloping a moist, dense chocolate cake...oh my!!! You can't go wrong with this recipe!

My only variations from the original recipe:

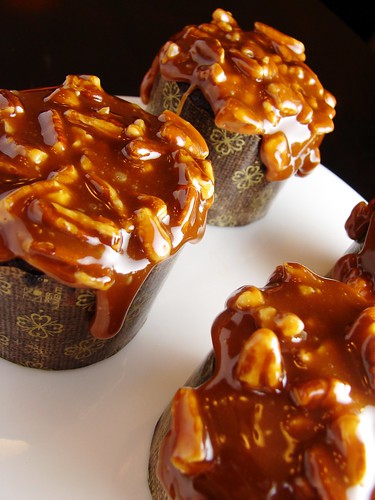
1.) Individual servings: I wondered how this recipe would hold up if there were made into individual cakes (I worry that the cake would come out too dry). For the individual servings I used 6 flat bottom baking cups (they look like mini panetone liners), and adjusted the baking time (325F for ~25 minutes):


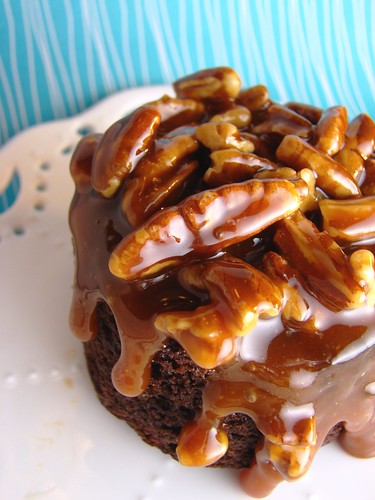
2.) Pecans: I usually go for the toasted chopped pecans instead of the peanuts. I prefer the taste and texture of pecans: 3.) Caramel sauce recipe quantity: As the caramel sauce recipe makes WAY more that you would need for a single cake, I cut that recipe in half.

I loved these little cakes!!! The cake itself was very moist (whew!), and they were a perfectly sized individual portions. This caramel sauce is wonderfully gooey and it makes for a terrific presentation if you pour the sauce over the cake as you serve it to your guests. The bonus on the the caramel --- it doesn't turn to a hard brittle when it cools.
If you'd like to make this yourself, Tammy has the recipe on her site. If you're lovin' this cake, check out more delicious versions of this recipe at the Tuesdays With Dorie blogroll.

Tuesday, August 19, 2008

Granola Grabbers (TWD)

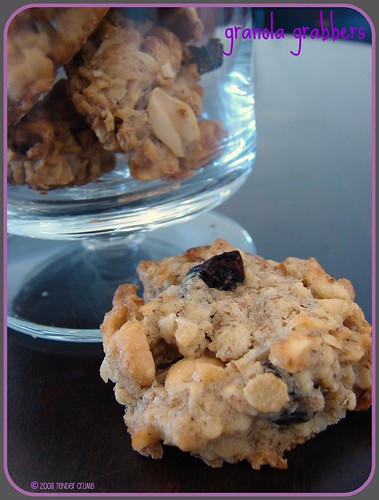
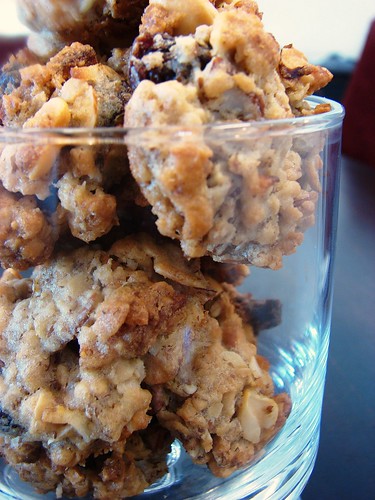
This week's Tuesdays With Dorie recipe, Granola Grabbers, was selected by Michele of Bad Girl Baking. At first glance, I was all excited about making a great healthy cookie recipe as it is chock full of grains, dried fruit and nuts. I guess I overlooked the the 14 tablespoons of butter, which eliminates the word "healthy" from this recipe. It's a cookie Linda, so get over it!

This recipe definitely begs to be played with, looking the wide variety of ingredients listed! I decided to make use of what was available in my pantry. I used Trader Joe's vanilla almond granola, and my substitutions included: flaxseed meal (instead of wheat germ), and a combination of dried apples and dried cherries (instead of raisins). As many of the bakers commented that the cookie was a bit sweet, I dialed back the amount of sugar, reducing the brown sugar to 1/2 cup and granulated sugar to 1/8 cup.
The resulting dough was really crumbly and dry. I would recommend that you press flat the balls of dough on the baking sheet (as Dorie instructs), as the dough does not spread much when baking in the oven (the cookies pictured here were pressed flat before baking).


What the cookie lacks in eye appeal definitely makes up for itself in taste and texture. I really enjoyed the crunch of the nuts and the chewy texture of the dried fruit. In many ways, this reminded me of an amped up oatmeal cookie.

Well, I'm going to stop writing now, as I need to enjoy more of these delicious gems with a cold glass of milk...nom, nom, nom, nom....

If you'd like to try this recipe out, it is available on Michelle's blog. To see how my fellow bakers fared, check out the Tuesday's With Dorie blogroll.

Sunday, June 29, 2008

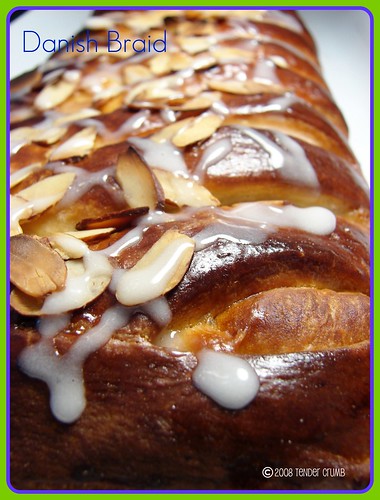
Danish Braid (DB)

Let's talk about rolling up my sleeves for my very first Daring Bakers challenge! For me, my goal in joining this fabulous baking group is to work with recipes that are typically out of my comfort zone. I was thrilled to see Danish Braid as this month's selection! I'll admit that I am the type to read these more complicated recipes, admire the pretty pictures, and make some excuse to not make the recipe. Now, I don't have an excuse! :)

Like making croissants and puff pastry, laminated dough is a time and labor intensive exercise. The first time I made croissants and puff pastry was in a pastry class this past winter, and I had to make both doughs one handed (I had broken my wrist a few weeks prior, so was in a cast....I finished a sweaty, floury mess, but the final baked items turned out pretty good! :)) I was happy to dive into this recipe...two handed!
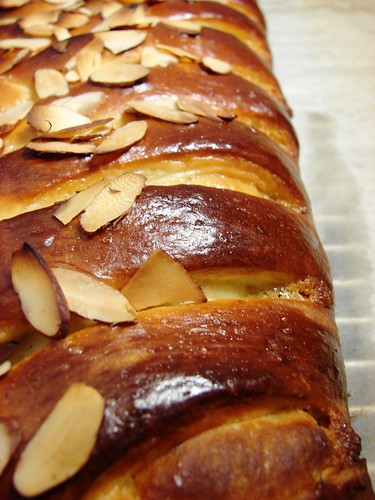
The trick is allocating enough time for the turns, resting and proofing. I started the dough Friday evening (the bonus is cooling temps to work with the dough) , finishing all four turns and preparing the filling before turning in for the evening. The next morning, I assembled the braid and baked it off. The beautiful thing about this recipe is that your hard work is rewarded with a GORGEOUS looking pastry that tastes better than anything you would find at the corner bakery.
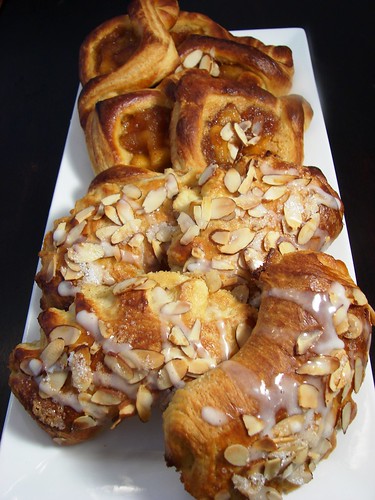
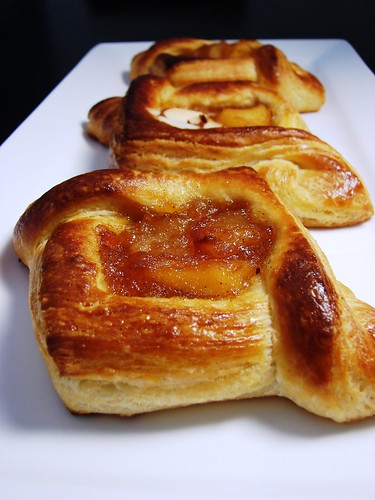
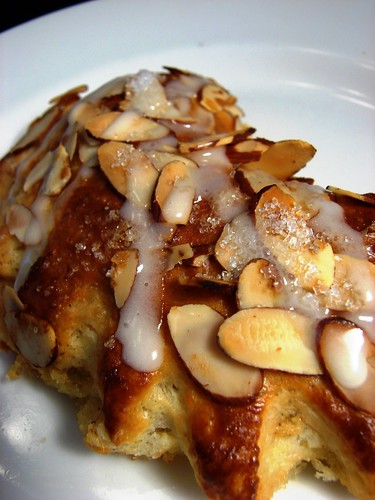
This recipe yielded enough dough for two braids. Instead of making a second braid, I opted to make some smaller pastries. With some of the dough, I made triangle twists and used the leftover apple mixture as the filling. I really love the beautiful shape, and the best part was that it was very easy to assemble!I also made bear claws, which was filled with a traditional remonce (almond filling)--- recipe is at the very end of this post). This was my absolute favorite pastry. The smell of the almond filling baking in the oven was intoxicating, and the pastry was light, fluffy and delicious.
~~~~~~~~~~~~~~~~~~~~~~~~~~~~~~
DANISH DOUGH
Makes 2-1/2 pounds dough

Ingredients

For the dough (Detrempe)
1 ounce fresh yeast or 1 tablespoon active dry yeast
1/2 cup whole milk
1/3 cup sugar
zest of 1 orange, finely grated
3/4 teaspoon ground cardamom
1-1/2 teaspoons vanilla extract
1/2 vanilla bean, split and scraped
2 large eggs, chilled
1/4 cup fresh orange juice
3 1/4 cups all-purpose flour
1 teaspoon salt

For the butter block (Beurrage)
1/2 pound (2 sticks) cold unsalted butter
1/4 cup all-purpose flour

DOUGH
- Combine yeast and milk in the bowl of a mixer fitted with the paddle attachment and mix on low speed. Slowly add sugar, orange zest, cardamom, vanilla extract, vanilla seeds, eggs, and orange juice. Mix well.
- Change to the dough hook and add the salt with the flour, 1 cup at a time, increasing speed to medium as the flour is incorporated. Knead the dough for about 5 minutes, or until smooth. You may need to add a little more flour if it is sticky.
- Transfer dough to a lightly floured baking sheet and cover with plastic wrap. Refrigerate for 30 minutes.
(Without a standing mixer: Combine yeast and milk in a bowl with a hand mixer on low speed or a whisk. Add sugar, orange zest, cardamom, vanilla extract, vanilla seeds, eggs, and orange juice and mix well. Sift flour and salt on your working surface and make a fountain. Make sure that the “walls” of your fountain are thick and even. Pour the liquid in the middle of the fountain. With your fingertips, mix the liquid and the flour starting from the middle of the fountain, slowly working towards the edges. When the ingredients have been incorporated start kneading the dough with the heel of your hands until it becomes smooth and easy to work with, around 5 to 7 minutes. You might need to add more flour if the dough is sticky.)

BUTTER BLOCK
- Combine butter and flour in the bowl of a mixer fitted with a paddle attachment and beat on medium speed for 1 minute. Scrape down the sides of the bowl and the paddle and then beat for 1 minute more, or until smooth and lump free. Set aside at room temperature.
- After the detrempe has chilled 30 minutes, turn it out onto a lightly floured surface. Roll the dough into a rectangle approximately 18 x 13 inches and ¼ inch thick. The dough may be sticky, so keep dusting it lightly with flour. Spread the butter evenly over the center and right thirds of the dough. Fold the left edge of the detrempe to the right, covering half of the butter. Fold the right third of the rectangle over the center third. The first turn has now been completed. Mark the dough by poking it with your finger to keep track of your turns, or use a sticky and keep a tally. Place the dough on a baking sheet, wrap it in plastic wrap, and refrigerate for 30 minutes.
- Place the dough lengthwise on a floured work surface. The open ends should be to your right and left. Roll the dough into another approximately 13 x 18 inch, ¼-inch-thick rectangle. Again, fold the left third of the rectangle over the center third and the right third over the center third. No additional butter will be added as it is already in the dough. The second turn has now been completed. Refrigerate the dough for 30 minutes.4. Roll out, turn, and refrigerate the dough two more times, for a total of four single turns. Make sure you are keeping track of your turns. Refrigerate the dough after the final turn for at least 5 hours or overnight. The Danish dough is now ready to be used. If you will not be using the dough within 24 hours, freeze it. To do this, roll the dough out to about 1 inch in thickness, wrap tightly in plastic wrap, and freeze. Defrost the dough slowly in the refrigerator for easiest handling. Danish dough will keep in the freezer for up to 1 month.

APPLE FILLING
Makes enough for two braids

Ingredients
4 Fuji or other apples, peeled, cored, and cut into ¼-inch pieces
1/2 cup sugar
1 tsp. ground cinnamon
1/2 vanilla bean, split and scraped
1/4 cup fresh lemon juice
4 tablespoons unsalted butter

Toss all ingredients except butter in a large bowl. Melt the butter in a sauté pan over medium heat until slightly nutty in color, about 6 - 8 minutes. Then add the apple mixture and sauté until apples are softened and caramelized, 10 to 15 minutes. If you’ve chosen Fujis, the apples will be caramelized, but have still retained their shape. Pour the cooked apples onto a baking sheet to cool completely before forming the braid. (If making ahead, cool to room temperature, seal, and refrigerate.) They will cool faster when spread in a thin layer over the surface of the sheet. After they have cooled, the filling can be stored in the refrigerator for up to 3 days. Left over filling can be used as an ice cream topping, for muffins, cheesecake, or other pastries.


DANISH BRAID
Makes enough for 2 large braids

Ingredients
1 recipe Danish Dough (see above)
2 cups apple filling, jam, or preserves (see above)
egg wash (1 large egg, plus 1 large egg yolk)

- Line a baking sheet with a silicone mat or parchment paper. On a lightly floured surface, roll the Danish Dough into a 15 x 20-inch rectangle, ¼ inch thick. If the dough seems elastic and shrinks back when rolled, let it rest for a few minutes, then roll again. Place the dough on the baking sheet.
- Along one long side of the pastry make parallel, 5-inch-long cuts with a knife or rolling pastry wheel, each about 1 inch apart. Repeat on the opposite side, making sure to line up the cuts with those you’ve already made.
- Spoon the filling you’ve chosen to fill your braid down the center of the rectangle. Starting with the top and bottom “flaps”, fold the top flap down over the filling to cover. Next, fold the bottom “flap” up to cover filling. This helps keep the braid neat and helps to hold in the filling. Now begin folding the cut side strips of dough over the filling, alternating first left, then right, left, right, until finished. Trim any excess dough and tuck in the ends.
- Egg Wash: Whisk together the whole egg and yolk in a bowl and with a pastry brush, lightly coat the braid.

Proofing and Baking
- Spray cooking oil onto a piece of plastic wrap, and place over the braid.
- Proof at room temperature or, if possible, in a controlled 90 degree F environment for about 2 hours, or until doubled in volume and light to the touch.
- Near the end of proofing, preheat oven to 400 degrees F. Position a rack in the center of the oven.3. Bake for 10 minutes, then rotate the pan so that the side of the braid previously in the back of the oven is now in the front. Lower the oven temperature to 350 degrees F, and bake about 15-20 minutes more, or until golden brown.
- Cool and serve the braid either still warm from the oven or at room temperature. The cooled braid can be wrapped airtight and stored in the refrigerator for up to 2 days, or freeze for 1 month.
~~~~~~~~~~~~~~~~~~~~~~~~~~~~~~~~~~~~~~~
Remonce (Almond Cream Filling)
Adapted from The Pie and Pastry Bible by Rose Levy Beranbaum

Ingredients
3 tbsp almond paste
1/4 C + 1 1/2 tsp sugar
4 tbsp butter
1 egg, room temp and slightly beaten
1/2 tsp vanilla
1 tbsp + 1 1/2 tsp flour

In a food processor, pulse together the almond paste and sugar until it looks like wet sand. Add butter and pulse 3-4 times until incorporated. Add the egg, vanilla, and flour and pulse just until incorporated. It will be a soft cream. Place in a piping bag and refrigerated until it is used (otherwise it may ooze from the pastry when baking)
Sunday, May 4, 2008

Peanut Butter Torte (TWD)


This week's TWD selection comes from Elizabeth
at Ugg Smell Food. I will be very honest...I am not a huge fan of peanut butter desserts. Don't get me wrong, as I'm not a hater of peanut butter. I love eating PB&J sandwiches and enjoy slathering PB on apples, but I've never developed a fondness of PB cakes, pies, cookies, candy, ice cream etc (strange isn't it?). I've never tried a PB mousse, so I'm giving PB based desserts one more try.


Instead of a 9" springform pan, I used a 7" and two 4" springform pans(showing only one of the mini tortes here).


The recipe was uncomplicated and the torte came together very quickly. I made the following tweaks to the original receipe:

- increase the quantity of oreos (the recipe asked for 24 - I used 30)
- increase the amount of mini chips (the recipe called for 1/2 C - I used 1 C).
- reduced the amount of sugar in the mousse (the recipe called for 1 1/4 C - I used 1 C


For the larger torte, I didn't pull the crust all the way up the side of the pan, as I wanted to show off the decadent mousse.


Overall, the texture of the cold fluffy mousse really helped to offset the heaviness and richness of the peanut butter. The mousse was a nice, creamy, slightly salty contrast to the sweet crunchy crust. This is a wonderful recipe, and this is definitely one to repeat for my PB lovin' friends....and for me!

Peanut Butter Torte
From Baking From My Home to Yours, By Dorie Greenspan

Ingredients
1 ¼ c. finely chopped salted peanuts (for the filling, crunch and topping)
2 teaspoons sugar
½ teaspoon instant espresso powder (or finely ground instant coffee)
¼ teaspoon ground cinnamon
Pinch of freshly grated nutmeg
½ c. mini chocolate chips (or finely chopped semi sweet chocolate)
24 Oreo cookies, finely crumbed or ground in a food processor or blender
½ stick (4 tablespoons) unsalted butter, melted and cooled
Small pinch of salt
2 ½ c. heavy cream
1 ¼ c confectioners’ sugar, sifted
12 ounces cream cheese, at room temperature
1 ½ c salted peanut butter – crunchy or smooth (not natural; I use Skippy)
2 tablespoons whole milk
4 ounces bittersweet chocolate finely chopped


Getting ready:
Center a rack in the oven and preheat the oven to 350°F. Butter a 9-inch Springform pan and place it on a baking sheet lined with parchment or a silicone mat.
Toss ½ cup of the chopped peanuts, the sugar, espresso powder, cinnamon, nutmeg and chocolate chops together in a small bowl. Set aside.
Put the Oreo crumbs, melted butter and salt in another small bowl and stir with a fork just until crumbs are moistened. Press the crumbs evenly over the bottom and up the sides of the spring form pan (they should go up about 2 inches on the sides). Freeze the crust for 10 minutes.
Bake the crust for 10 minutes, then transfer it to a rack and let it cool completely before filling.
Working with a stand mixer fitted with the whisk attachment or with a hand mixer in a large bowl, whip 2 cups of the cream until it holds medium peaks. Beat in ¼ cup of the confectioners’ sugar and whip until the cream holds medium-firm peaks. Crape the cream into a bowl and refrigerate until needed.
Wipe out (do not wash) the bowl, fit the stand mixer with the paddle attachment if you have one, or continue with the hand mixer, and beat the cream cheese with the remaining 1 cup confectioners’ sugar on medium speed until the cream cheese is satiny smooth. Beat in the peanut butter, ¼ cup of the chopped peanuts and the milk.
Using a large rubber spatula, gently stir in about one quarter of the whipped cream, just to lighten the mousse. Still working with the spatula, stir in the crunchy peanut mixture, then gingerly fold in the remaining whipped cream.
Scrape the mouse into the crust, mounding and smoothing the top. Refrigerate for at least 4 hours, or overnight; cover with plastic wrap as soon as the mousse firms.

To Finish The Torte:
Put the chopped chocolate in a heatproof bowl and set the bowl over a saucepan of simmering water. Leave the bowl over the water just until the chocolate softens and starts to melt, about 3 minutes; remove the bowl from the saucepan.
Bring the remaining ½ cup cream to a full boil. Pour the cream over the chocolate and , working with a a rubber spatula, very gently stir together until the ganache is completely blended and glossy.
Pour the ganache over the torte, smoothing it with a metal icing spatula. Scatter the remaining ½ cup peanuts over the top and chill to set the topping, about 20 minutes.
When the ganache is firm, remove the sides of the Springform pan; it’s easiest to warm the pan with a hairdryer, and then remove the sides, but you can also wrap a kitchen towel damped with hot water around the pan and leave it there for 10 seconds. Refrigerate until ready to serve.
Blog Widget by LinkWithin