 In my prior TWD post for Pecan Honey Sticky Buns, I mentioned a different technique for making brioche dough, which I will share here. I recently completed a terrific 10 week pro-baking course at a local cooking school, New School of Cooking. I was thrilled to find out that we would be learning how to make brioche during one of the weeks. As we started assembling our ingredients and brought out the kitchen aid mixers, I was very surprised to see that we would be using the PADDLE attachment instead of the dough hook to mix the dough. I really like this technique as it doesn't force my poor hardworking kitchen aid mixer into overdrive! Here are the quick instructions to making the dough (any recipe can be used, but the basic technique is the same):
- combine warm water/milk and yeast, and allow for yeast to dissolve
- add dry ingredients (flour, sugar, salt) and mix to combine
- 0nce the mixture starts looking lumpy, add eggs one at a time. Once all eggs are added, turn mixer up to low/medium and mix for approx 5 minutes. The purpose of this is to extract all the gluten out of the flour. Contrary to what I've read in cookbooks, we were told to mix at a lower speed as you don't want to aerate the dough. At the end of this mixing time, you want to see 1/2 of the mixture sticking to the sides of the bowl and the other 1/2 sticking to the paddle. You should see "strings" of dough stretching from the paddle to the side of the bowl. If the dough still clumps in the middle, add a little water to loosen.
- turn the mixer to low and add the butter to incorporate (takes me 2-3 minutes). Not overmixing is emphasized here, as overmixing will warm up the butter. - at this point, the dough should be very soft, but hold together with noticable elasticity
- proofing and baking instructions are similar to that in Dorie Greenspan's recipe.


Ideally, the brioche crumb should look tight and dense, like pound cake. As you can see here with all of the little air pockets and lack of a tight crumb, I was not successful in my handiwork this weekend. Still, trust me, as this technique has worked almost everytime for me.
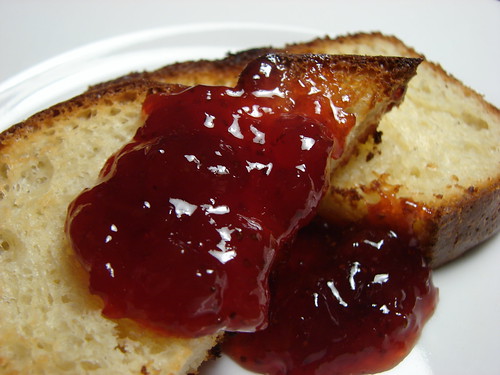
Regardless of technique, the taste of the final product was delicious. Thank you Dorie for another wonderful recipe!
6 comments:
beautiful brioche loaf! looks delish with the jam spread.
Always interesting when there is an alternate recipe! I'm glad it was yummy, and with jam it must be heaven!
I think your brioche loaf looks lovely and I'm going to try fooling around with the shapes next time too!
I definitely want to make brioche again, but I was afraid about overworking my poor mixer. Thanks for these tips on how to make the loaf a little easier (never would have thought a paddle attachment!).
I also have easier and much less butter laden brioche recipes to use than the Dorie one, no matter how nice it was. I really did feel almost uncomfortable eating it. Yours looks lovely - beautiful top. It's nice to do a baking course - I want to learn how to make a sour starter.
Post a Comment