Sunday, August 31, 2008

Chocolate Eclairs (DB)

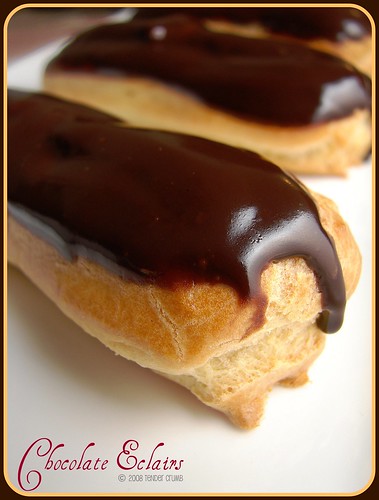
No one needed to twist my arm to participate in this month's Daring Baker's challenge --- ECLAIRS. The hosts, Meeta of What's for Lunch, Honey? and Tony Hahhan, selected one of my all time favorite pastries, and I was looking forward to trying a recipe from Pierre Herme, pastry chef extrordinaire.

I think most people never think of making eclairs, as it looks like it would take skill and effort to replicate the pastry at home. Surprisingly, this recipe is really straightforward and not time consuming. Once you get down making the choux and tinkering with baking time, these puffy treats are worth making at home.
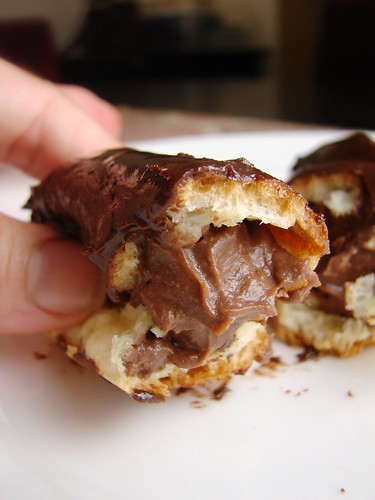
Once the choux is baked and cooled, now the fun begins...what do I fill them with? I decided to go with three pastry creams: chocolate, vanilla bean, and raspberry. I've heard many great things about Pierre Herme's chocolate pastry cream recipe, so had to go ahead and make the recipe (I did cut the recipe in half with no problem). Definitely use bittersweet, as it delivers a wonderfully intense chocolate punch! For the vanilla and raspberry creams, I used a basic pastry cream recipe, and enhanced the cream with vanilla bean and chambord.
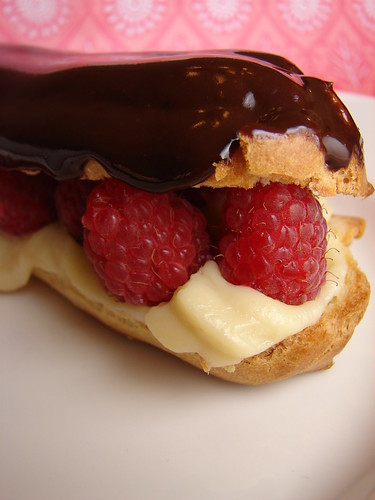
The chocolate and vanilla bean creams were piped into the choux (no slicing needed, just poke a small hole in the choux and pipe the pastry... the holes have been covered by the chocolate glaze). To complement the charmbord cream, I sliced the choux in half and stuffed it with the cream and fresh raspberries.

The results were unbelievably delicious, and I wholeheartedly recommend the Pierre Herme recipe. To see the delicious creations of the other DB'ers, check out the blogroll.
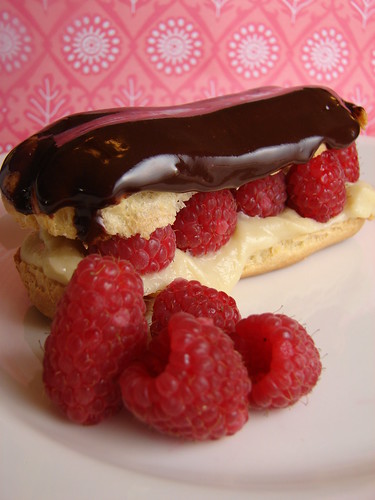
Pierre Hermé’s Chocolate Éclairs
Recipe from Chocolate Desserts by Pierre Hermé
(makes 20-24 Éclairs)•

Cream Puff Dough (see below for recipe), fresh and still warm

1) Preheat your oven to 375 degrees F (190 degrees C). Divide the oven into thirds bypositioning the racks in the upper and lower half of the oven. Line two baking sheets withwaxed or parchment paper.
2) Fill a large pastry bag fitted with a 2/3 (2cm) plain tip nozzle with the warm cream puff dough.Pipe the dough onto the baking sheets in long, 4 to 41/2 inches (about 11 cm) chubby fingers.Leave about 2 inches (5 cm) space in between each dough strip to allow them room to puff.The dough should give you enough to pipe 20-24 éclairs.
3) Slide both the baking sheets into the oven and bake for 7 minutes. After the 7 minutes, slip thehandle of a wooden spoon into the door to keep in ajar. When the éclairs have been in theoven for a total of 12 minutes, rotate the sheets top to bottom and front to back. Continuebaking for a further 8 minutes or until the éclairs are puffed, golden and firm. The total bakingtime should be approximately 20 minutes.

Notes:
1) The éclairs can be kept in a cool, dry place for several hours before filling.

Assembling the éclairs:•
Chocolate glaze (see below for recipe)•
Chocolate pastry cream (see below for recipe)

1) Slice the éclairs horizontally, using a serrated knife and a gently sawing motion. Set aside thebottoms and place the tops on a rack over a piece of parchment paper.
2) The glaze should be barely warm to the touch (between 95 – 104 degrees F or 35 – 40degrees C, as measured on an instant read thermometer). Spread the glaze over the tops ofthe éclairs using a metal icing spatula. Allow the tops to set and in the meantime fill thebottoms with the pastry cream.
3) Pipe or spoon the pastry cream into the bottoms of the éclairs. Make sure you fill the bottomswith enough cream to mound above the pastry. Place the glazed tops onto the pastry creamand wriggle gently to settle them.

Notes:
1) If you have chilled your chocolate glaze, reheat by placing it in a bowl over simmering water,stirring it gently with a wooden spoon. Do not stir too vigorously as you do not want to createbubbles.
2) The éclairs should be served as soon as they have been filled.

Pierre Hermé’s Cream Puff Dough
Recipe from Chocolate Desserts by Pierre Hermé
(makes 20-24 Éclairs)•

½ cup (125g) whole milk•
½ cup (125g) water•
1 stick (4 ounces; 115g) unsalted butter, cut into 8 pieces•
¼ teaspoon sugar•
¼ teaspoon salt•
1 cup (140g) all-purpose flour•
5 large eggs, at room temperature

1) In a heavy bottomed medium saucepan, bring the milk, water, butter, sugar and salt to theboil.
2) Once the mixture is at a rolling boil, add all of the flour at once, reduce the heat to mediumand start to stir the mixture vigorously with a wooden spoon. The dough comes together veryquickly. Do not worry if a slight crust forms at the bottom of the pan, it’s supposed to. Youneed to carry on stirring for a further 2-3 minutes to dry the dough. After this time the doughwill be very soft and smooth.
3) Transfer the dough into a bowl of a mixer fitted with the paddle attachment, or using yourhandmixer or if you still have the energy, continue by hand. Add the eggs one at a time,beating after each egg has been added to incorporate it into the dough.You will notice that after you have added the first egg, the dough will separate, once again donot worry. As you keep working the dough, it will come back all together again by the time youhave added the third egg. In the end the dough should be thick and shiny and when lifted itshould fall back into the bowl in a ribbon.
4) The dough should be still warm. It is now ready to be used for the éclairs as directed above.

Notes:
1) Once the dough is made you need to shape it immediately.
2) You can pipe the dough and the freeze it. Simply pipe the dough onto parchment-lined bakingsheets and slide the sheets into the freezer. Once the dough is completely frozen, transfer thepiped shapes into freezer bags. They can be kept in the freezer for up to a month.

Chocolate Pastry Cream
Recipe from Chocolate Desserts by PierreHermé

2 cups (500g) whole milk•
4 large egg yolks•
6 tbsp (75g) sugar•
3 tablespoons cornstarch, sifted•
7 oz (200g) bittersweet chocolate, preferably Velrhona Guanaja, melted•
2½ tbsp (1¼ oz: 40g) unsalted butter, at room temperature

1) In a small saucepan, bring the milk to a boil. In the meantime, combine the yolks, sugar and cornstarch together and whisk in a heavy‐bottomed saucepan.
2) Once the milk has reached a boil, temper the yolks by whisking a couple spoonfuls of the hot milk into the yolk mixture.Continue whisking and slowly pour the rest of the milk into the tempered yolk mixture.
3) Strain the mixture back into the saucepan to remove any egg that may have scrambled. Place the pan over medium heat and whisk vigorously (without stop) until the mixture returns to a boil. Keep whisking vigorously for 1 to 2 more minutes (still over medium heat).Stir in the melted chocolate and then remove the pan from the heat.
4) Scrape the pastry cream into a small bowl and set it in an ice‐water bath to stop the cooking process. Make sure to continue stirring the mixture at this point so that it remains smooth.
5) Once the cream has reached a temperature of 140 F remove from the ice‐water bath and stir in the butter in three or four installments. Return the cream to the ice‐water bath to continue cooling, stirring occasionally, until it has completely cooled. The cream is now ready to use or store in the fridge.

Notes:
1) The pastry cream can be made 2-3 days in advance and stored in the refrigerator.
2) In order to avoid a skin forming on the pastry cream, cover with plastic wrap pressed onto the cream.
3) Tempering the eggs raises the temperature of the eggs slowly so that they do not scramble.

Chocolate Glaze
Recipe from Chocolate Desserts by Pierre Hermé
(makes 1 cup or 300g)•

1/3 cup (80g) heavy cream •
3½ oz (100g) bittersweet chocolate, finely chopped•
4 tsp (20 g) unsalted butter, cut into 4 pieces, at room temperature•
7 tbsp (110 g)
Chocolate Sauce (recipe below), warm or at room temperature

1)In a small saucepan, bring the heavy cream to a boil. Remove from the heat and slowly begin to add the chocolate, stirring with a wooden spoon or spatula.
2) Stirring gently, stir in the butter, piece by piece followed by the chocolate sauce.

Notes:
1) If the chocolate glaze is too cool (i.e. not liquid enough) you may heat it briefly
 in the microwave or over a double boiler. A double boiler is basically a bowl sitting over (not touching) simmering water.
2) It is best to glaze the eclairs after the glaze is made, but if you are pressed for time, you can make the glaze a couple days ahead of time, store it in the fridge and bring it up to the proper temperature (95 to 104 F) when ready to glaze.

Chocolate Sauce
Recipe from Chocolate Desserts by Pierre Hermé
(makes 1½ cups or 525 g)•

4½ oz (130 g) bittersweet chocolate, finely chopped •
1 cup (250 g) water•
½ cup (125 g) crème fraîche, or heavy cream •
1/3 cup (70 g) sugar

1) Place all the ingredients into a heavy‐bottomed saucepan and bring to a boil, making sure to stir constantly. Then reduce the heat to low and continue stirring with a wooden spoon until the sauce thickens.
2) It may take 10‐15 minutes for the sauce to thicken, but you will know when it is done when it coats the back of your spoon.

Notes:
1) You can make this sauce ahead of time and store it in the refrigerator for two weeks. Reheat the sauce in a microwave oven or a double boiler before using.
2) This sauce is also great for cakes, ice-cream and tarts.
Tuesday, August 26, 2008

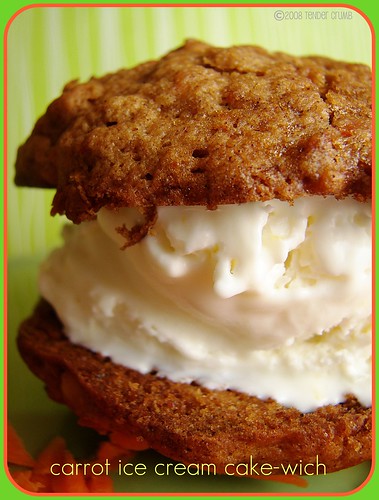
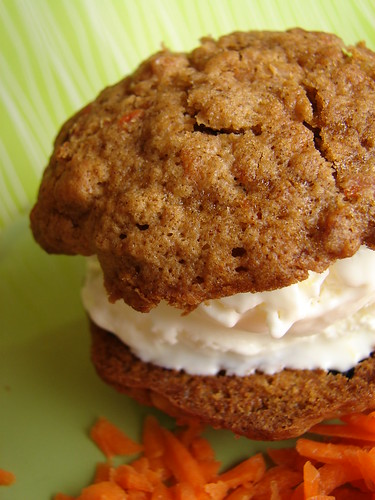
Carrot Ice Cream Cake-wich

Call me a bit obsessed...it's been a kick taking my favorite cakes and transforming them into portable ice cream creations. After having success with my red velvet ice cream sandwiches, I turned to riff on another favorite cake of mine---carrot cake! I had more than enough cheesecake ice cream leftover and thought that it act as the perfect foil for a moist cookie that incorporated all of the elements of carrot cake. The cookie recipe was adapted from epicurious, and I've made and enjoyed this soft chewy cookie on its own on more than one occasion. The experience of pairing this moist, cakey cookie with the tart, creamy ice cream --- pure heaven!
The ice cream recipe can be found on my red velvet post.

Carrot Cake Cookies
adapted from epicurious.com
makes approx 24 cookies

Ingredients
1 1/8 cups all-purpose flour
1 tsp cinnamon
1/4 tsp nutmeg
1/4 tsp cloves
1/2 tsp baking soda
1/2 tsp salt
1/2 cup unsalted butter, softened
1/3 cup packed light brown sugar
1/3 cup granulated sugar
1 large egg
1/2 teaspoon vanilla
1 cup coarsely grated carrots
1/2 cup chopped walnuts
1/2 cup sweetened shredded coconut
1/2 cup raisins

Directions
- preheat oven to 375°F.
- line 2 baking sheets with parchment.
- whisk together flour, spices, baking soda, and salt in a bowl.
- beat together butter, sugars, egg, and vanilla in a bowl with an electric mixer at medium speed until pale and fluffy, about 2 minutes.
- mix in carrots, nuts, coconut and raisins at low speed, then add flour mixture and beat until just combined.
- drop 1 1/2 tablespoons batter per cookie 2 inches apart on baking sheets and bake, switching position of sheets halfway through baking, until cookies are lightly browned and springy to the touch, 12 to 16 minutes total. Cool cookies on sheets on racks 1 minute, then transfer cookies to racks to cool completely

Sunday, August 24, 2008

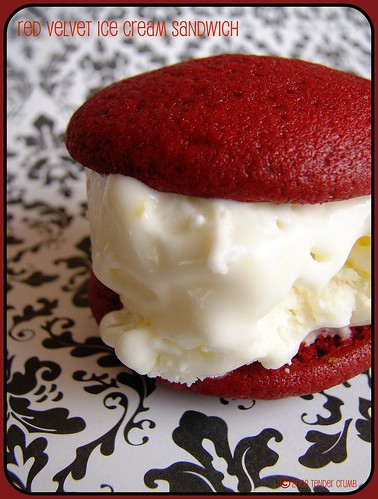
Red Velvet Ice Cream Sandwiches

Don't ask me why, I've recently been obsessing over ice cream sandwiches. During my undergrad days at UCLA, my friends and I would take study breaks and head into Westwood to Diddy Reese for their yummy homemade ice cream sandwiches (gee, and I wondered all that time how the hell I gained 15 pounds my freshman year). The fun of this experience was creating your own cookie/ice cream combo --- my favorite was white chocolate macadamia w. strawberry ice cream (sounds strange, but it was delish). The bonus was that this delicious treat was only $1 (and no, this isn't a typo) --- perfect for a student budget. Mind you, this was many moons ago, but today Diddy Reese is still staying strong in the ever changing retail landcape of Westwood, and they are still making those lovely ice cream sandwich treats for only $1.50.

I don't make it into Westwood as often as I'd like (well, until UCLA basketball season starts - Go Bruins!), so Diddy Reese is a bit out of reach for me. I wanted to recreate these treats at home, but do something with a little twist. I've been craving red velvet lately, so why not kill two birds w. one stone.

I 'm reluctant to admit this, but the red velvet cookie base was based on a recipe by Rachel Ray. Love her or hate her, she's here to stay. I've never bothered with her cooking show or books (RR is now working on a petfood line...i'm not sure if I really needed to know that), so this would be a first to try one of her recipes. The cookies sandwich a rich, homemade cheesecake ice cream. This was a terrific treat, as it has all of the flavors of red velvet cake, complemented by the tangy, cool and creamy ice cream.


Red Velvet Cookies
adapted from Every Day w. Rachel Ray
makes approx 20 cookies for 10 ice cream sandwiches

Ingredients
1 1/4 cups flour
1 1/2 tbsn unsweetened cocoa powder
1/2 tsp baking soda
1/2 tsn salt
5 tbsp unsalted butter, at room temperature
3/4 cup granulated sugar
1 large egg
1 tbsn red food coloring
1 1/2 tsp pure vanilla extract
1/2 cup buttermilk

Directions
1. Preheat the oven to 350°. Line a baking sheet with parchment paper. In a medium bowl, sift together the flour, cocoa, baking soda and salt.
2. Using a mixer, beat butter with the granulated sugar until fluffy, 3 minutes. Beat in the egg, food coloring and 1 teaspoon vanilla. Beat in the flour mixture alternately with the buttermilk until smooth.
3. Place 1/4-cup scoops of batter 2 inches apart on the prepared baking sheet; spread out. Bake until a toothpick inserted in the center comes out dry, 12 to 15 minutes. Let the cookies sit for 5 minutes, then transfer to a rack to cool.

Cheesecake Ice Cream
adapted from The Perfect Scoop by David Lebovitz

Ingredients
8 oz cream cheese
2/3 cup sour cream
1/2 cup half and half
2/3 cup sugar
zest of half a lemon
1 tsp vanilla extract
2 tbsp vodka (optional: helps ice cream from getting too hard in the freezer)
pinch of salt

Directions
1. Combine all of the ingredients in food processor and puree until smooth
2. Chill mixture in the frig, and then freeze in an ice cream maker

Ice Cream Sandwich Assembly
1. pull ice cream from freezer and allow to soften slightly at room temp
2. place a 2oz scoop of ice cream on one cookie. place another cookie on top and press slightly to sandwich together. Optional: press chopped pecans into the exposed ice cream.
3. wrap individuals sandwiches in plastic wrap and freeze until ready to serve.

Tuesday, August 19, 2008

Granola Grabbers (TWD)

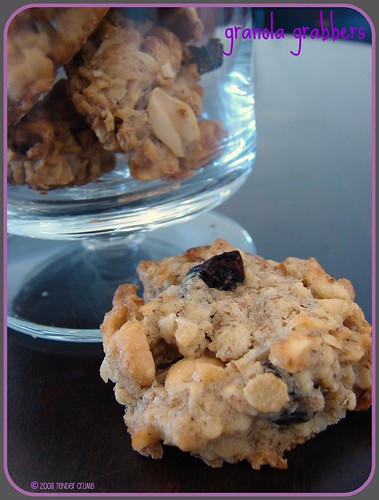
This week's Tuesdays With Dorie recipe, Granola Grabbers, was selected by Michele of Bad Girl Baking. At first glance, I was all excited about making a great healthy cookie recipe as it is chock full of grains, dried fruit and nuts. I guess I overlooked the the 14 tablespoons of butter, which eliminates the word "healthy" from this recipe. It's a cookie Linda, so get over it!

This recipe definitely begs to be played with, looking the wide variety of ingredients listed! I decided to make use of what was available in my pantry. I used Trader Joe's vanilla almond granola, and my substitutions included: flaxseed meal (instead of wheat germ), and a combination of dried apples and dried cherries (instead of raisins). As many of the bakers commented that the cookie was a bit sweet, I dialed back the amount of sugar, reducing the brown sugar to 1/2 cup and granulated sugar to 1/8 cup.
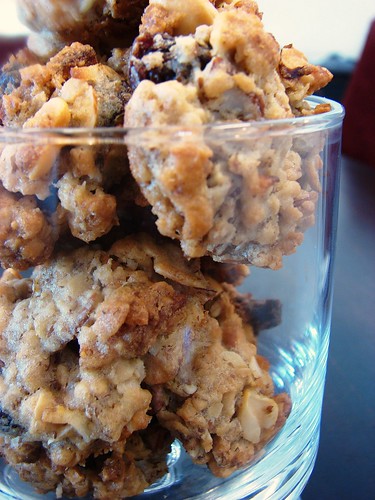
The resulting dough was really crumbly and dry. I would recommend that you press flat the balls of dough on the baking sheet (as Dorie instructs), as the dough does not spread much when baking in the oven (the cookies pictured here were pressed flat before baking).


What the cookie lacks in eye appeal definitely makes up for itself in taste and texture. I really enjoyed the crunch of the nuts and the chewy texture of the dried fruit. In many ways, this reminded me of an amped up oatmeal cookie.

Well, I'm going to stop writing now, as I need to enjoy more of these delicious gems with a cold glass of milk...nom, nom, nom, nom....

If you'd like to try this recipe out, it is available on Michelle's blog. To see how my fellow bakers fared, check out the Tuesday's With Dorie blogroll.

Tuesday, August 12, 2008

Blueberry Sour Cream Ice Cream Sandwich (TWD)

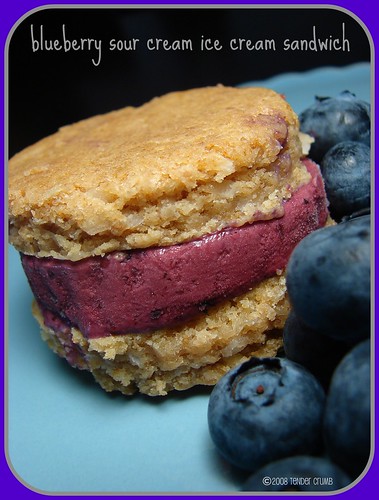
If you haven't figured out by now, I LOVE making homemade ice cream! I was thrilled to see that we had ice cream slated for this week's Tuesdays With Dorie. Selected by Dolores at Chronicles in Culinary Curiousity, this recipe for blueberry sour cream ice cream sounded like a perfect summer treat. This recipe was really simple to prepare, as all you need to do is cook & puree the berries, mix in a combination of heavy cream and sour cream, chill and churn. I love this recipe as there were no eggs to temper...yippeee! I went with fresh blueberries, as my local markets are overflowing with them. I also went ahead and added twice the amount of lemon juice (really dig the tart flavor). Once assembled and frozen, I took a little taste test (okay, twist my arm! ;) )...YUM!!! Great thick, creamy texture, beautiful purplish/bluish hue, and a nice tangy flavor that comes from the sour cream. In many ways, this tasted like a frozen blueberry cheesecake filling.With cheesecake in mind, I decide to play with the recipe and made mini ice cream sandwiches. I paired the ice cream with a ridiculously easy graham cracker based cookie (the original recipe and my adaptation notes are below). To make these sandwiches, pour the just churned icecream into a 8x8 dish (or a loaf pan---that's what I used here) and freeze to set.

Graham Cookies
makes approx 24 cookies

1 1/2 C graham cracker crumbs (I pulverized my in a food processor)
1/2 C flour
2 tsp baking powder
1 14 oz can sweetened condensed milk
1/2 C butter, softened
1 C shredded coconut
2 C chocolate chips/nuts (if omitting completely, as I did here, up the flour by 1/2 C)

- Preheat oven to 350 degrees.
- Mix the graham cracker crumbs, flour and baking powder in a bowl to combine
- Incoporate the butter and condensed milk until combined
- Fold in the shredded coconut (and choc chips and nuts, if using)
- Drop dough by the teaspoon and bake until nice and browned - 8-10 minutes.

For the sandwich recipe, halve the recipe and spread the dough onto an 9x13" pan or 1/4 sheet pan lined with parchment (very important as the dough is extremely sticky). Bake at 350 for approx 18-22 minutes, until the top is nice and golden brown. Note: I used an 8x8 pan for the cookies shown here, and the cookies came out a bit thicker than I would have liked. If you like thicker cookies, this should fit the bill; if you like your cookies thinner, definitely go with a larger pan.

I cut the cookies and ice cream using a fluted round cookie cutter, assembled the sandwiches, and placed the finished sandwiches in the freezer to set. Keep in mind that the ice cream needs to be frozen solid when assembling the sandwiches and you need to work quickly, or you will end up with a melting mess.

These mini cheesecake ice cream sandwiches tasted fantastic (it's another story on how these little guys looked :( ). The ice cream was the highlight in this treat, and this recipe will definitely be flagged for a repeat!

For the receipe, please head over to Dolores' blog. To see what everyone else churned, check out the TWD blogroll.

Tuesday, August 5, 2008

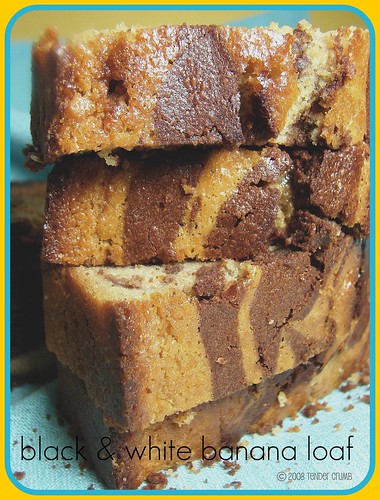
Black & White Banana Loaf (TWD)

It's that time again...this week's Tuesday's With Dorie recipe, Black & White Banana Loaf, was selected by Ashlee of A Year In The Kitchen.

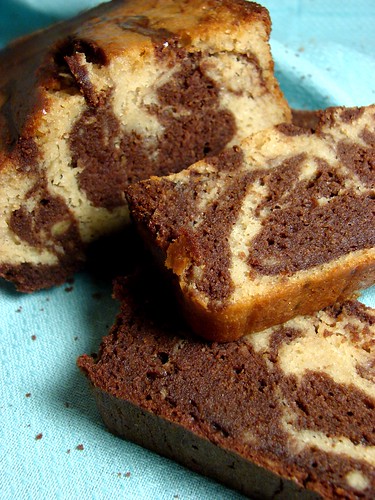
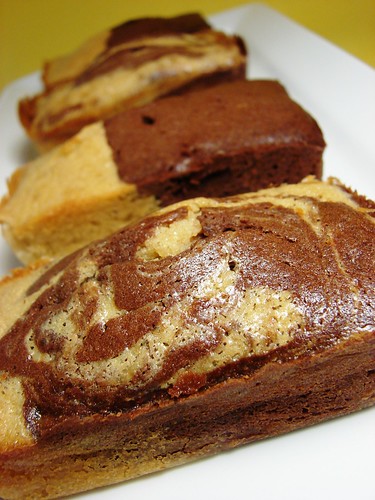
I'd like to make a confession...when I first purchased BFMHTY last year, this was one of the first recipes that I tried out...and what a disappointment...it was a big disaster! I always thought that breads & cakes made with bananas were always forgiving, but this one decided not to cooperate. I'm not sure what went wrong, but the loaf turned out really dense and gummy in the middle. I ended up throwing out the entire loaf, as it was pretty inedible. I almost sat this week out, as I wasn't interested in repeating that fiasco again. Still, in the spirit of the group, I decided to give this recipe one more try. I really wanted this try to be a success, as the desciption of this spiced banana-ey loaf marbled with chocolate was too good!! To avoid the gummy mess I created the last time, I used a smaller 8x4x2 loaf pan. As I had some batter left over, I also made four mini loaves. With the smaller pan sizes, I also decreased the baking time --- 50 minutes for the 8x4x2 pan, 17 minutes for the mini loaves. I didn't stray far from the ingredient list. The only exception was the dark rum...as I didn't have in the house, I substituted it with creme de banana liqueur.

So, how does this try compare to my last attempt? This time around, the texture was a huge improvement over the last try, but I have to admit, there was a moistness and a spongy texture that really turned me off (and trust me, these loaves were baked thru and thru). I ended up toasting a slice to "crisp" it up a bit... a little better, but not quite to my liking.

The mini loaves looked adorable, but fell victim to the same texture issue. Maybe it's just me, but this recipe will not cooperate in my hands. I hate to cry uncle, but I won't be repeating this recipe...sorry Dorie, this recipe doesn't do it for me.

Hopefully, my talented fellow bakers fared better than me. To see how they all did, check out the TWD blogroll. If you'd like to try this recipe out, please check out Ashlee's blog.

Sunday, August 3, 2008

Now You Can Drink Your Cupcake...

This weekend, I found this at Cost Plus World Market...surprisingly, a really drinkable red wine, and at $10.99 it doesn't hurt the pocketbook!
Blog Widget by LinkWithin