Saturday, December 6, 2008

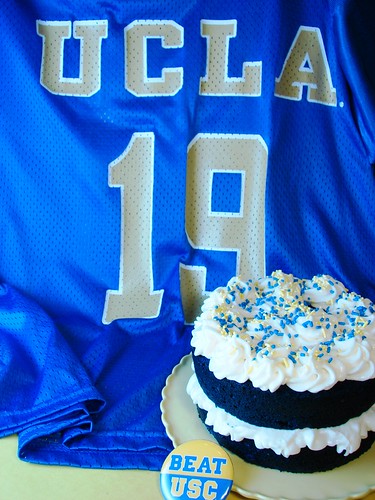
Bruin Blue Velvet Cake

GO BRUINS!!!

It's that time of year to resurrect the crosstown rivalry between the UCLA Bruins and the Trojans of USC. No one can deny that it's been a pretty tough go for the Bruin football program these days. Being a diehard UCLA alum and fan, I'm hoping to witness another upset ala 2006 ---- sure, another upset is a longshot, but don't count us out! This afternoon, I'm armed with the remote in hand and a nice bottle of wine by my side to take the edge off.
My fellow food blogging Bruins Mary aka The Food Librarian and Clara of I Heart Food For Thought are hosting a virtual tailgating party to mark the occassion. Make sure to go check out what these two baking divas concocted to show their school spirit!

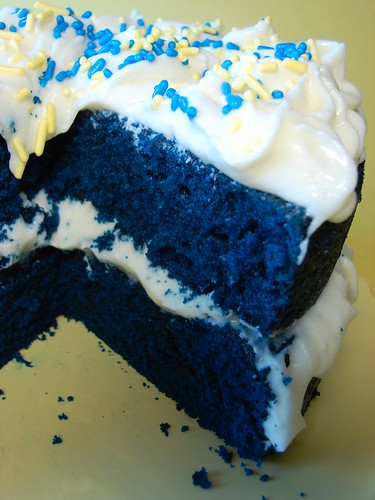
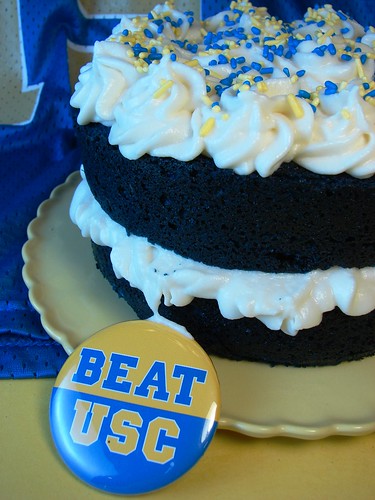
My contribution --- a Bruin Blue Velvet Cake. This is essentially my tried and true red velvet cake recipe, with blue food coloring substituting the traditional red.

BTW, sorry about the picture quality for this post...had some serious equipment issues, and the colors didn't come out as vibrant as they should. Trust me, the cake had a total unnatural blue hue!

Tuesday, December 2, 2008

Linzer Sables (TWD)

Tis the season...I LOVE this time of year! Yes, I'm one of those crazy lunatics that loves to decorate the house top to bottom, play holiday music every chance I get (and successfully drive my hubby crazy), shop til I drop, and bake to my heart's content for family and friends.

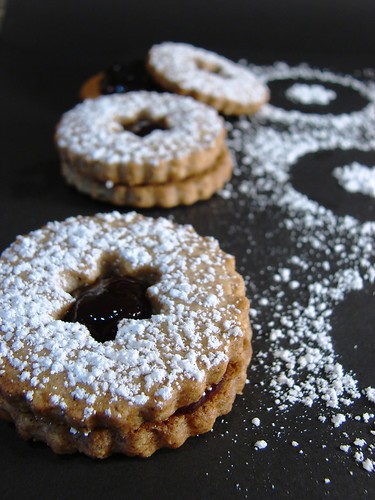
Linzer Sables are a perfect seasonal choice for this week's Tuesdays With Dorie. Selected by Noskos of Living The Life, these darling looking cookie gems are tender, nutty and so flavorful.I followed the recipe as written, with hazelnuts as my ground nut choice. I would definitely recommend freezing the rolled sheets of cookie dough before cutting, as the dough is really sticky and tough to work with otherwise. To get a nice golden brown color, I reduced the baking time to 9 minutes; at the recommended 11-13 minutes, the cookies were a bit well done.
I sandwiched the cookies with dollops of raspberry and blackberry jams. Dorie Greenspan's suggestion for a chocolate filling sounded divine (hazelnuts & chocolate --- how can you go wrong!), and I'll definitely keep that in mind for the next time.
This was the perfect recipe to kick off the holiday baking season. This was just a warm up --- I have quite the variety of cookies to make this month, and I definitely be sharing them with you in future posts.

If you'd like to make this yourself (which I highly recommend), Noskos has it available on his blog. To see the handiwork of 350+ TWD bakers, check out the blogroll.

Sunday, November 30, 2008

Thanksgiving Twofer Pie (TWD)


Apologies for being so out of pocket lately. Life has gotten in the way of my blog. Work and home life has been extraordinarily hectic this month, and things have been pretty chaotic all around.

The hubby and I did have an opportunity to escape for a bit R&R this past week with our ritual Thanksgiving week trek to Las Vegas. Relaxing in Vegas sounds a bit odd, but the combination of gambling (love blackjack and craps!!), great restaurants, nice spas, and excellent shopping does a lot for a positive attitude adjusment, and all is well in my world again.

The Tuesdays With Dorie gang was given the option of posting this week's recipe after the Thanksgiving holiday (and thus my posting this on Sunday). I was very grateful for the repreive, as there was no way that I was going to make it earlier this week.

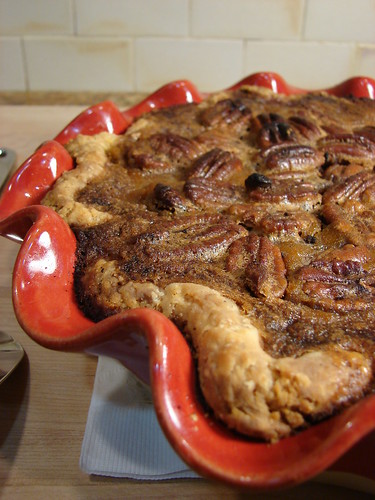
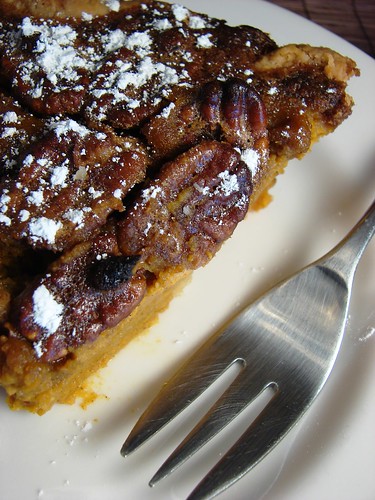
Selected by the lovely Vibi of La Casserole Carree, Thanksgiving Twofer Pie was a perfect selection for the season. Part pumpkin, part pecan, this recipe merges these two Thanksgiving favorites into one pie. This recipe starts with Dorie Greenspan's Good for Almost Everything Pie Dough, which is my all time favorite pie crust recipe:


For whatever reason, I expected this pie to have a layer of pumpkin filling on the bottom and a gooey pecan layer on top (did anyone get two distinct layers?). Instead, I ended up with a pumpkin pie with nuts studded on the top:
My hubby and I love pumkpin pie and dislike pecan pie, so we were both a little unsure about the marriage of these two fillings. So, what did we think?
Bottom line, we both agreed that we like our pumpkin pie unadorned with nuts, so the pecans didn't do it for us. Also, the pumpkin filling fell a little flat on flavor (it needed more spice, molasses, maple syrup - something). I liked Dorie Greenspan's inspiration and intent with the recipe, but I'm going to stick with my tried and true pumpkin pie recipe. As I now owe my hubby (in his words) "a real pumpkin pie", I'll share the recipe w. pictures in the next couple of weeks.

For the recipe, you can find it at Vibi's site. To see the pie making talents of 350+ TWD bakers, check out the blogroll.

Thursday, November 20, 2008

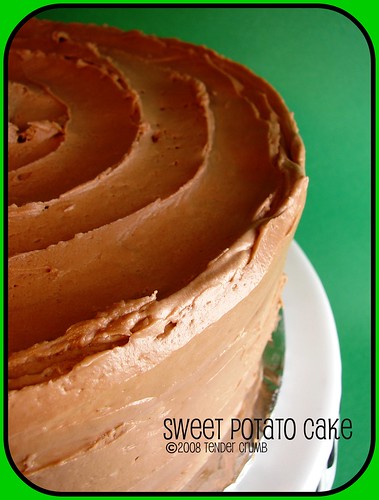
Sweet Potato Cake w. Orange Filling and Chocolate Frosting (TCS)

This is my second post for The Cake Slice, which is a lovely group that is baking its way through Sky High: Irresistible Triple-Layer Cakes by Alisa Huntsman and Peter Wynne. Baking through this book has been treat, as it gives me an excuse every month to make delicious, interesting and ginormous triple layer cakes (DH and my work colleagues get to benefit from the sweet windfall of my baking endeavors).

This month’s recipe for The Cake Slice bakers is Sweet Potato Cake. Now, I’ve had sweet potato pie, but sweet potato in a cake? This would be a first for me. I was intrigued by the combination of sweet potato, spices, orange and chocolate flavors, and was very curious to see how this would all come together.

The cake, filling and frosting were a breeze to prepare (adjustments I made are highlighted in parentheses). The resulting cake was extremely delicious and it was impossibly moist --- YUM! I didn’t get much of a sweet potato flavor from the cake, as the predominant flavors came from the spices.

I did enjoy the orange filling, as it provided a nice complement to the spices and chocolate flavors. The frosting was your typical cream cheese frosting, with the addition of some melted chocolate. I cut back on the powdered sugar, and it was still a bit too sweet for my taste --- I think I’m going to cut the powdered sugar down by half the next time around…and there will definitely be a next time for this recipe!

To see beautiful and delicious versions of this recipe, check out The Cake Slice Bakers blogroll.


~~~~~~~~~~~~~~~~~~~~~~~~~~~~~~~~~~~

Sweet Potato Cake
From Sky High: Irresistible Triple-Layer Cakes by Alisa Huntsman and Peter Wynne (pp 178-181)
Makes a 9-inch triple layer cake, serves 16-20 people


Cake:
2 medium or 1 large sweet potato (12 ounces)
3 cups of cake flour
3 teaspoons of baking powder
1 and 1/2 teaspoons of ground cinnamon
3/4 teaspoon of ground nutmeg
1/4 teaspoon of cloves
5 eggs, separated
2 and 1/4 cups of sugar
1 stick plus 2 tablespoons of butter, at room temperature
1 and 1/2 teaspoons of vanilla
1 and 1/4 cups of milk

1. Preheat the oven to 400F degrees. Prick the sweet potatoes in 2-3 places, place on a small baking dish and bake for 1 hour or until the potatoes are very soft. Remove from the oven and cool slightly. (I baked the sweet potatoes the day before and kept them in the fridge)

2. Reduce the oven temperature to 350F degrees. Butter the bottoms and the sides of the pans and line with parchment paper. Butter the parchment paper also.

3. When the sweet potatoes are cool peel off the skin and remove any dark spots. Cut the potatoes into chunks and puree in a food processors. Puree until smooth. Measure out one cup of potato puree and set aside. (I skipped pureeing in the FP; instead I whipped the potatoes in the stand mixer using a paddle attachment, and then added the rest of the ingredients as written)

4. Sift the flour, baking powder, cinnamon, nutmeg, and ground cloves. Set aside.

5. In the bowl of electric mixer add the egg whites and attach whip attachment. Beat on medium speed until egg whites are frothy. Raise the speed to high and gradually beat in 1/4 cup of sugar. Continue to beat until the egg whites are moderately stiff.

6. In another large bowl with the paddle attachment, combine the sweet potato, butter, vanilla, and remaining sugar. Beat until light and fluffy. Add the egg yolks one at a time. Make sure to scrape the sides of the bowl after each egg yolk is added. With the mixer on low speed, add the dry ingredients and milk in alternately in 2-3 additions making sure to begin and end with the dry ingredients.

7. With a large spatula, fold in one fourth of the egg whites into the batter to lighten. Then fold in the remaining egg whites until no streaks remain. Making sure to not over mix or this will deflate the batter. Divide the batter among of the three pans.

8. Bake for 25-30 minutes or until a cake tester comes out clean. Let the cake layers cool in the pan for 10 minutes. Then turn out the cake layers onto a wire rack and cool completely at least 1 hour.

9. To assemble the cake, place one layer flat side up on to a cake stand. With a pastry bag fitted with a 1/2 inch round tip and filled with chocolate cream cheese icing, pipe border around the edge of the cake. Fill the center with the orange cream filling smoothing it to the edge of the border. Place the second layer on top and repeat the process. Place the third layer on top and use all the chocolate cream cheese frosting to cover the top and sides of the cake.

Chocolate Cream Frosting
makes 3 cups

10 ounces cream cheese at room temperature
1 stick of butter at room temperature
16 ounces of powdered sugar; sifted (decreased to 12 ounces)
1 and 1/2 ounces of unsweetened chocolate melted and slightly cooled (increased to 3 ounces)

1. In a large mixing bowl, beat together the cream cheese and butter until fluffy. Slowly add the powdered sugar to cream cheese butter mixture making sure to scrape down the sides the sides of the bowl. Then beat until light fluffy 2-3 minutes.

2. Measure out 1 cup of frosting and set aside.

3. Add the melted chocolate to the remaining icing in the bowl and beat until well combined.

Orange Cream Filling

1 cup of reserved cream cheese icing from above
2 tablespoons of frozen orange juice concentrate, thawed
1/4 teaspoon of orange extract (omitted)

1. Stir together all the ingredients until well mixed.

Tuesday, November 18, 2008

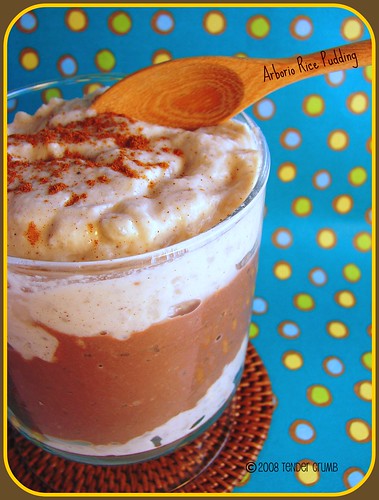
Arborio Rice Pudding - Chocolate & Chai (TWD)

Rice pudding is on the menu for this week’s Tuesdays With Dorie. I was looking forward to making this recipe, selected by Isabelle of Les gourmandises d’Isa. Rice pudding is the epitome of comfort food, and for me it is best eaten when curled up on the couch with my favorite blanket and catching up on TIVO (Top Chef, House, Grey’s Anatomy marathon, anyone?).

The recipe itself is pretty simple and straightforward. I noted a couple of major differences between this recipe and others that I’ve tried: (1) parboiling the rice first and (2) no eggs. I decided to follow the recipe as written too see how things would turn out. For flavor, I added a cinnamon stick (broken in two) to the mixture.

Dorie Greenspan personally reached out to the TWD group to highlight a correction on the recipe, which is to cook the pudding for 45-55 minutes (not the 30 minutes noted in the book). Even after cooking over a low heat for one hour, the pudding mixture barely thickened (could I have parboiled for too long, stripping the starch out of the rice?).

After taking the pudding off the stove, I divided the pudding into two containers and flavored one with 2 oz bittersweet chocolate (it melted into the still hot pudding beautifully) and the other with vanilla extract and chai spices (cinnamon, cardamom, cloves, ginger).

The chocolate version thickened nicely overnight. I couldn’t say the same for the chai version as it was still watery and soupy (blech!). I ended up reheating that portion, tempered in one egg and cooked it for a few minutes, allowing the mixture to thicken. After re-cooling and refrigerating, I finally got the thick, creamy texture that I was looking for.

Taste-wise, I thought that both versions were quite delicious. I was particularly really happy with the chocolate version, as for whatever reason chocolate in rice pudding didn’t really excite me.

I liked the simplicity of this recipe (and would make a mental note to temper in two eggs for the full recipe), but I don’t think this will trump my go-to rice pudding recipe. For the recipe, please check out Isabelle’s charming site. To see rice pudding by the hundreds, check out the TWD blogroll.

Tuesday, November 4, 2008

Rugelach Trio (TWD)

After two glorious weeks road tripping through NorCal, it is so good to be home!!! Now, don't get me wrong --- vacation was a total blast, but there is something to be said for the comforts of home i.e. to sleep in my own comfy bed!!! :)
Now, back to the business of baking! Rugelach is this week's Tuesdays With Dorie pick, selected by Grace of Piggy's Cooking Journal.

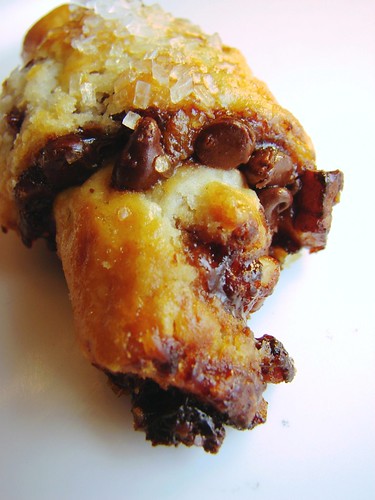
I'll admit that I've attempted to make rugelah once a few years back, and it was a total disaster! I ended up with a sticky/messy dough, misshapen cookies, and burnt filling that oozed out of the cookie. Dorie Greenspan's recipes rarely fail, so I entrusted in her rugelach recipe to redeem myself. I followed the dough recipe exactly as written, and made three different fillings:

raspberry jam, mini chocolate chips, and pecans

Nutella & Heath toffee bits

blueberry jam, dried blueberries, white chocolate and almonds

Yipeee!!! This recipe worked like a charm! As I made the rugelach this time around, I've learned a couple of things:

1. freeze the shaped cookies before baking to retain their shape
2. use restraint with the filling...a little goes a long way!

I was really pleased with this recipe, and as a bonus it was really quick and easy to assemble. All three of the fillings were delicious, but I would have to say that Dorie's suggestion of the jam, chocolate chips & pecans was my favorite. This is definitely going be part of my cookie baking rotation from this point on!

If you'd like this recipe, go to Grace's blog or Dorie Greenspan's blog (it also includes some great rugelach pointers). To see other creative versions of this delicious recipe, make sure to peruse the TWD blogroll.

Wednesday, October 29, 2008

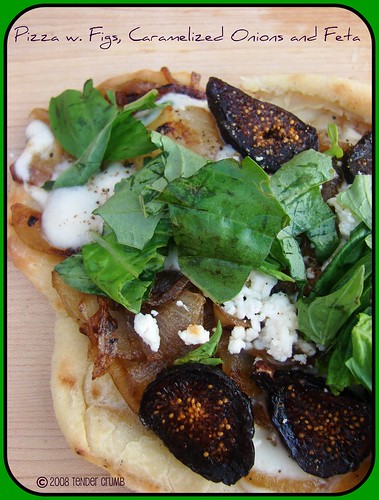
Pizza w. Figs, Caramelized Onions & Feta (Daring Bakers)

October's Daring Bakers Challenge was one that I couldn't refuse --- PIZZA!!! It has never dawned on me to make my own pizza dough, given the availability and convenience of using ready made refrigerated pizza dough (I'm partial to the dough available at Trader Joes).

As it's still summer weather in SoCal, I decided to skip the oven and grill the pizzas on the BBQ. This dough is definitely stickier that your typical bread dough, so I had a challenge getting the rolled (sorry, pizza tossing wasn't in the cards for me this time around) dough on to the grill in one piece and retaining its shape. I started with pretty pizza dough ovals...as I struggled to get them on the grill, they ended up looked like giant amoebas.

I ended up making two types of pizzas. The first was topped with dried figs (couldn't rationalize spending $5.99 at Whole Paycheck ---opps, I meant Whole Foods for a basket of fresh figs), carmelized onions, feta and fresh mozzarella cheese, and topped with basil (I prefer arugula, but I went with what I had in the fridge):
The second was a pizza margherita, made with fresh mozzarella, small heirloom tomatoes, and topped with fresh basil and cracked black pepper:
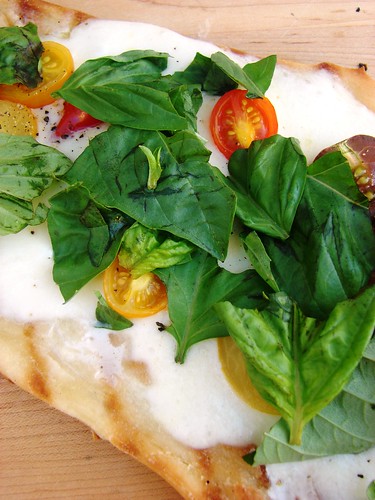
Both pizzas turned out delicious, despite their homely looking shapes. The pizza crust was definitely a differentiator, as it was nice and crispy, and wasn't too heavy and bread-y. It definitely blew the TJ's dough out of the water!! With a little planning on the front end, making homemade pizza dough is definitely worth the effort.

This was definitely a fun challenge--- Thanks very much to our hostess Rosa of Rosa's Yummy Yums! To see more delicious and creative pizzas, check out the Daring Bakers blogroll.

~~~~~~~~~~~~~~~~~~~
BASIC PIZZA DOUGH
Original recipe taken from “The Bread Baker’s Apprentice” by Peter Reinhart
Makes 6 pizza crusts (about 9-12 inches/23-30 cm in diameter)

Ingredients:
4 1/2 Cups (20 1/4 ounces/607.5 g) Unbleached high-gluten (%14) bread flour or all purpose flour, chilled -
1 3/4 Tsp Salt
1 Tsp Instant yeast
1/4 Cup (2 ounces/60g) Olive oil or vegetable oil (both optional, but it’s better with)
1 3/4 Cups (14 ounces/420g or 420ml) Water, ice cold (40° F/4.5° C)
1 Tb sugar
Semolina/durum flour or cornmeal for dusting

DAY ONE

Method:
1. Mix together the flour, salt and instant yeast in a big bowl (or in the bowl of your stand mixer).
2. Add the oil, sugar and cold water and mix well (with the help of a large wooden spoon or with the paddle attachment, on low speed) in order to form a sticky ball of dough. On a clean surface, knead for about 5-7 minutes, until the dough is smooth and the ingredients are homogeneously distributed. If it is too wet, add a little flour (not too much, though) and if it is too dry add 1 or 2 teaspoons extra water.

NOTE: If you are using an electric mixer, switch to the dough hook and mix on medium speed for the same amount of time.The dough should clear the sides of the bowl but stick to the bottom of the bowl. If the dough is too wet, sprinkle in a little more flour, so that it clears the sides. If, on the contrary, it clears the bottom of the bowl, dribble in a teaspoon or two of cold water.
The finished dough should be springy, elastic, and sticky, not just tacky, and register 50°-55° F/10°-13° C.

3. Flour a work surface or counter. Line a jelly pan with baking paper/parchment. Lightly oil the paper.

4. With the help of a metal or plastic dough scraper, cut the dough into 6 equal pieces (or larger if you want to make larger pizzas).

NOTE: To avoid the dough from sticking to the scraper, dip the scraper into water between cuts.

5. Sprinkle some flour over the dough. Make sure your hands are dry and then flour them. Gently round each piece into a ball.

NOTE: If the dough sticks to your hands, then dip your hands into the flour again.

6. Transfer the dough balls to the lined jelly pan and mist them generously with spray oil. Slip the pan into plastic bag or enclose in plastic food wrap.

7. Put the pan into the refrigerator and let the dough rest overnight or for up to thee days.

NOTE: You can store the dough balls in a zippered freezer bag if you want to save some of the dough for any future baking. In that case, pour some oil(a few tablespooons only) in a medium bowl and dip each dough ball into the oil, so that it is completely covered in oil. Then put each ball into a separate bag. Store the bags in the freezer for no longer than 3 months. The day before you plan to make pizza, remember to transfer the dough balls from the freezer to the refrigerator.

DAY TWO

8. On the day you plan to eat pizza, exactly 2 hours before you make it, remove the desired number of dough balls from the refrigerator. Dust the counter with flour and spray lightly with oil. Place the dough balls on a floured surface and sprinkle them with flour. Dust your hands with flour and delicately press the dough into disks about 1/2 inch/1.3 cm thick and 5 inches/12.7 cm in diameter. Sprinkle with flour and mist with oil. Loosely cover the dough rounds with plastic wrap and then allow to rest for 2 hours.

9. At least 45 minutes before making the pizza, place a baking stone on the lower third of the oven. Preheat the oven as hot as possible (500° F/260° C).

NOTE: If you do not have a baking stone, then use the back of a jelly pan. Do not preheat the pan.

10. Generously sprinkle the back of a jelly pan with semolina/durum flour or cornmeal. Flour your hands (palms, backs and knuckles). Take 1 piece of dough by lifting it with a pastry scraper. Lay the dough across your fists in a very delicate way and carefully stretch it by bouncing it in a circular motion on your hands, and by giving it a little stretch with each bounce. Once the dough has expanded outward, move to a full toss.

During the tossing process, if the dough tends to stick to your hands, lay it down on the floured counter and reflour your hands, then continue the tossing and shaping.

In case you would be having trouble tossing the dough or if the dough never wants to expand and always springs back, let it rest for approximately 5-20 minutes in order for the gluten to relax fully,then try again.
You can also resort to using a rolling pin, although it isn’t as effective as the toss method.

11. When the dough has the shape you want (about 9-12 inches/23-30 cm in diameter - for a 6 ounces/180g piece of dough), place it on the back of the jelly pan, making sure there is enough semolina/durum flour or cornmeal to allow it to slide and not stick to the pan.

12. Lightly top it with sweet or savory toppings of your choice.

NOTE: Remember that the best pizzas are topped not too generously. No more than 3 or 4 toppings (including sauce and cheese) are sufficient.

13. Slide the garnished pizza onto the stone in the oven or bake directly on the jelly pan. Close the door and bake for abour 5-8 minutes.

NOTE: After 2 minutes baking, take a peek. For an even baking, rotate 180°.

If the top gets done before the bottom, you will need to move the stone or jelly pane to a lower shelf before the next round. On the contrary, if the bottom crisps before the cheese caramelizes, then you will need to raise the stone or jelly.

14. Take the pizza out of the oven and transfer it to a cutting board or your plate. In order to allow the cheese to set a little, wait 3-5 minutes before slicing or serving.
Tuesday, October 28, 2008

Chocolate-Chocolate Cupcakes (TWD)

HAPPY HALLOWEEN! I'm still on vacation, but couldn't resist getting this post done before I left town.

This week's Tuesday's With Dorie is hosted by Clara of I Heart Food 4 Thought. For those of you who aren't familiar with Clara's other very cute blog, I Heart Cuppycakes, she is a total cupcake maven, and you guessed it, she selected Chocolate-Chocolate Cupcakes for this week's recipe.

Clara encouraged everyone to decorate their cupcakes with a Halloween theme. Okay, I was totally running out of time before I left for vacation, so I cheated and purchased these cute sugar toppings:BTW, I love this time of year, as it gives me an excuse to go out and buy my annual allotment of candy corn: I also experimented with some larger baking cups. These cups are taller but they have the same diameter at the base, so these will fit perfectly into the regular muffin pans...thank God, as I need another baking pan like I need a hole in my head! :P I used the same amount of batter for both cup sizes, and here's how they turned out:
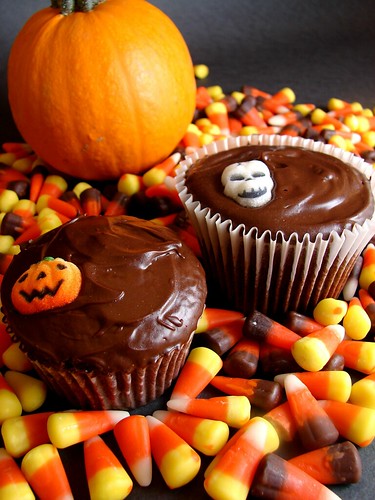
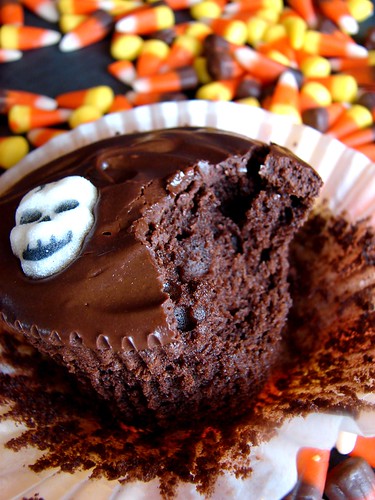
The chocolate cake is pretty simple and straightforward, and I love the fact that the recipe makes exactly one dozen cupcakes. The chocolate glaze was easy to make and set beautifully.
What terrific treat! Hands down, I would prefer one of these perfect treats over a giant bag of Halloween candy (okay with the exception of M&Ms --- my chocolate kryptonite) For the recipe, check out Clara's site. To see the creative cupcake creations of my fellow TWD bakers, check out the blogroll.

Tuesday, October 21, 2008

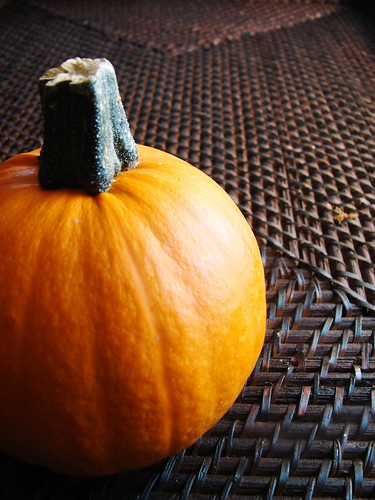
Pumpkin Muffins (TWD)

I'm going to keep this post sweet and simple...As you are reading this, my DH and I are well into our vacation.... first we're getting back to nature by spending time in Yosemite and then indulging in a lot of great food and wine in San Francisco and wine country (and the bonus of driving down the gorgeous California coast).

In the meantime, I won't be able to visit and comment on everyone's blogs, so it looks like I'll have alot of catch up to do when I get back home! :)

This week's Tuesdays With Dorie recipe, Pumpkin Muffins, was selected by Kelly of Sounding My Barbaric Gulp.
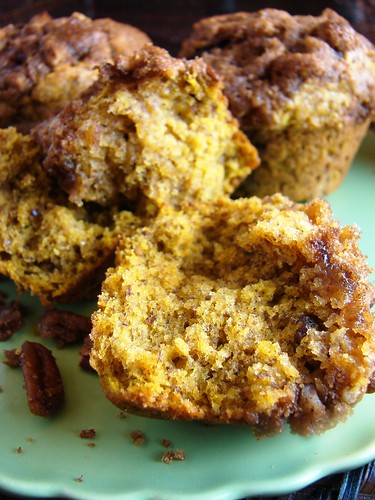
This is a pretty easy and straightforward recipe (as muffins should be). I didn't have any sunflower seeds to top the muffins, so instead topped the muffins with a streusel mix ( made with brown sugar, cinnamon, butter, pecans). I enjoyed the pumpkin flavor and the light fluffy texture of the muffins. My only complaint ---I didn't think that the raisins did much for this recipe. The next time I make this, out with the raisins and in with chocolate chunks/chips.
I thought this muffin was tasty, satisfying and not overly sweet... a perfect accompaniment to a morning cup of coffee. I'll definitely repeat this recipe as it's super easy to assemble and bake.
If you're interested in making this at home, check out Kelly's site. To see the amazing handiwork of the other TWD bakers, check out the blogroll.

Monday, October 20, 2008

Cappucino Chiffon Cake (TCS)

I recently stumbled up a new baking group called The Cake Slice. The Cake Slice is about discovering a great baking cookbook and using it all year long. The goal is to bake one recipe every month from a single book.

I had to pause and ask myself "do I really need to participate in another baking group?". That question was quickly answered with an emphatic YES when I discovered that the group is baking its way thru Sky High: Irresitable Triple Layer Cakes by Alisa Huntsman and Peter Wynne. Along with some really wonderful cake recipes, the pictures in this book are totally gorgeous!

I've seen many beautiful cake creations made from the recipes in this book. I need to take a second and give props to Mary of The Food Librarian, as she's made some spectacular cakes from this book here and here and here...after admiring her creations I couldn't resist trying my hand at these recipes!
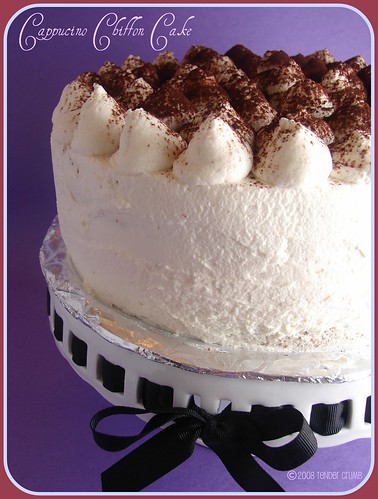
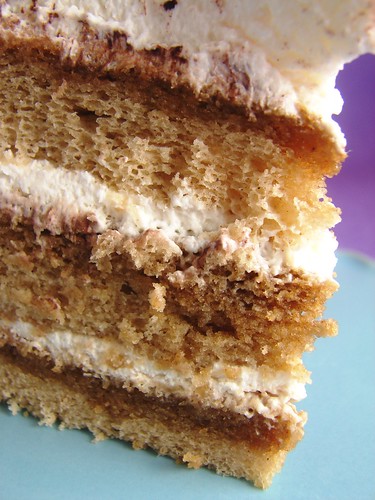
Our first recipe is Cappucino Chiffon Cake. As a I read through the recipe, one word came to mind --- tiramisu. The cake consists of 3 espresso-flavored chiffon cake layers that are soaked with a booze an espresso syrup. All of this goodness is frosted with a simple vanilla whipped cream.
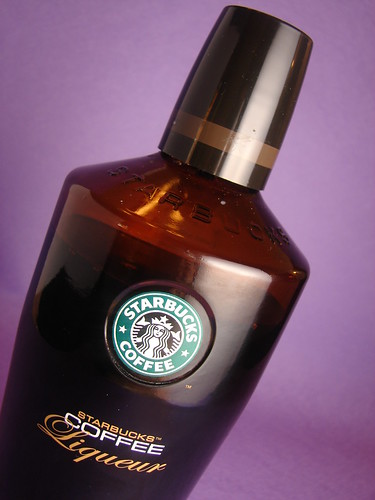
As our liquor cabinet was depleted of dark rum (damn those mai tais), I used coffee liqueur to flavor the espresso syrup:
I didn't have the 8" cake pans the recipe called for, so I used the 9" pans I had on hand. As a result, the cake layers turned out a bit thinner than I would have liked. As the cookbook calls for 8" pans for many of the recipes, it looks like I'll be making another investment in baking equipment (I know, twist my arm :) ) I need to work on my cake layer technique, as I would have liked the layers to be more even.
Aside from my nitpicking at the appearance, I would have to say that the flavor of this cake is heavenly! The espresso syrup-soaked cake along with the whipped cream was delicious, and the texture was very light and not overly sweet (two pluses in my book).
To see other fantastic versions of this cake, check out The Cake Slice blogroll.
~~~~~~~~~~~~~~~~~~~~~~~~~~
CAPPUCCINO CHIFFON CAKE
Makes an 8-inch triple layer cake

Cake Layers
1/4 cup of neutral oil, ie. vegetable, canola, or soybean
6 eggs separated
6 tablespoons of freshly brewed espresso, room temperature (I used strong brewed coffee)
2 teaspoons of vanilla extract
1 and 1/3 cups of cake flour*
1 and 1/2 cups of sugar
1 teaspoon of baking powder
1/2 teaspoon of ground cinnamon
1/2 teaspoon of salt
1/2 teaspoon of cream of tartar
Cocoa powder or cinnamon for dusting

(*The recipe calls for cake flour and if you only have all-purpose flour on hand, you can substitute 3/4 cup (105 grams) all purpose flour plus 2 tablespoons (30 grams) cornstarch.)

1. Preheat the oven to 350F degrees. Line the bottom s of three 8-inch round cake pans with parchment paper but do not grease.

2. In a medium bowl, combine the oil, egg yolks, espresso, and vanilla; whisk lightly to blend. In a large mixing bowl, sift together the flour, 1 cup of sugar, the baking powder, cinnamon, and salt. Set aside.

3. In the large bowl of an electric mixer, whip the egg whites with the cream of tartar on medium-low speed until frothy. Raise the mixer to medium high and gradually add the remaining 1/2 cup of sugar. Continue to beat until soft peaks form. Do not whip to stiff peaks or the cake will shrink upon cooling.

4. Add the espresso-egg mixture to the dry ingredients and fold together just until combined. Add one fourth of the egg whites and fold them gently into the batter. Fold in the remaining egg whites just until no streaks remain. Divide the batter among the pans.

5. Bake the cakes for 18 minutes or until a cake tester comes out clean. Allow the cakes to cool completely in the pans. Once cooled run a knife around the edge of the pans to release the cakes. Invert onto a wire rack and remove the parchment papers.

Espresso Syrup
makes 1 cup

1/3 cup hot freshly brewed espresso (I used strong brewed coffee)
1/3 cup of sugar
1/3 cup dark rum, such as Meyers*
(I used coffee liqueur)

(*if you want to leave out the rum you can use molasses thinned with pineapple juice and flavored with almond extract to equal 1/3 cup. Or use 1 to 2 teaspoons of rum extract flavoring but you'll have less syrup.)

In a bowl, stir together the espresso and sugar. Stir until the sugar dissolves. Add the rum and let cool to room temperature.

Vanilla Whipped Cream
makes 6 cups

3 cups of heavy cream
1/3 cup of sugar
2 teaspoons of vanilla

Place the cream, sugar, and vanilla in large chilled mixing bowl with chilled beaters. With the whip attachment, beat the cream until stiff peaks form.


To Assemble The Cake
1. Place one cake layer flat side up on a cake stand or platter. Soak the cake with 1/3 cup of the espresso syrup. Spread 1 and 1/3 cups of whipped cream evenly over the top of the cake. Repeat with the next layer the same steps. Finally top with the third layer. Soak with syrup and frost the top and sides of the cake with the whipped cream.

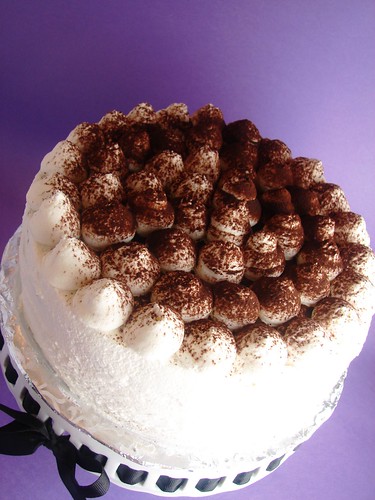
2. To decorate the cake smooth out the whipped cream as much as possible on top. Lay a paper doily on top and sift cocoa powder or cinnamon over the doily to reveal a lacy detail.

Friday, October 17, 2008

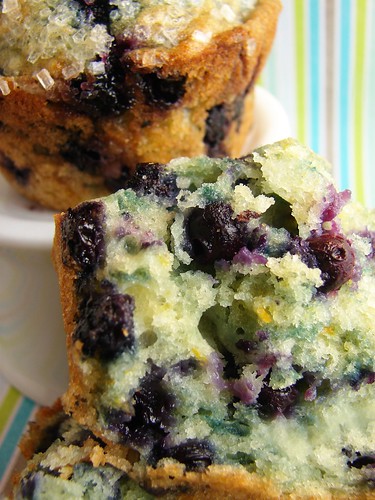
Berry Orange Muffins (TWD rewind)

Since I had muffins on the brain while making this week's Tuesdays With Dorie pick of pumpkin muffins, I also went ahead and made a rewind recipe, Berry Orange Muffins, which I've been meaning to try since joining the group.
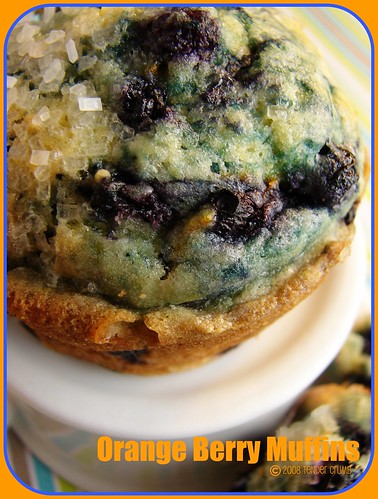
What makes this muffin special is the delicious flavor combination of blueberries and orange. I followed the recipe as written, and used Trader Joe's frozen wild blueberries (LOVE these, as the berries are smaller and more flavorful than the other frozen options IMHO). I also topped the muffins with decorating sugar crystals, and thought the crunch of the sugar was a nice contrast to the tender muffin.
This muffin is super flavorful, moist and delicious, and this is going to definitely get put into my morning baking rotation.
~~~~~~~~~~~~~~~~~~~~~~~~~~~~~
Berry Orange Muffins
from Baking: From My Home To Yours by Dorie Greenspan
Makes 12 muffins

Ingredients

grated zest and juice of 1 orange
about 3/4 cup buttermilk
2 large eggs
3 tablespoons honey
1 stick (8 tablespoons) unsalted butter, melted and cooled
1/3 cup sugar
2 cups all-purpose flour
2 1/2 teaspoons baking powder
1/4 teaspoon baking soda
1/4 teaspoon salt
1 cup blueberries - fresh, preferably, or frozen (not thawed)
Decorating sugar, for topping (optional)

Center a rack in the oven and preheat the oven to 400 degrees F

Butter or spray the 12 molds in a regular-size muffin pan or fit the molds with paper muffin cups. Alternatively, use a silicone muffin pan, which needs neither greasing nor paper cups. Place the muffin pan on a baking sheet.

Pour the orange juice into a large glass measuring cup or a bowl and pour in enough buttermilk to make 1 cup. Whisk in the eggs, honey and melted butter.

In a large bowl, rub the sugar and orange zest together with your fingertips until the sugar is moist and the fragrance of orange strong. Whisk in the flour, baking powder, baking soda and salt.

Pour the liquid ingredients over the dry ingredients and, with the whisk or a rubber spatula, gently but quickly stir to blend. Don’t worry about being thorough - the batter will be lumpy and bubbly, and that’s just the way it should be. Stir in the blueberries. Divide the batter evenly among the muffin cups.

Bake for 22 to 25 minutes. If you want to top the muffins with decorating sugar, sprinkle on the sugar after the muffins have baked for 10 minutes. When fully baked, the tops of the muffins will be golden and springy to the touch and a thin knife inserted into the center of the muffins will come out clean. Transfer the pan to a rack and cool for 5 minutes before carefully removing each muffin from its mold.

Tuesday, October 14, 2008

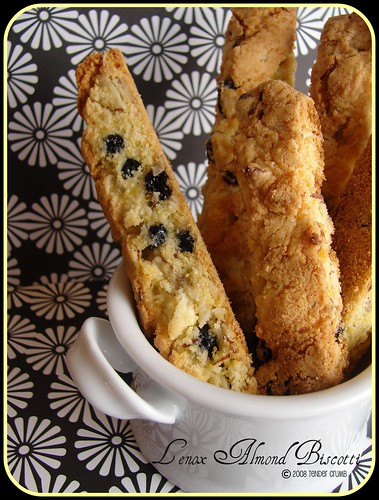
Lenox Almond Biscotti w. Dried Blueberries (TWD)

It's that time of the week again, so you know it's time for a Tuesdays With Dorie sweet treat. This week's hostess is Gretchen at Canela & Comino , and she selected Lenox Almond Biscotti for this week's baking exercise. BTW, Gretchen writes often about Peruvian food on her blog, and it's really fun and interesting to read about Peru's cuisine and culture...check it out!

I've been curious to try Dorie Greenspan's biscotti recipes since I purchased the book, and now I have an opportunity to try them out! I think biscotti is the perfect cookie to bake and share, as it:

1.) has a pretty decent shelf life (a week +)
2.) is sturdy and holds its shape
3.) is the perfect vehicle for a variety of flavors and ingredients.

For these reasons, it's the perfect "pack & ship" cookie for family and friends who don't live close by.

I've tried a wide variety of biscotti recipes, and have now narrowed my favorites down to two (which are both from epicurious.com): cranberry & pistachio and double chocolate walnut. I love both of these recipes as they are not overly sweet, crispy/crunchy in texture, easy and unfussy to bake, and loved by everyone who tries them! :)

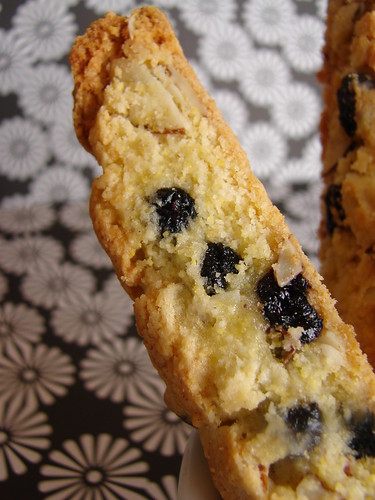
"Lenox" in the recipe title refers to the NYC restaurant from where Dorie obtained this recipe. The recipe looks like your typical biscotti recipe, except for the unusual addition of cornmeal. I decided to make the recipe as written, and folded in 1/2 cup of dried wild blueberries (from Trader Joes) along with the almonds.
So, what are my thoughts on the recipe? On the positive side, I liked the use of sliced almonds and I was pleasantly surprised by the crunchy texture that the cornmeal provided.

Speaking of slicing, I have a great tip to ensure pretty biscotti slices: when you take the cookie logs out after the first bake, spray the tops with H2O (or you can apply with a pastry brush) right before you slice them. This softens the top just enough, so the crust will not crumble when you cut into them, and you won't have jaggedy looking slices. Once they are baked a second time, the cookies will come out looking perfect and crunchy!

On the negative side, I had a couple of problems with the flavor and baking instructions. The cookies were too sweet for my taste (perhaps reducing the sugar to 2/3 cup would help) and the almond flavor was overwheming (next time, going to reduce the almond extract to 1/2 tsp). The baking times were also way off... the first baking time should have been much longer. The recipe calls for 15 minutes, but it took 30 minutes for my logs to bake through.

I'm going to try this recipe again, making the above adjustments. I don't think this will replace my go-to recipes, but I did find that the cornmeal provided and unexpected but enjoyable crunch and texture.
For the recipe, Gretchen has it on her site. To see how the other TWD bakers did, check out the blogroll.

Tuesday, October 7, 2008

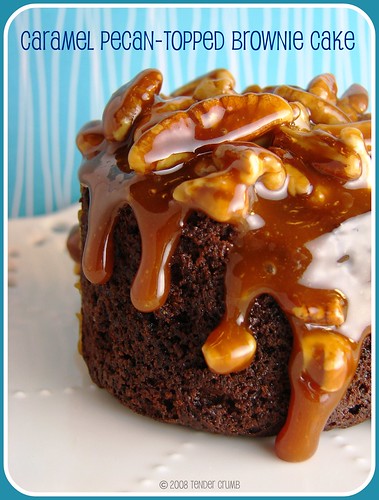
Caramel PECAN-Topped Brownie Cake (TWD)

Tammy from Wee Treats By Tammy made this terrific selection for this week's TWD baking exercise. Previously, I've made this cake on many occasions with great success during my PB (pre blogging) days, so I'm excited to finally have an opportunity to take pictures and write a post about this delicious cake. There is something so seductive about having a warm, gooey caramel sauce studded with nuts enveloping a moist, dense chocolate cake...oh my!!! You can't go wrong with this recipe!

My only variations from the original recipe:

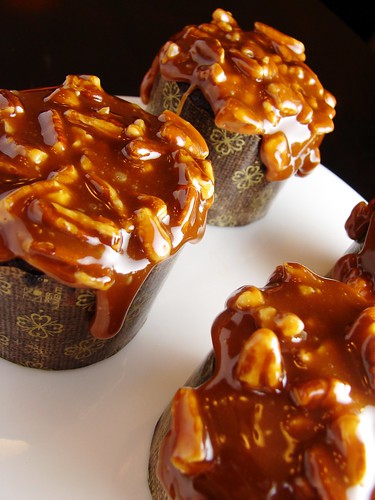
1.) Individual servings: I wondered how this recipe would hold up if there were made into individual cakes (I worry that the cake would come out too dry). For the individual servings I used 6 flat bottom baking cups (they look like mini panetone liners), and adjusted the baking time (325F for ~25 minutes):


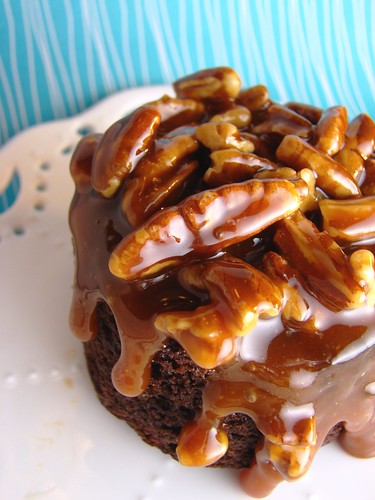
2.) Pecans: I usually go for the toasted chopped pecans instead of the peanuts. I prefer the taste and texture of pecans: 3.) Caramel sauce recipe quantity: As the caramel sauce recipe makes WAY more that you would need for a single cake, I cut that recipe in half.
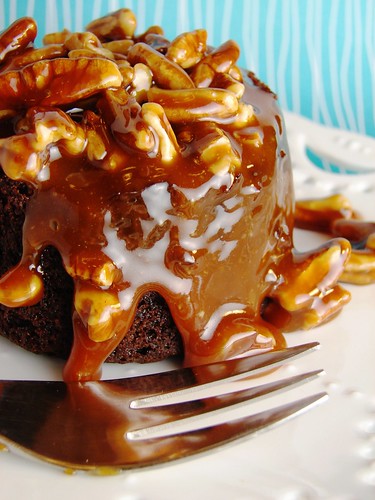
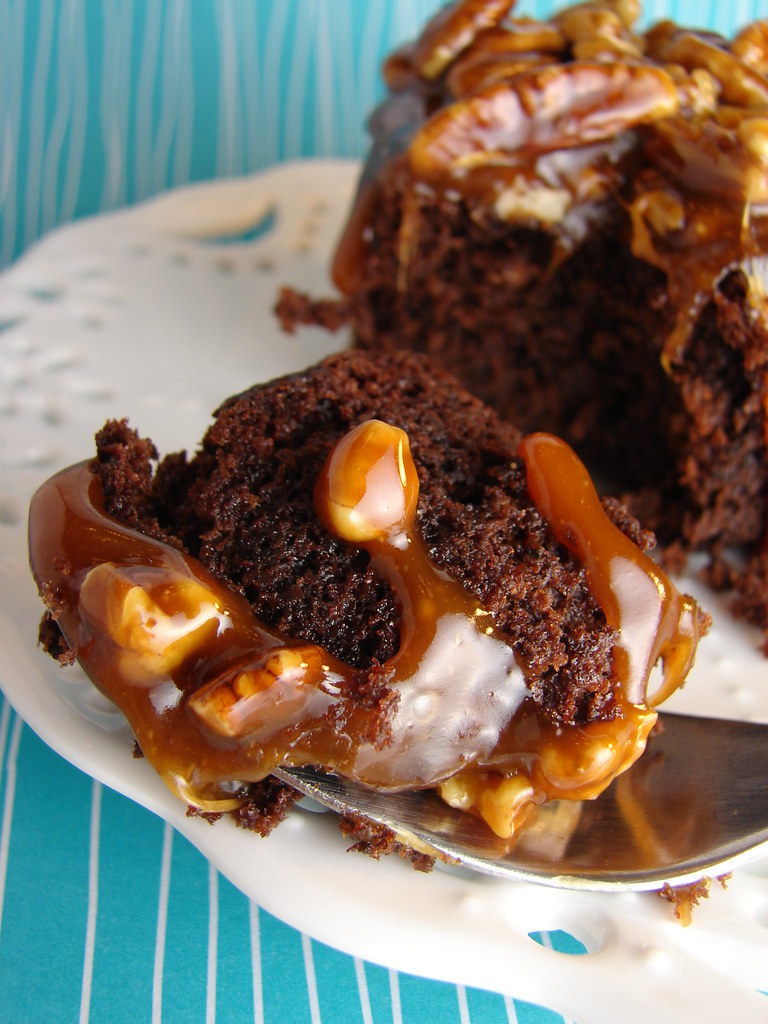
I loved these little cakes!!! The cake itself was very moist (whew!), and they were a perfectly sized individual portions. This caramel sauce is wonderfully gooey and it makes for a terrific presentation if you pour the sauce over the cake as you serve it to your guests. The bonus on the the caramel --- it doesn't turn to a hard brittle when it cools.
If you'd like to make this yourself, Tammy has the recipe on her site. If you're lovin' this cake, check out more delicious versions of this recipe at the Tuesdays With Dorie blogroll.

Blog Widget by LinkWithin